New Release: Email Security Awareness Training- Empower your team to proactively combat email threats with easy-to-launch phishing simulations and assessments Learn More
New Release: Email Security Awareness Training- Empower your team to proactively combat email threats with easy-to-launch phishing simulations and assessments
After finishing the deployment of Trustifi’s inbound relay in Google, we highly recommend disabling or modifying some of Google’s default protection policies. This is for a couple of reasons:
To make sure that emails will be successfully received by your users after Trustifi sends them back to user mailboxes, and that Google will not block or quarantine these emails.
To consolidate all inbound quarantine in Trustifi – so that you will only need to manage the Trustifi inbound quarantine, instead of both Trustifi and Google.
Important note: If you are in the process of a POC, or if otherwise Trustifi protection is enabled only on specific mailboxes and not the entire organization, we highly recommend making these changes for a specific org unit and not for the entire organization. This is to make sure mailboxes which are not protected by Trustifi will still have Google’s protections.
If you have not yet completed the deployment of Trustifi’s inbound relay in Google, you can find a guide for deployment here:
https://trustifi.com/docs/inbound-shield/inbound-relay-integration-google-workspace/configuration/
Step 1 – Editing “Comprehensive mail storage” policy
First, navigate to the Google Admin Center via the following link – https://admin.google.com/.
Then, go to the “Compliance” page.In the “Compliance” page, find the section titled “Comprehensive mail storage” and click on the pencil icon to edit the policy.
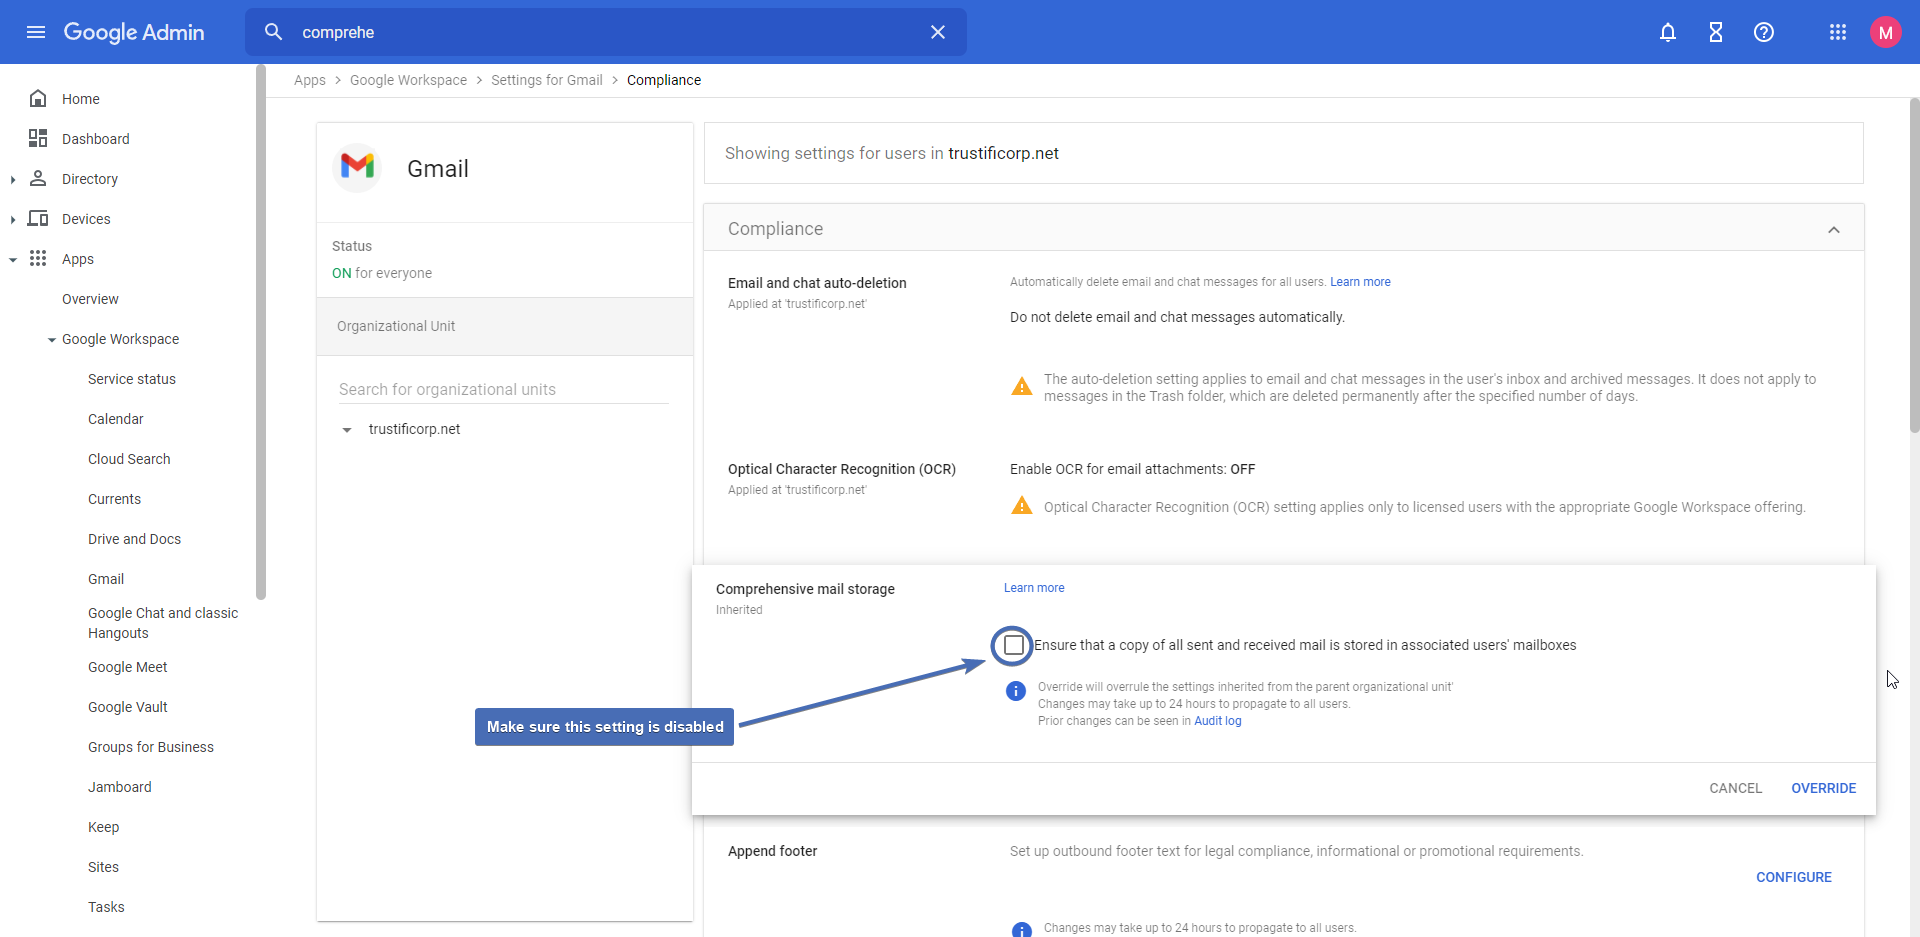
Step 2 – Disabling “Comprehensive mail storage”
Find the check box titled “Ensure that a copy of all sent and received mail is stored in associated users’ mailboxes” and disable it.Note: disabling this setting will allow Trustifi to quarantine malicious emails. If this setting is left enabled, malicious emails will still arrive into the recipient’s mailbox.
Step 3 – Adding the Trustifi IPs in the Email allowlist
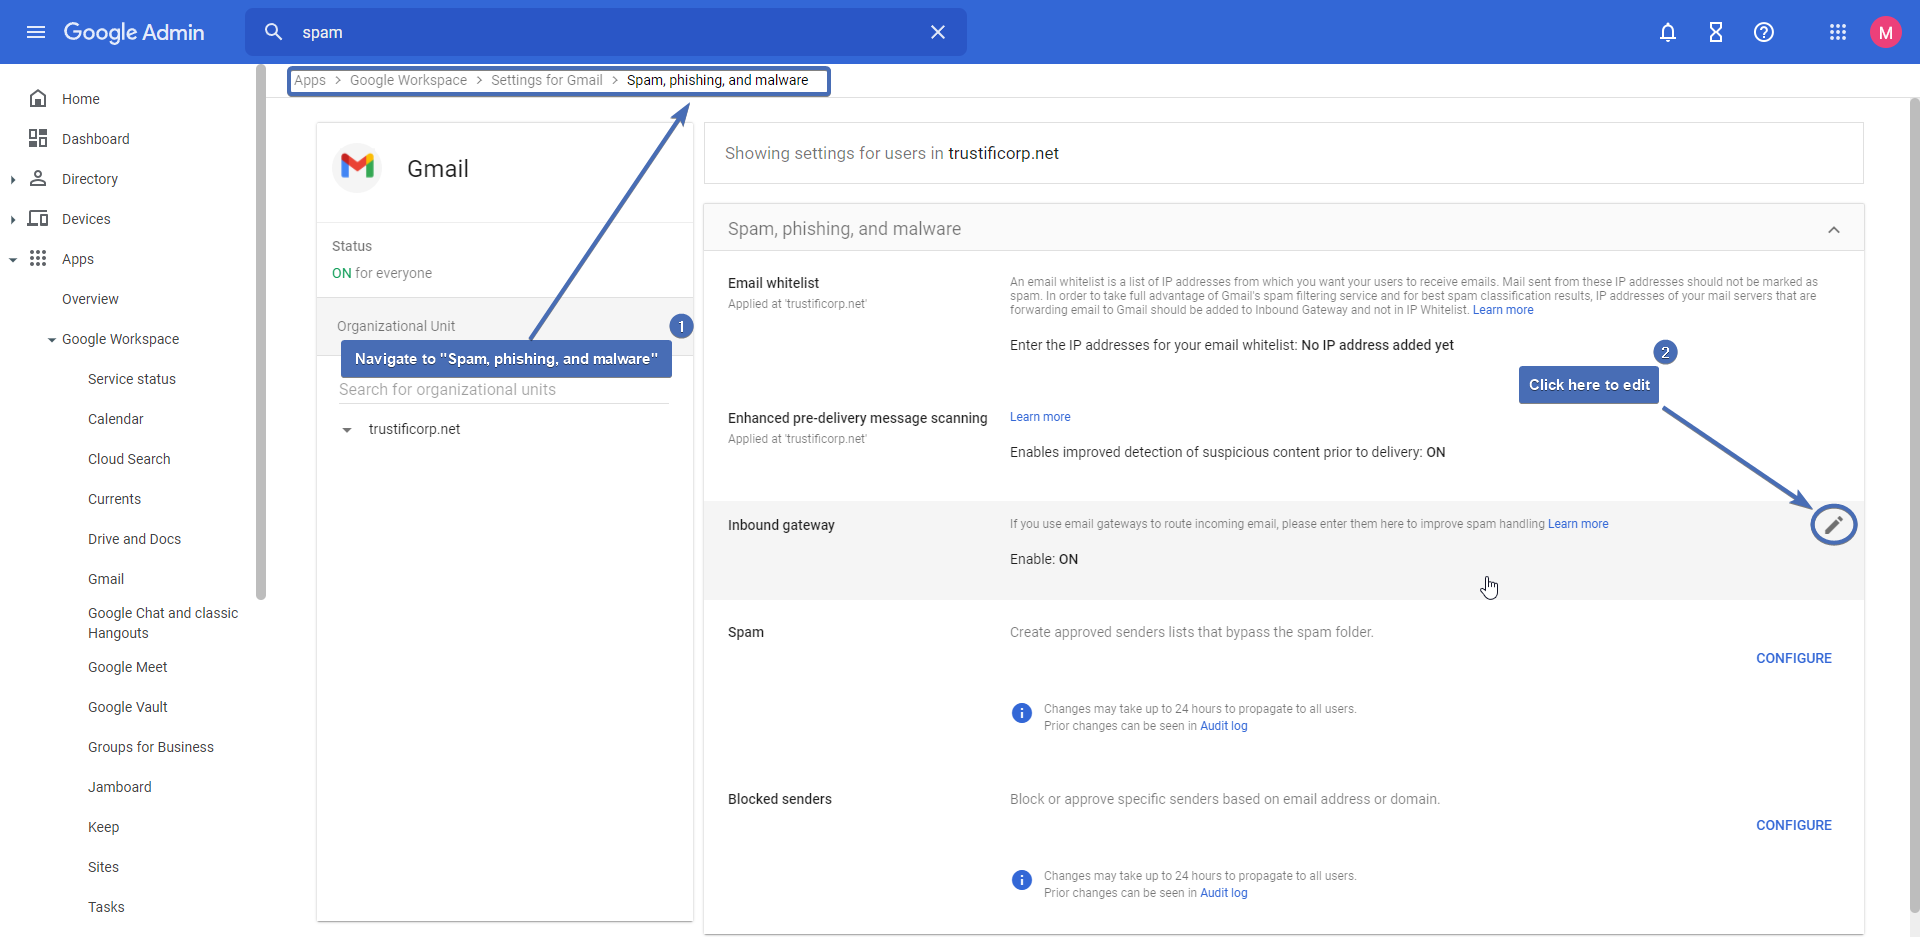
Navigate to the “Spam, phishing, and malware“ page and find the “Email allowlist” section. Click on the pencil icon at this section to edit it.
In the allowlist editor, add the following Trustifi IPs:
3.93.243.176
3.93.139.220
3.251.32.127
54.195.145.1
Note: you will need to a comma separator between each IP.
Once all of the IPs have been added, don’t forget to save at the bottom right.
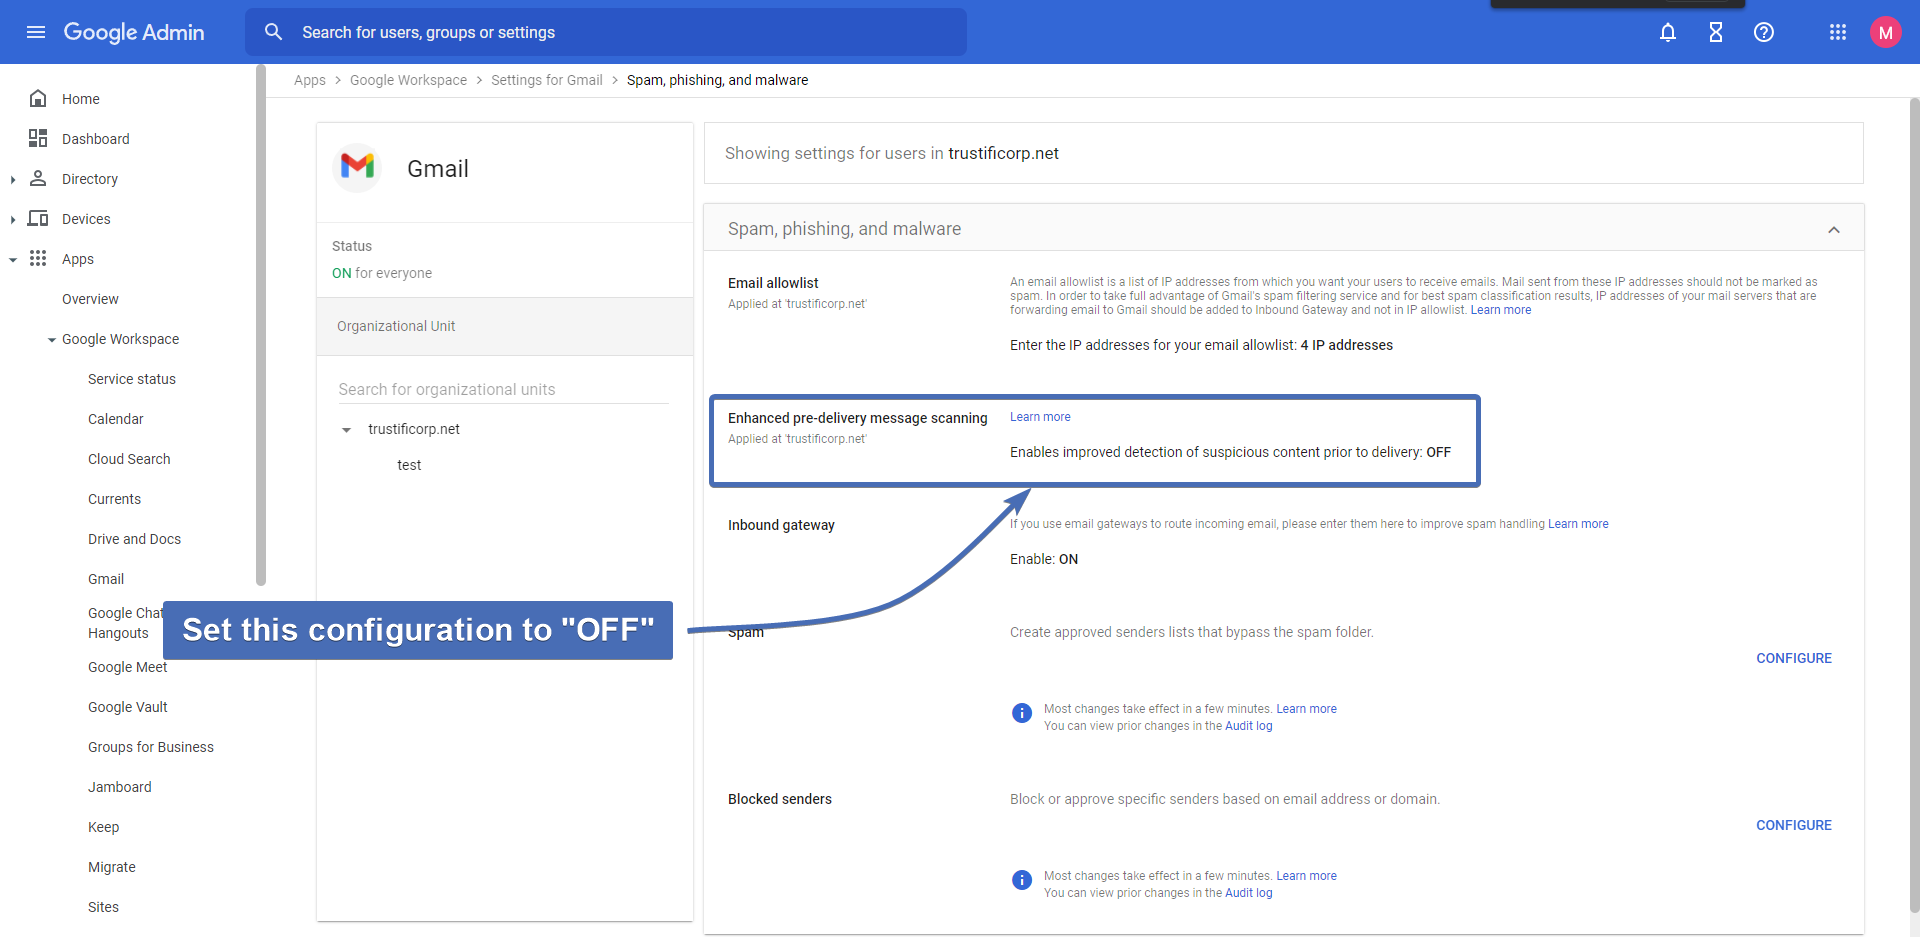
Under the email allowlist, look for the section titled “Enhanced pre-delivery message scanning” and set it to “OFF“.
Step 5 – Editing the inbound gateway
Find “Inbound gateway” section and click to edit it.
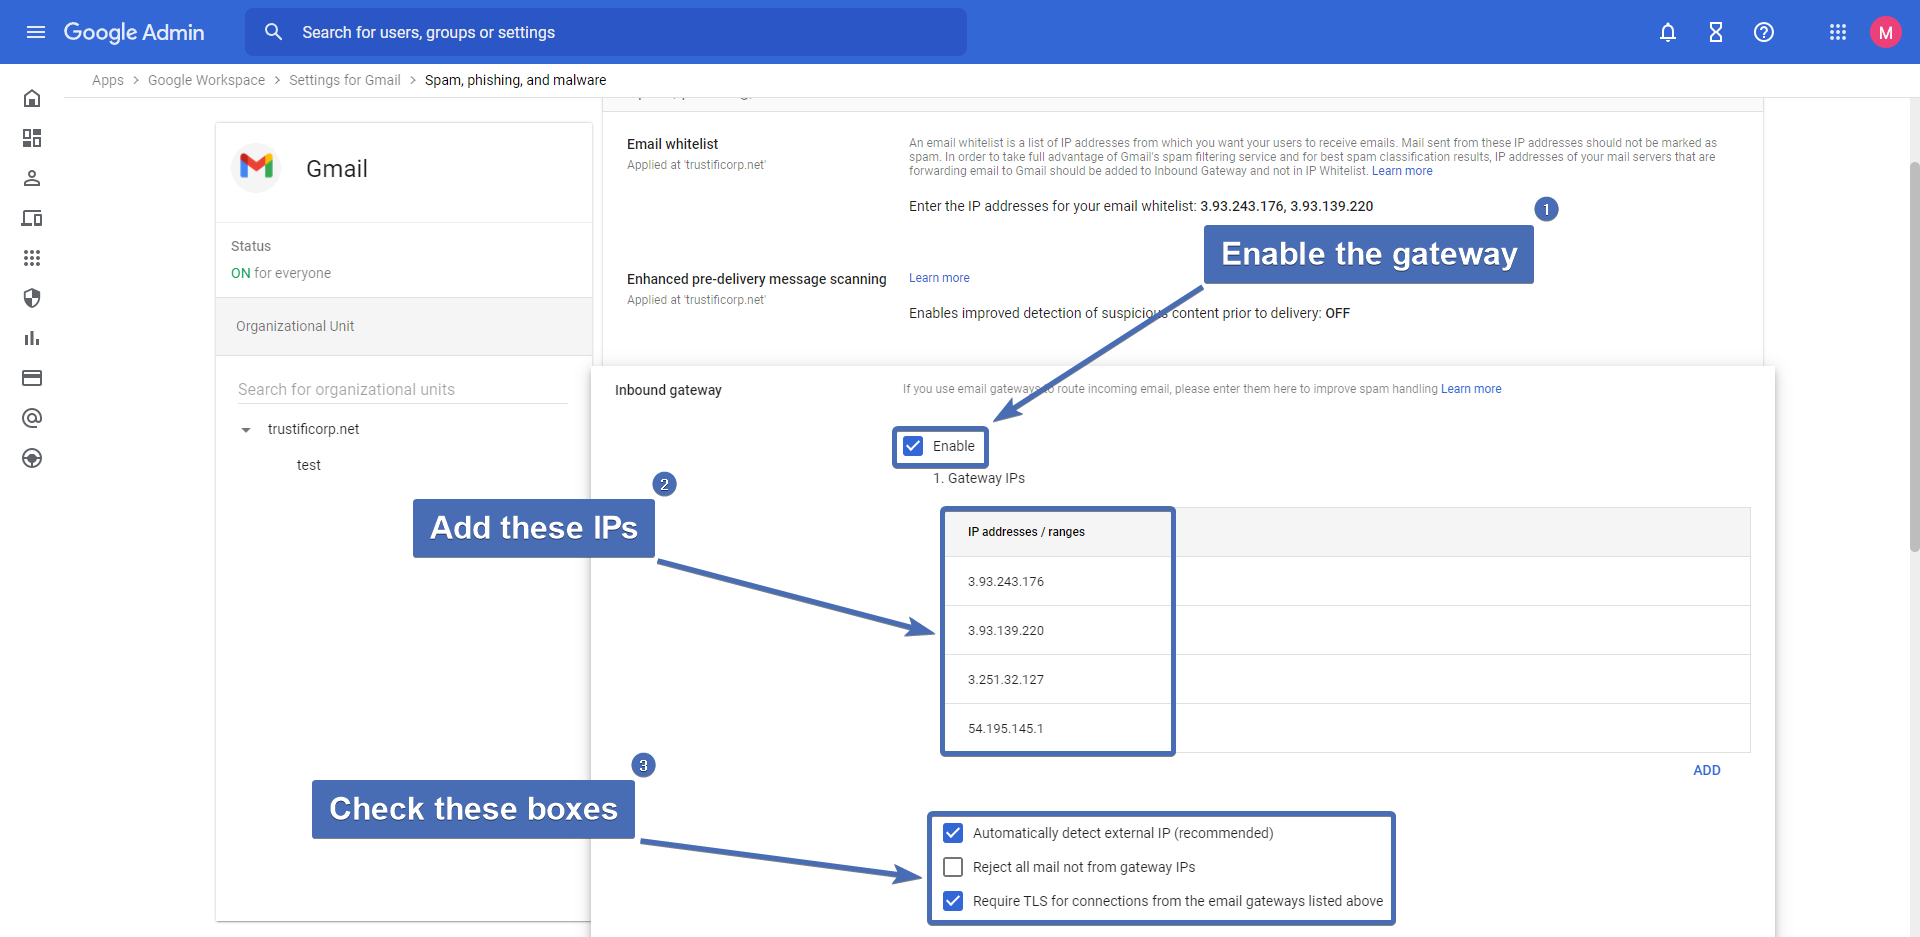
Step 6 – Adding the Trustifi IPs to the inbound gateway
First, make sure the gateway is enabled, then add the same Trustifi IPs you added in the allowlist.
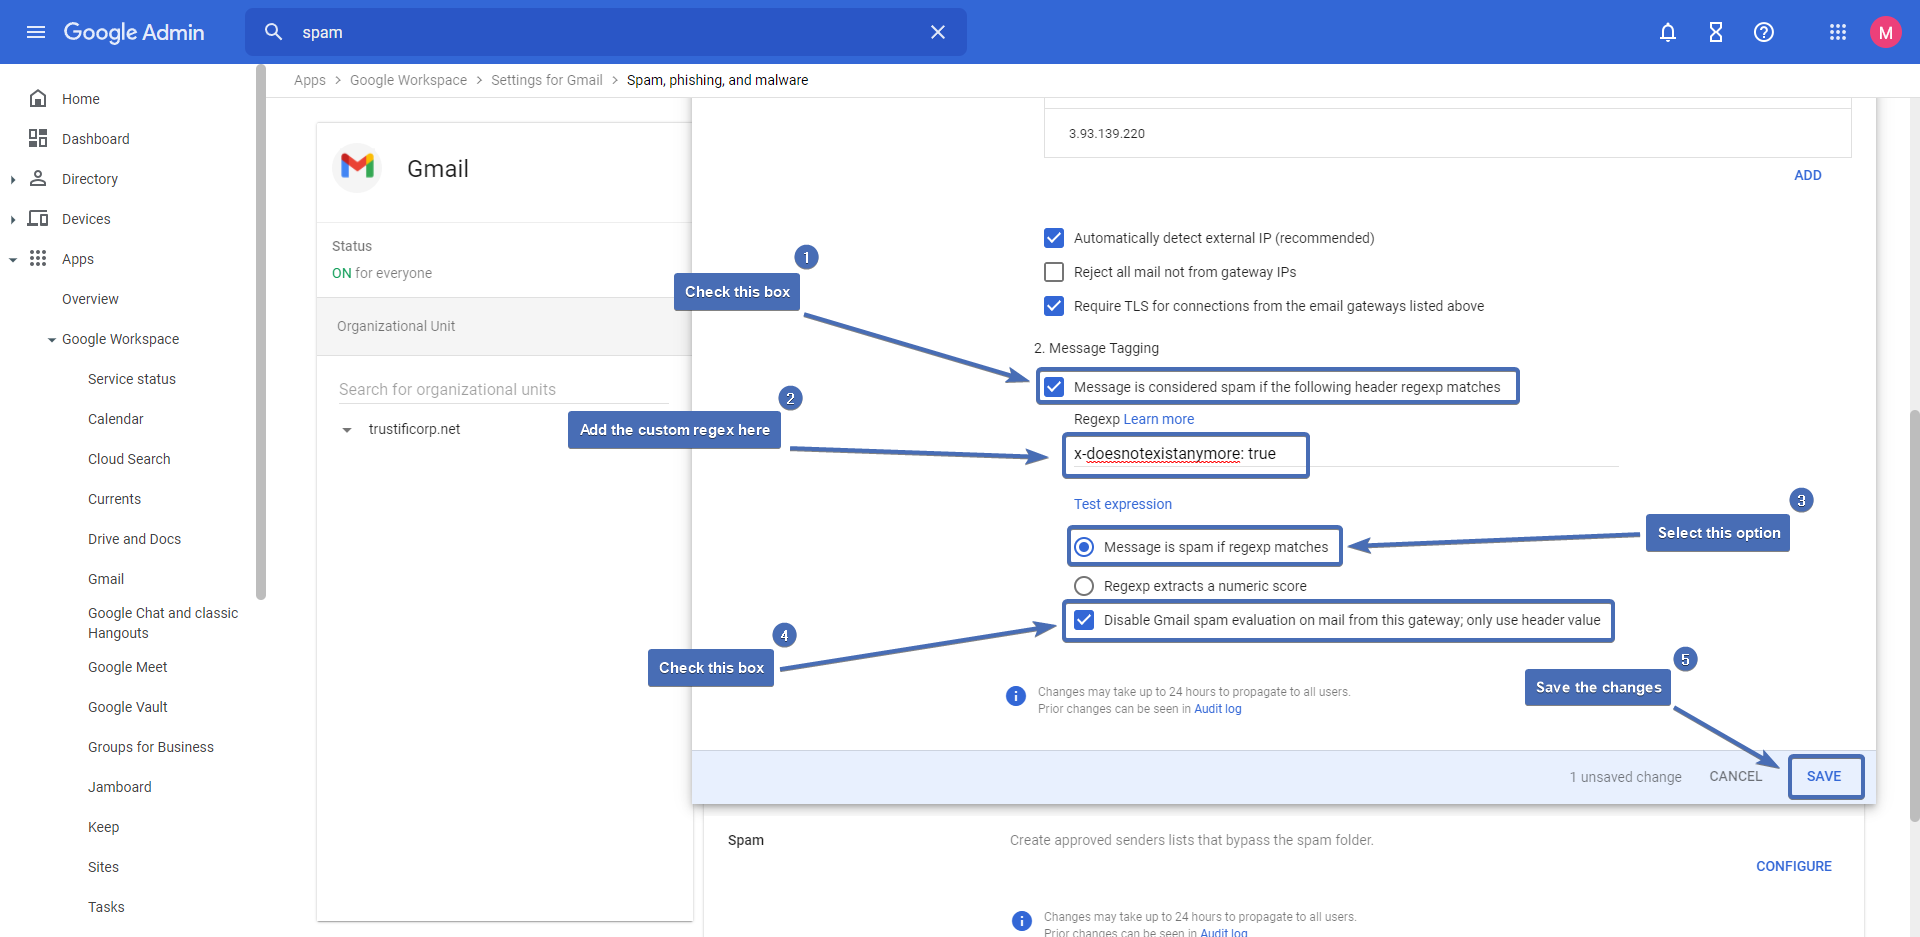
You will also need to check the boxes for “Automatically detect external IP (recommended)” and “Require TLS for connections from the email gateways listed above“.
Step 7 – Message tagging
Check the box for “Message is considered spam if the following header regexp matches“.Now you will need to add a fake header into the regex field. This is used only to enable the policies below, so make sure to add a header which will not actually be found in a real email.
After adding the header regex, select the option “Message is spam if regexp matches” and check the box for “Disable Gmail spam evaluation on mail from this gateway; only use header value”
Once these settings have been configured, click on “Save“.
Step 8 – Creating a spam bypass
Find the “Spam” section and click on the “Configure” link.Add a description to the spam bypass setting, for example “Trustifi spam bypass“.
Scroll all the way down the window and check the box for “Bypass spam filters and hide warnings for all messages from internal and external senders (not recommended)”
Note: Google will display a warning that you will need to confirm.
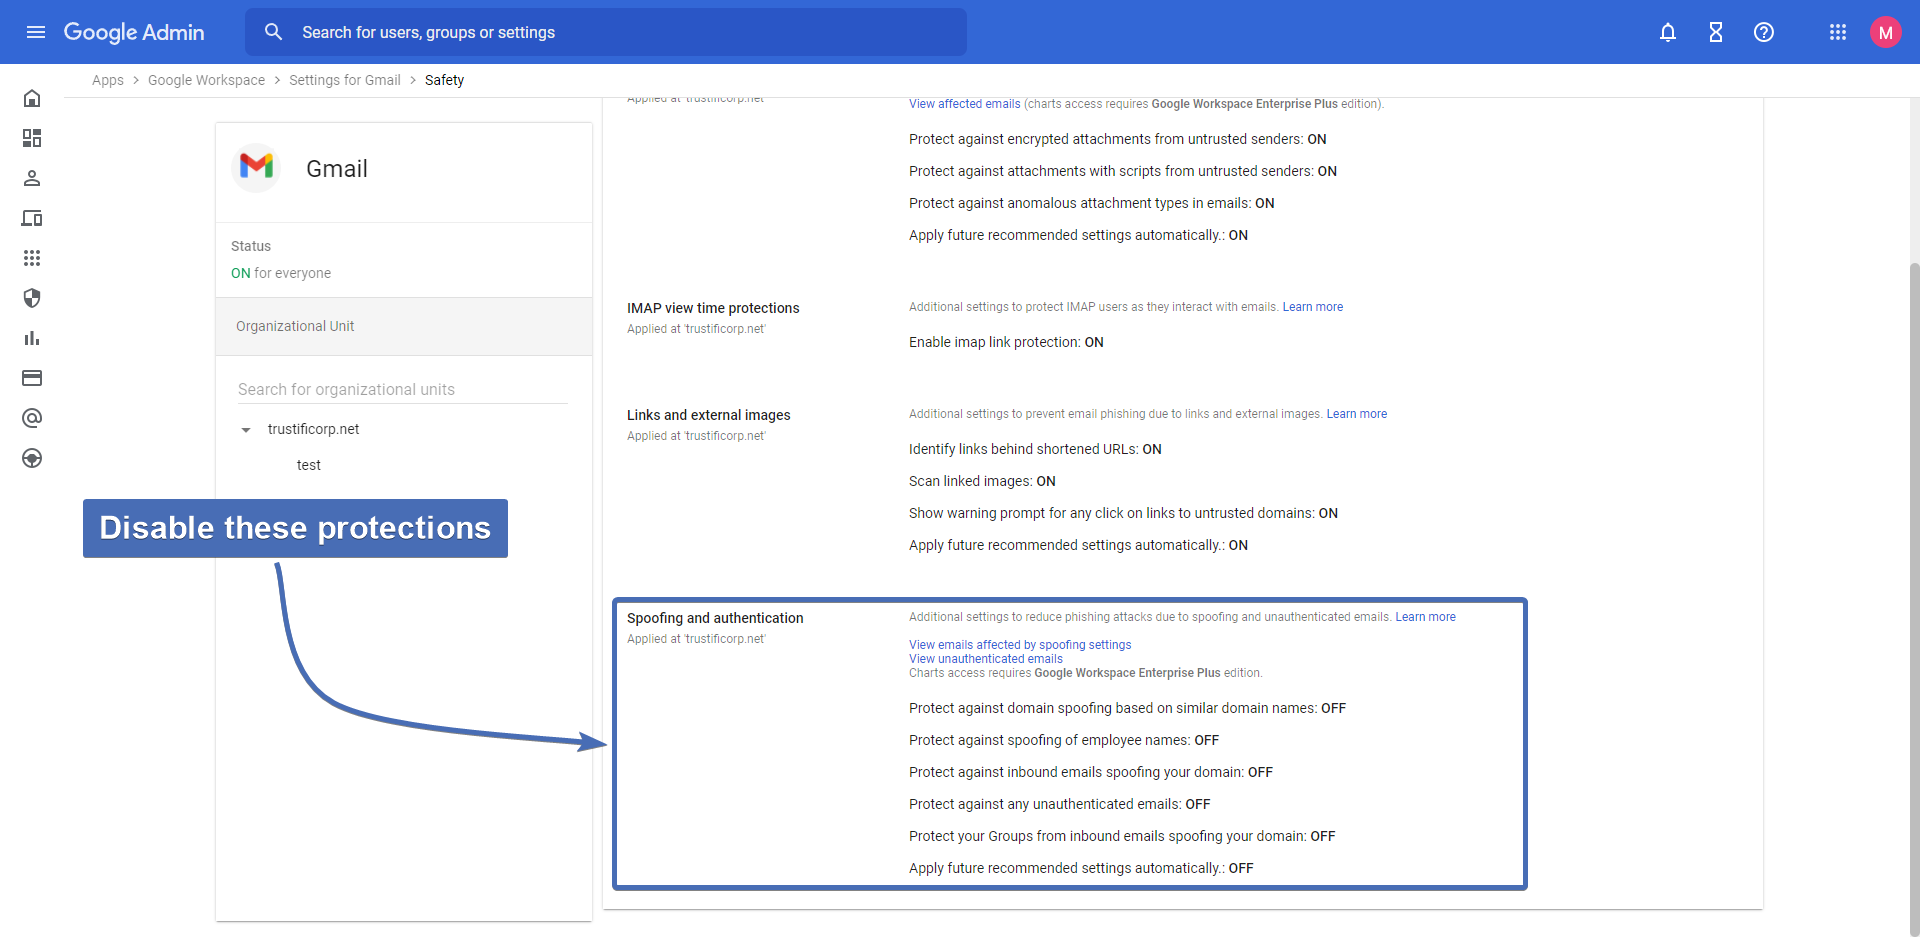
Step 9 – Disabling Google’s spoofing and authentication protections
Navigate to the “Safety” page by searching for the keyword “safety” in the search bar on top.On this page, make sure all the default protections are disabled under “Spoofing and authentication“: