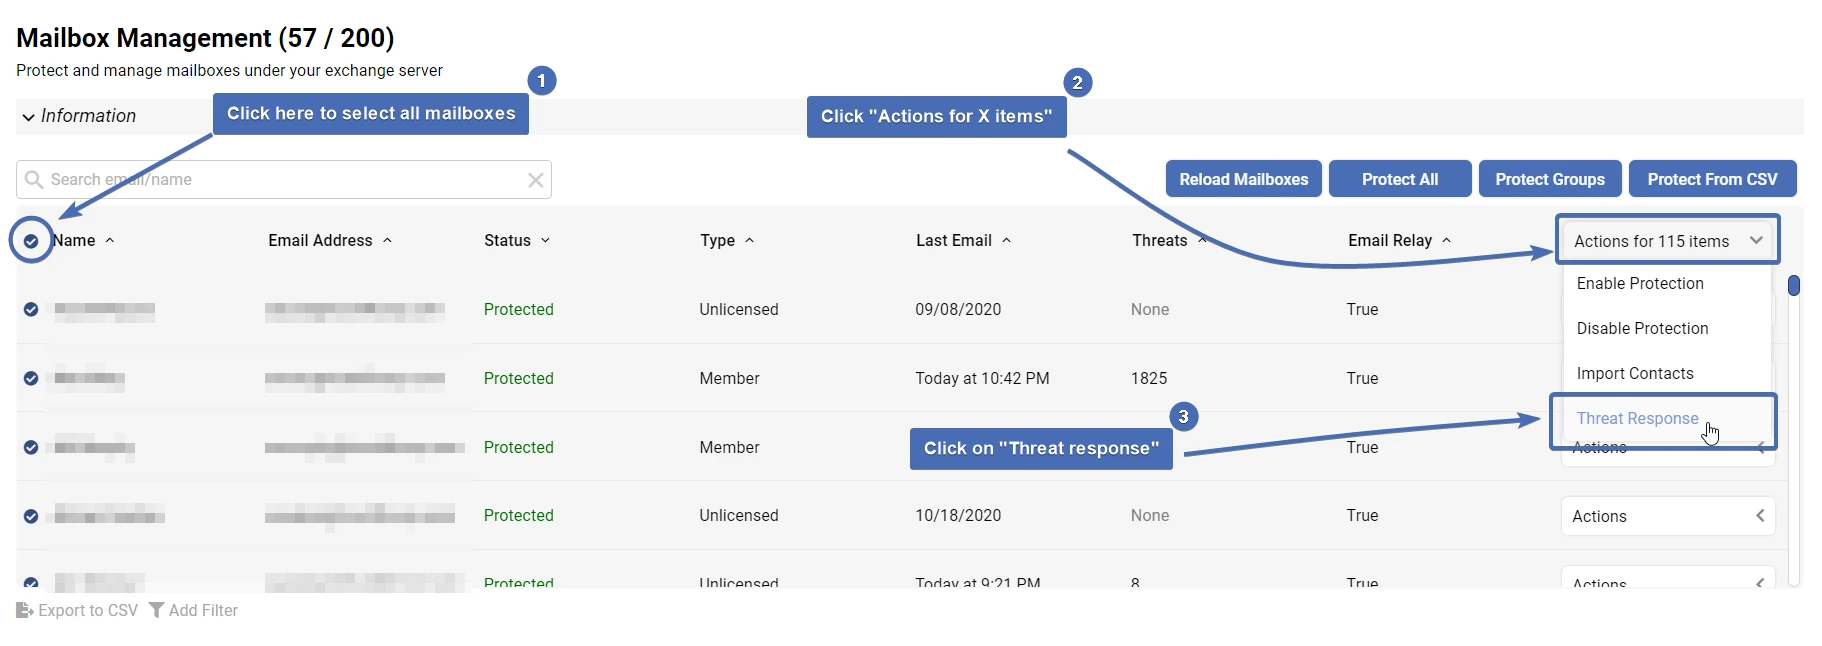
Step 1 – Selecting mailboxes and choosing the “Threat Response” action
To start, you will need to navigate to the “Mailbox Management” page and select which mailboxes you wish to perform the process for.
You have a choice of doing each of the following:
To run Threat Response on a single mailbox, simply click on the “Actions” menu next to it and select “Threat Response”To run Threat Response on multiple mailboxes, first select the mailboxes by clicking on the checkbox next to them. Then, click on the “Actions for X items” button and select “Threat Response”To run Threat Response on all mailboxes, first select all mailboxes by clicking on the “Select all” check box (top left). Then, click on the “Actions for X items” button and select “Threat Response”
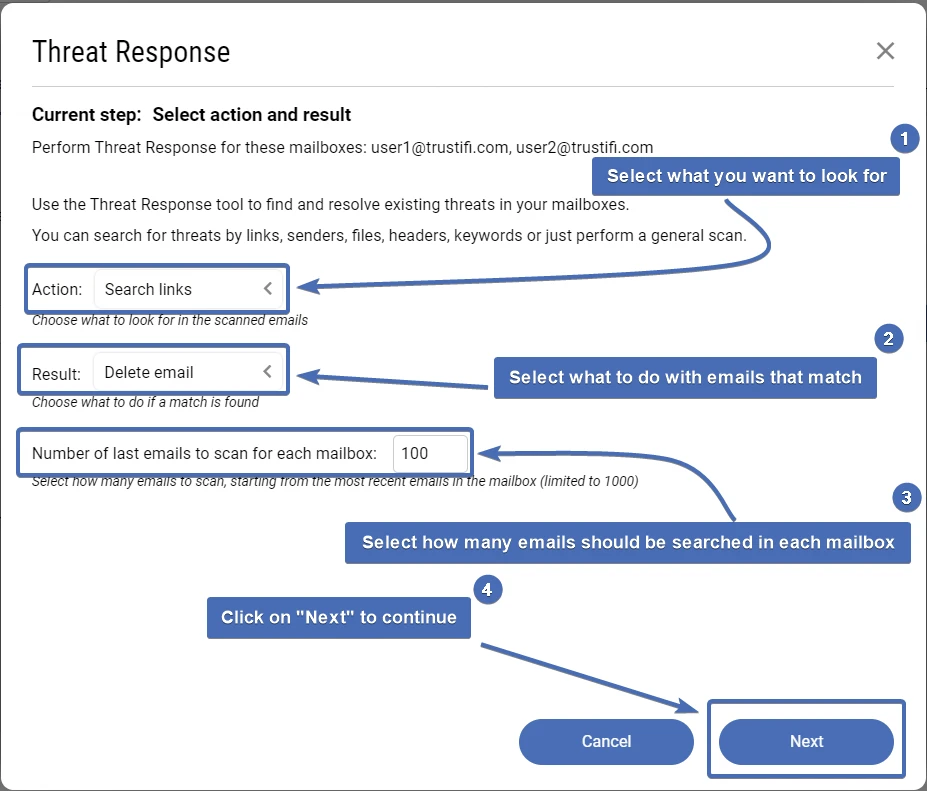
Step 2 – Selecting an action and a result in the Threat Response wizard
You will now be presented with the Threat Response wizard window, which will guide you through the steps to complete the process.
In the first window, you will need to select an action (what you want to look for/scan) and a result (what you want to do with emails that match your search). You will also choose how many emails will be scanned from each mailbox.
In the “Action” list you can choose from the following:
Rescan: performs a general scan to find all types of threats and spam.For this action you will not need to select a result, since the results are pre-determined by your existing threat prevention rules (which can be found under the “Inbound Shield” tab) and your black/white lists (which can be found under the “Configuration” tab)Search links: this will look for any specific URL(s) you provide. If found, the selected result will be applied to the emailSearch files: this will look for any specific file(s) you provide. If found, the selected result will be applied to the emailNote: this action requires uploading the file itself. If you do not have the file and wish to search by file name only, please use “Search keywords”Search sender: this will look for emails sent from specific senders. If found, the selected result will be applied to the emailSearch headers: this will look for emails containing specific headers (key and value). If found, the select result will be applied to the emailSearch keywords: this will look for emails containing specific keywords or phrases (in the body, subject and in attachment names). If found, the selected result will be applied to the email
In the “Result” list you can choose from the following:
Archive email: the email will be moved into the “Archive” folder.Delete email: the email will be permanently deleted.Review: the email content will only be displayed for your review.
Once you’ve selected an action(1), a result(2) and how many emails should be scanned in each mailbox(3), you can click on the “Next” to proceed.
Information! In each mailbox, emails will be scanned chronologically from latest to oldest and for each mailbox up to 1000 emails can be scanned.
Step 3 – Configuring the data
In this window, you will add the specific links, files, sender emails, headers, or keywords you want to search for.
For each of these, you can either enter the values manually or upload a csv file containing a list of values.
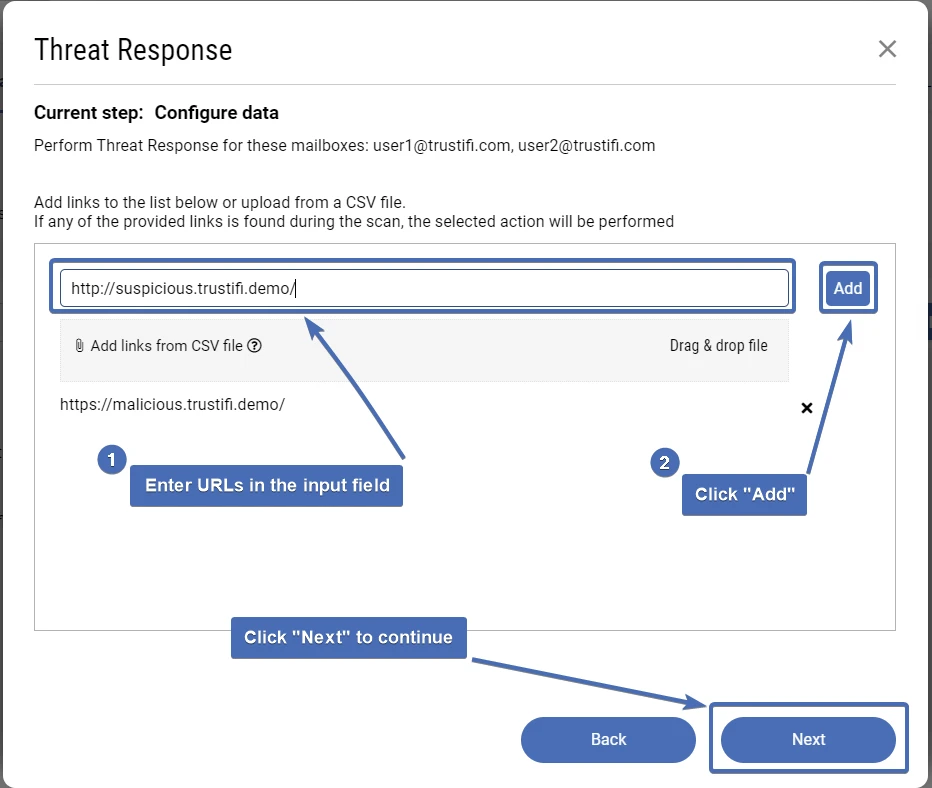
Once you are ready to continue, click on the “Next” button.
Information! If you chose the “Rescan” action, this step will be skipped.
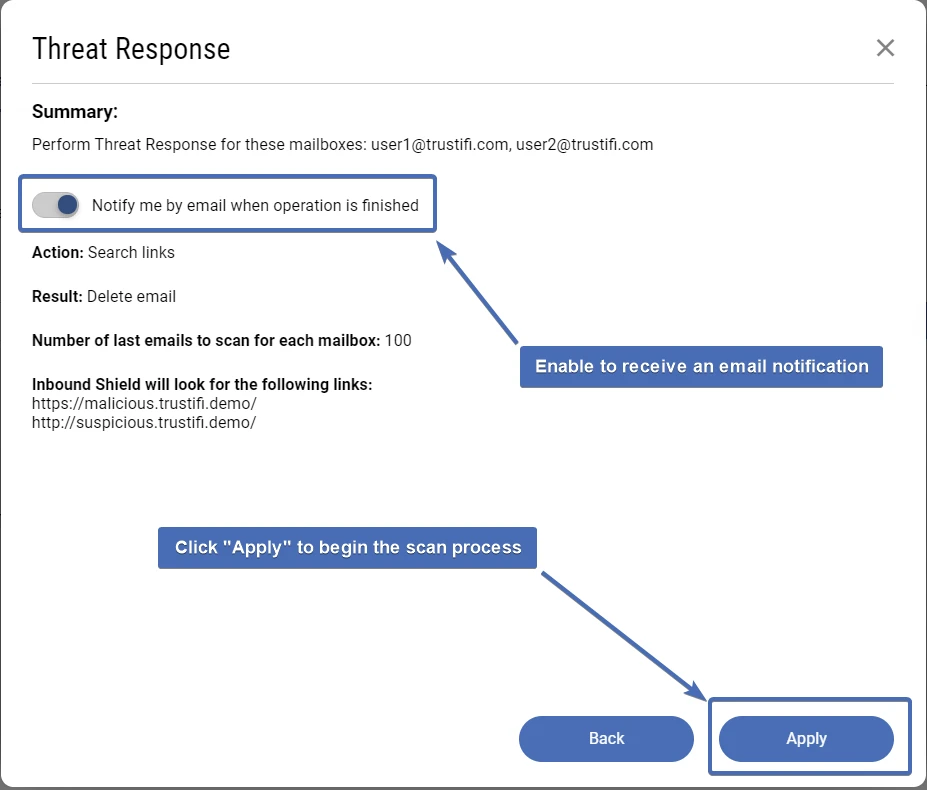
Step 4 – Summary
In this step you will be presented with a summary of the process, so that you may review the details before the process begins. If you wish to change any of the previous configurations, simply click on the “Back” button.
This process can take some time, depends on your choices, to receive a notification once the process is completed, click on the toggle that reads “Notify me by email when operation is finished”.
To begin the scan process, click on the “Apply” button.
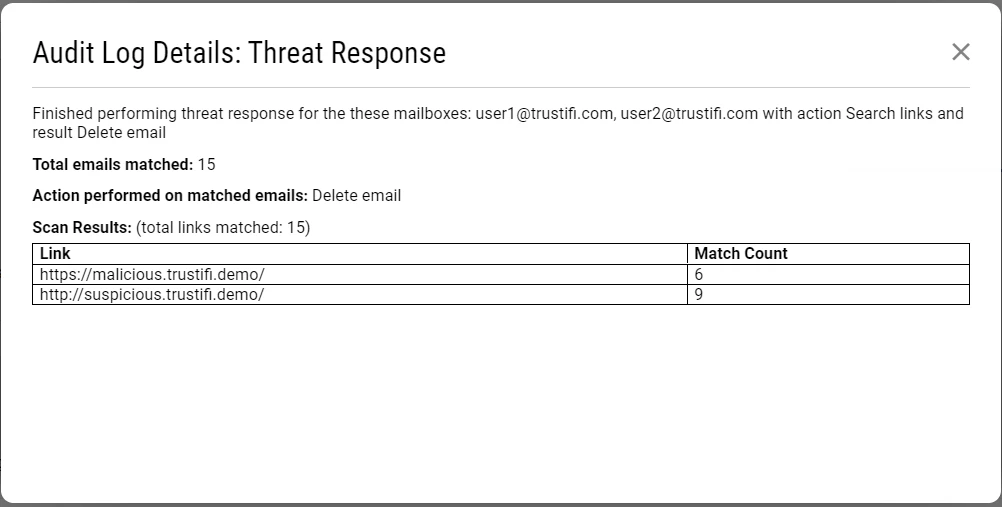
Step 5 – Viewing results
Once the process was finished, you can navigate to the “Audit Log” tab under “Inbound Management” to view the results.
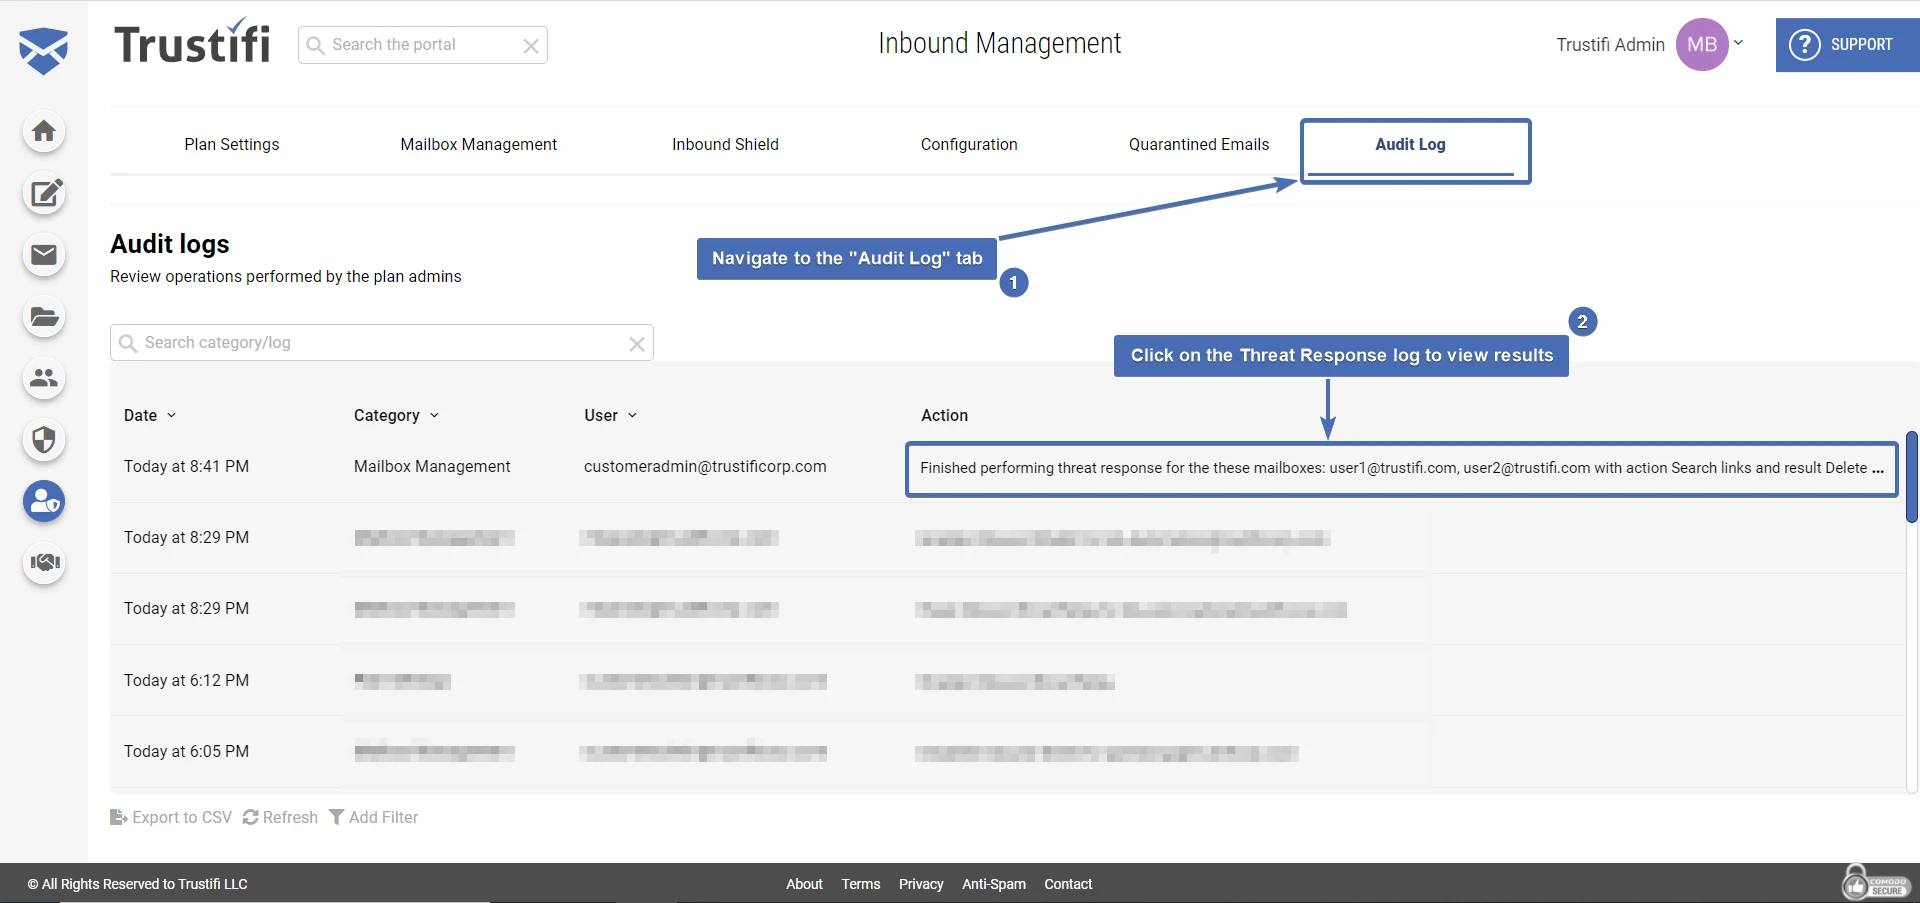
When you click on the Threat Response log, a new window will open which will show you a detailed list of:
Which mailboxes the Threat Response process was performed onWhich action and result were configured How many emails matched the search criteriaHow many matches were found for each link/file/keyword/header/sender