Verifying requirements
Before starting the process of integrating Trustifi with Microsoft Exchange, please verify that all the conditions in the requirements section are met.
Full coverage of the requirements is required in order to avoid unnecessary delays and complications.
Navigating the Trustifi web portal
To start the navigation process, the Trustifi admin will need to open the Trustifi web app and log in using their admin credentials.
Once logged in, the admin will need to locate the “Inbound Management” icon on the left-side navigation bar (see figure 2).
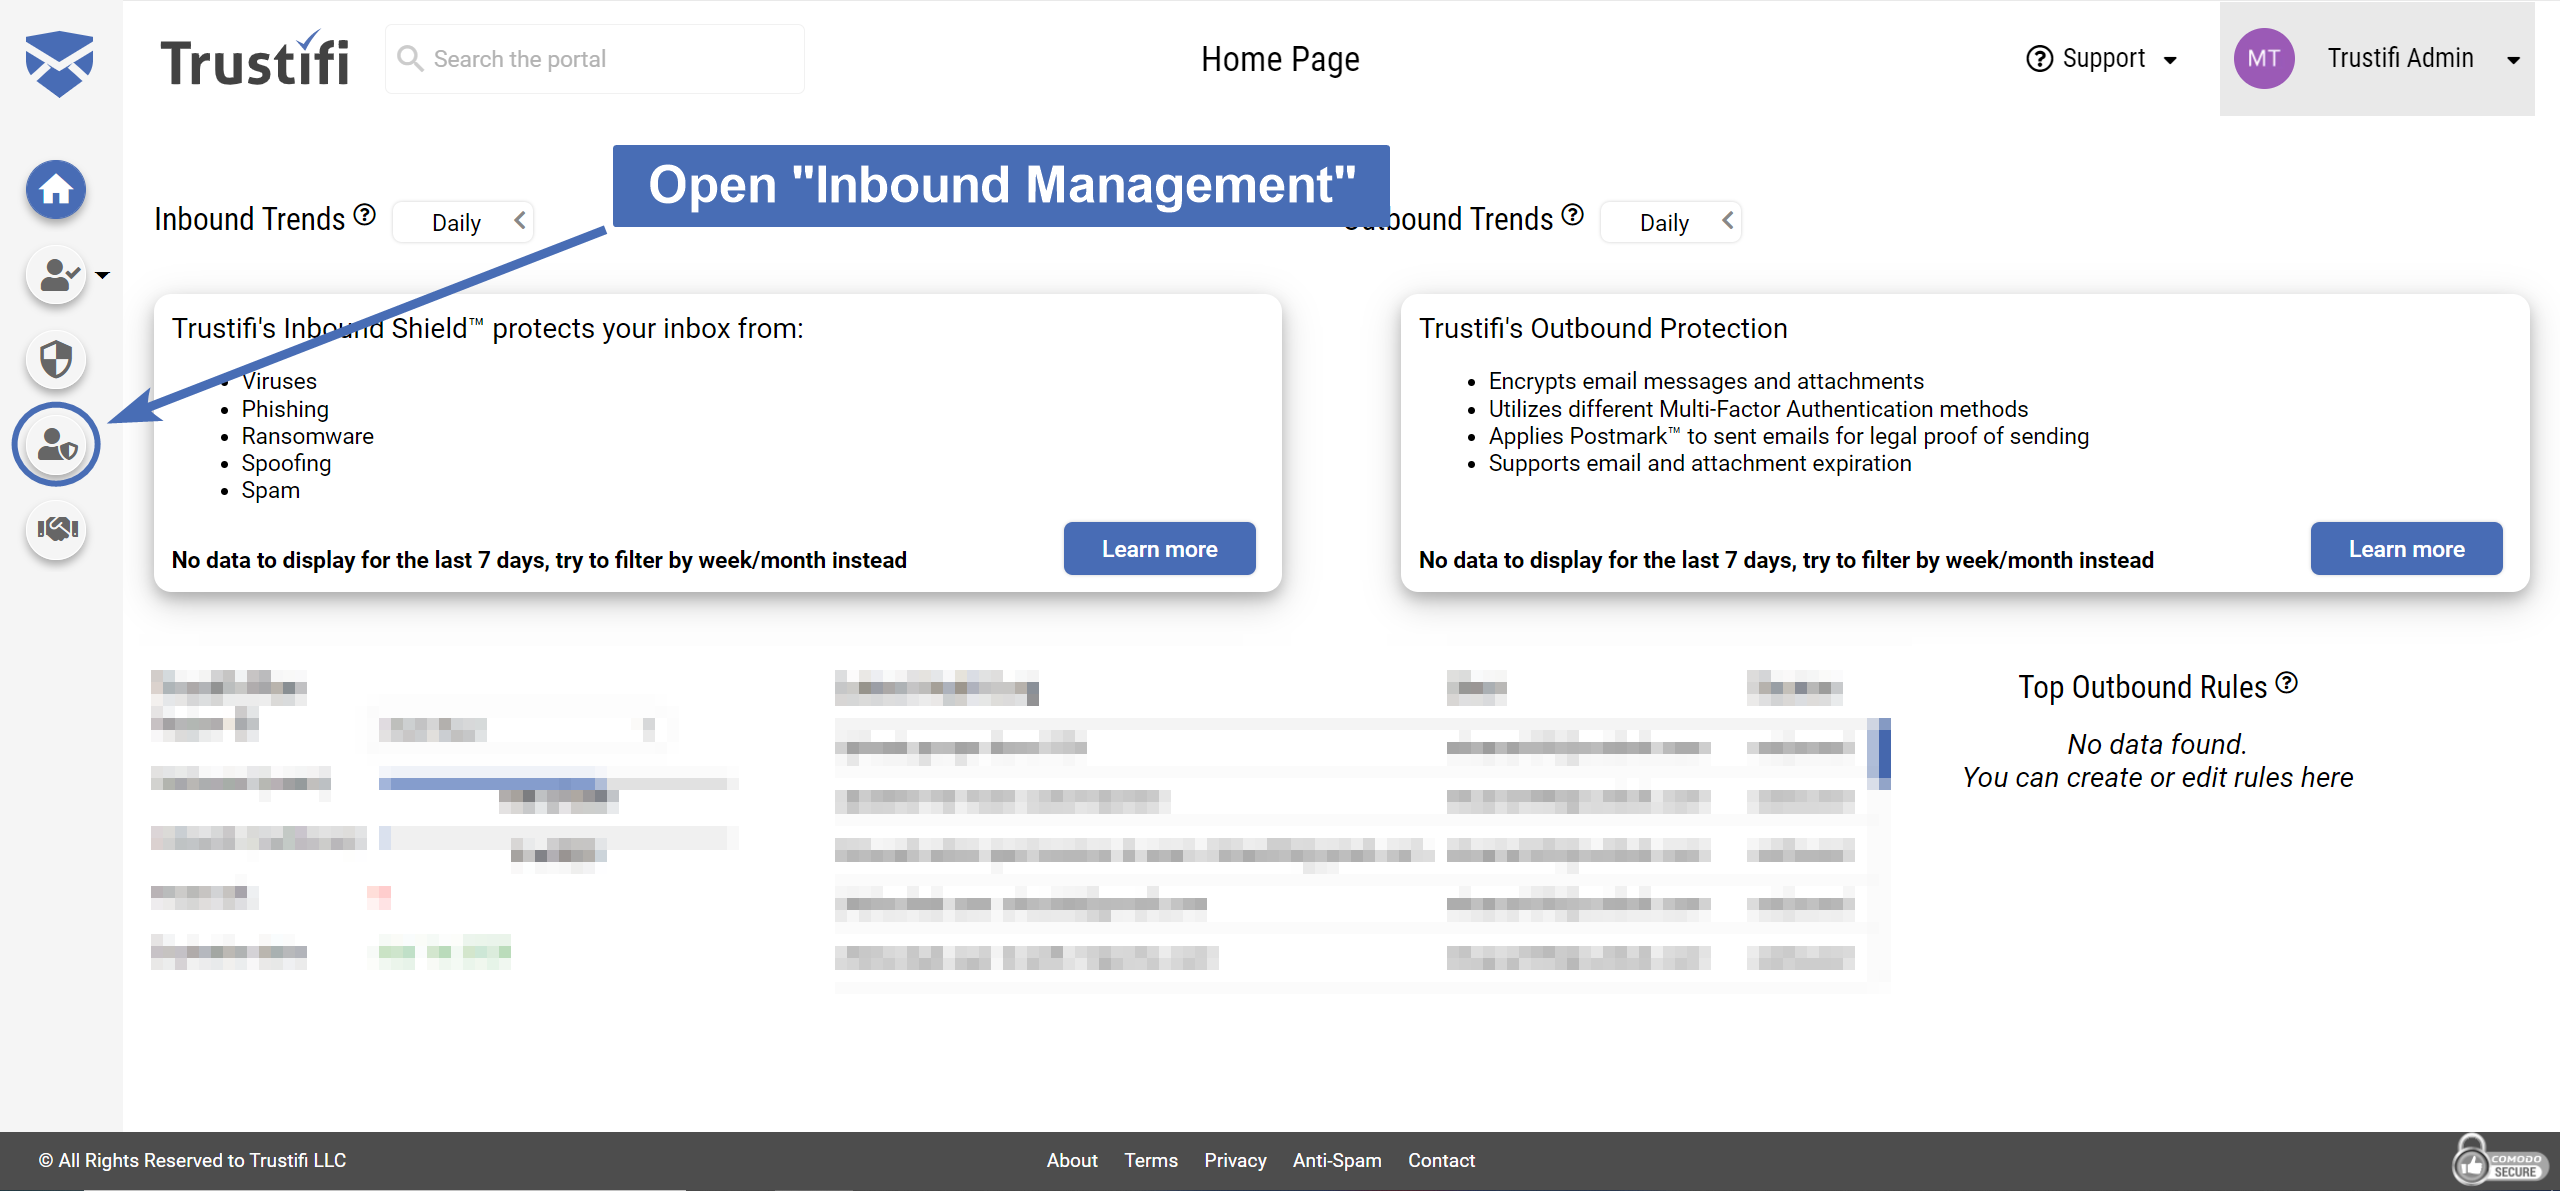
Figure 2: The Trustifi web portal home page. “Inbound Management” icon is visible in the bottom left.
In the “Inbound Management” section, navigate to the “Plan Settings” tab on the top of the page (see figure 3).
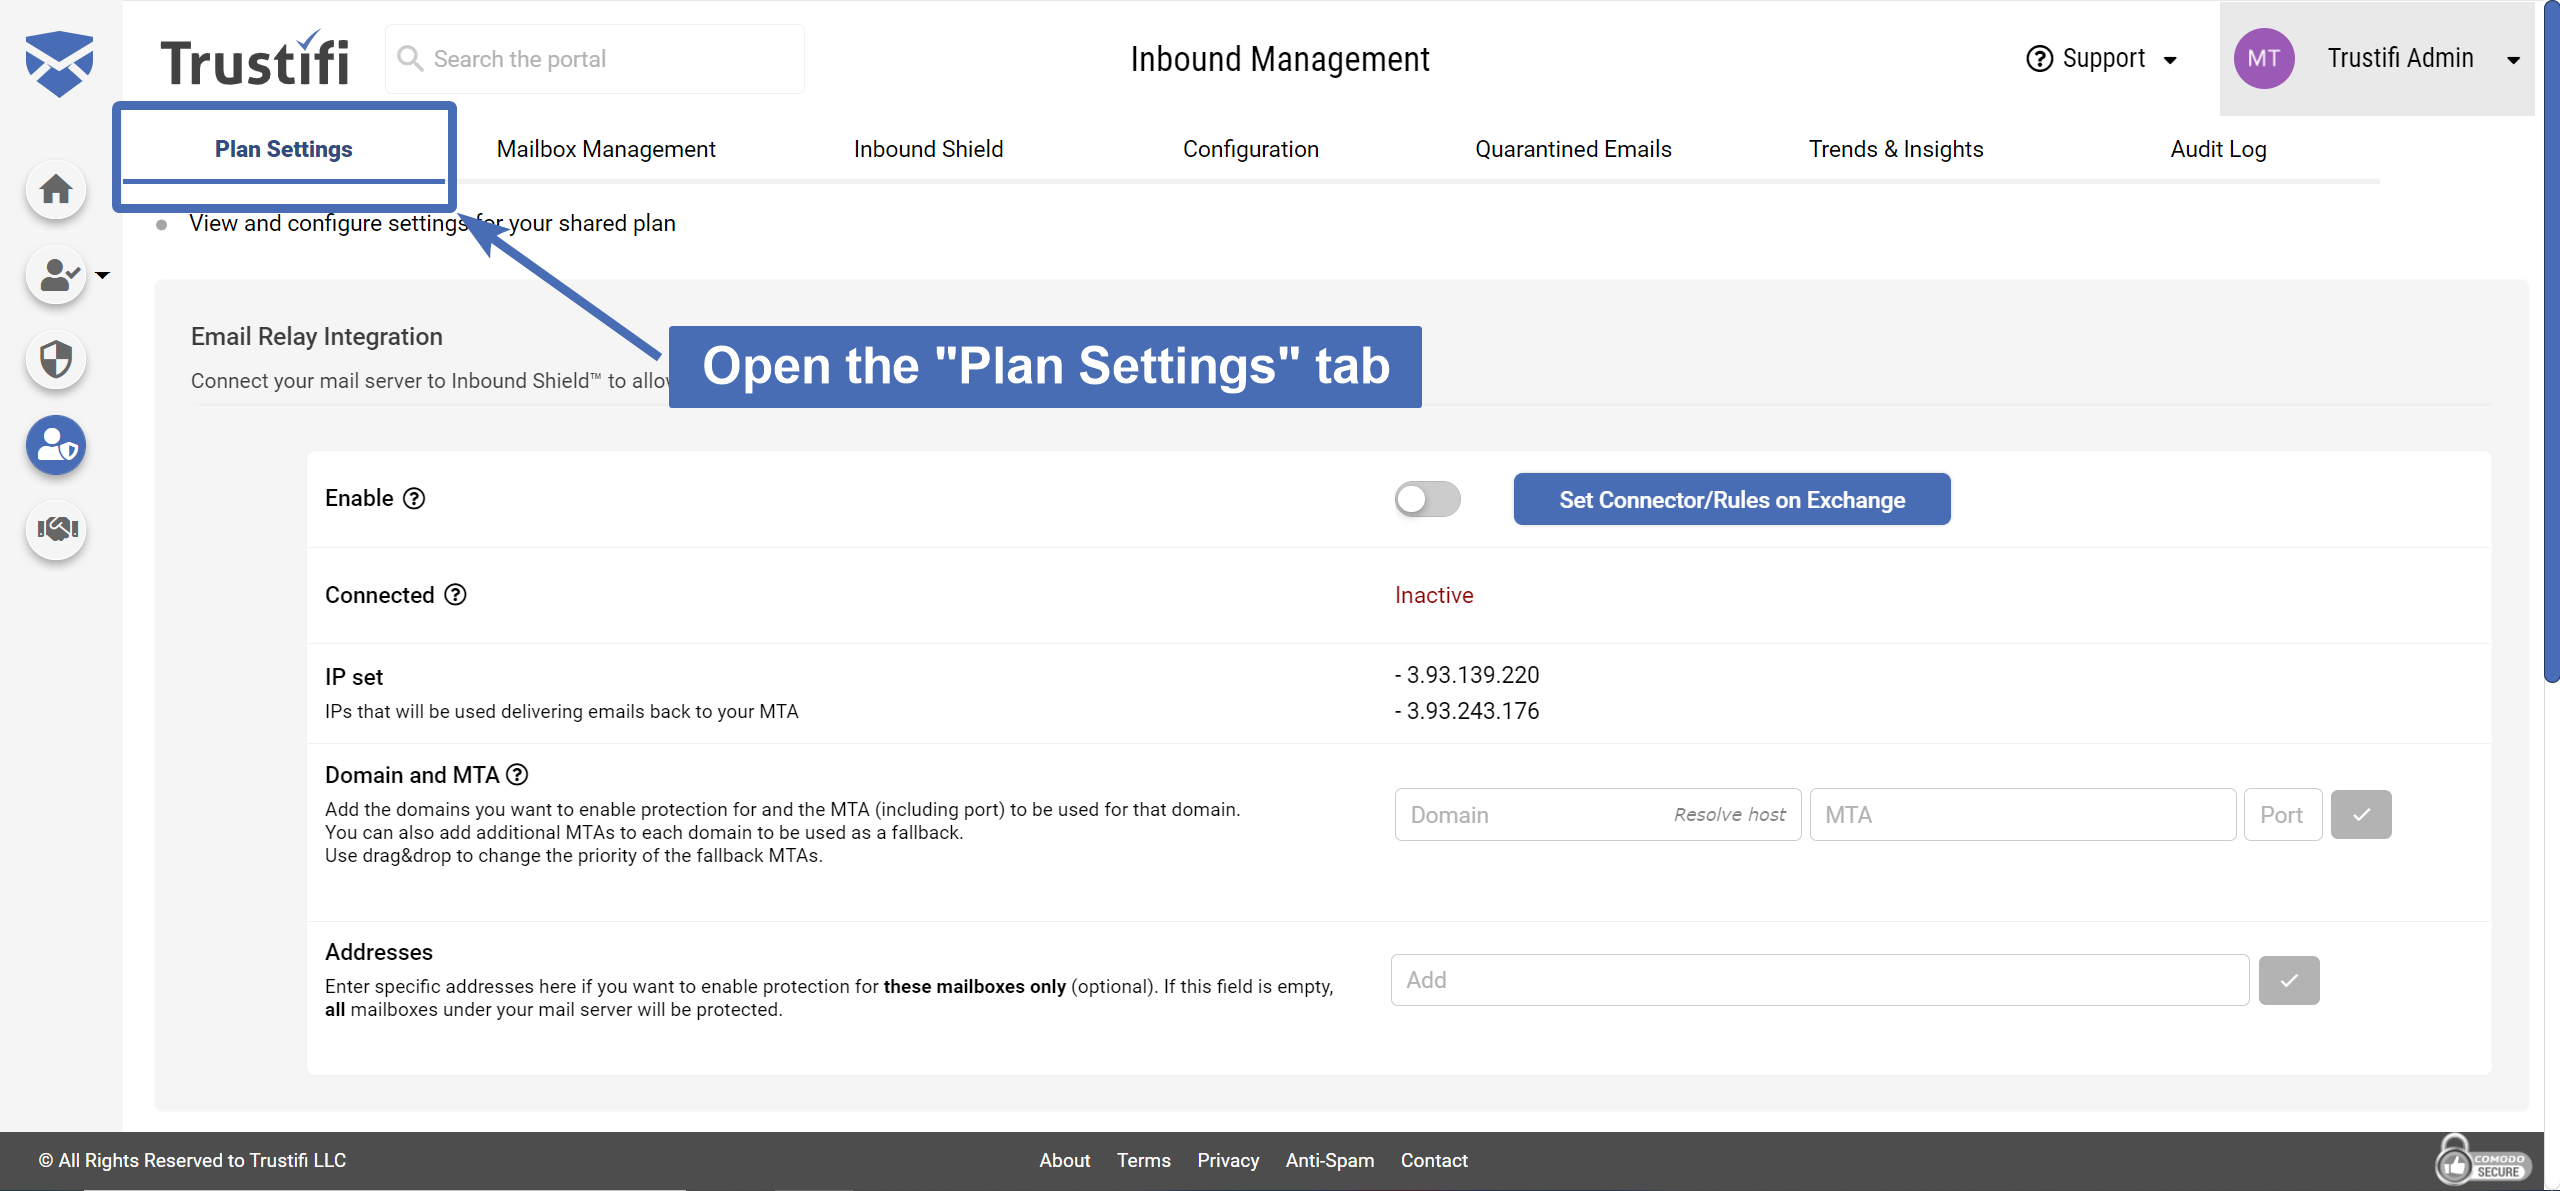
Figure 3: The “Inbound Management” page on the Trustifi web portal. “Plan Settings” tab is on the top left.
In the “Plan Settings” tab, scroll down until you see the “Exchange Integration” section.
The default status will be “Disconnected” until you log in to Exchange.
To begin the integration process, simply click on the “Connect” button (see figure 4).
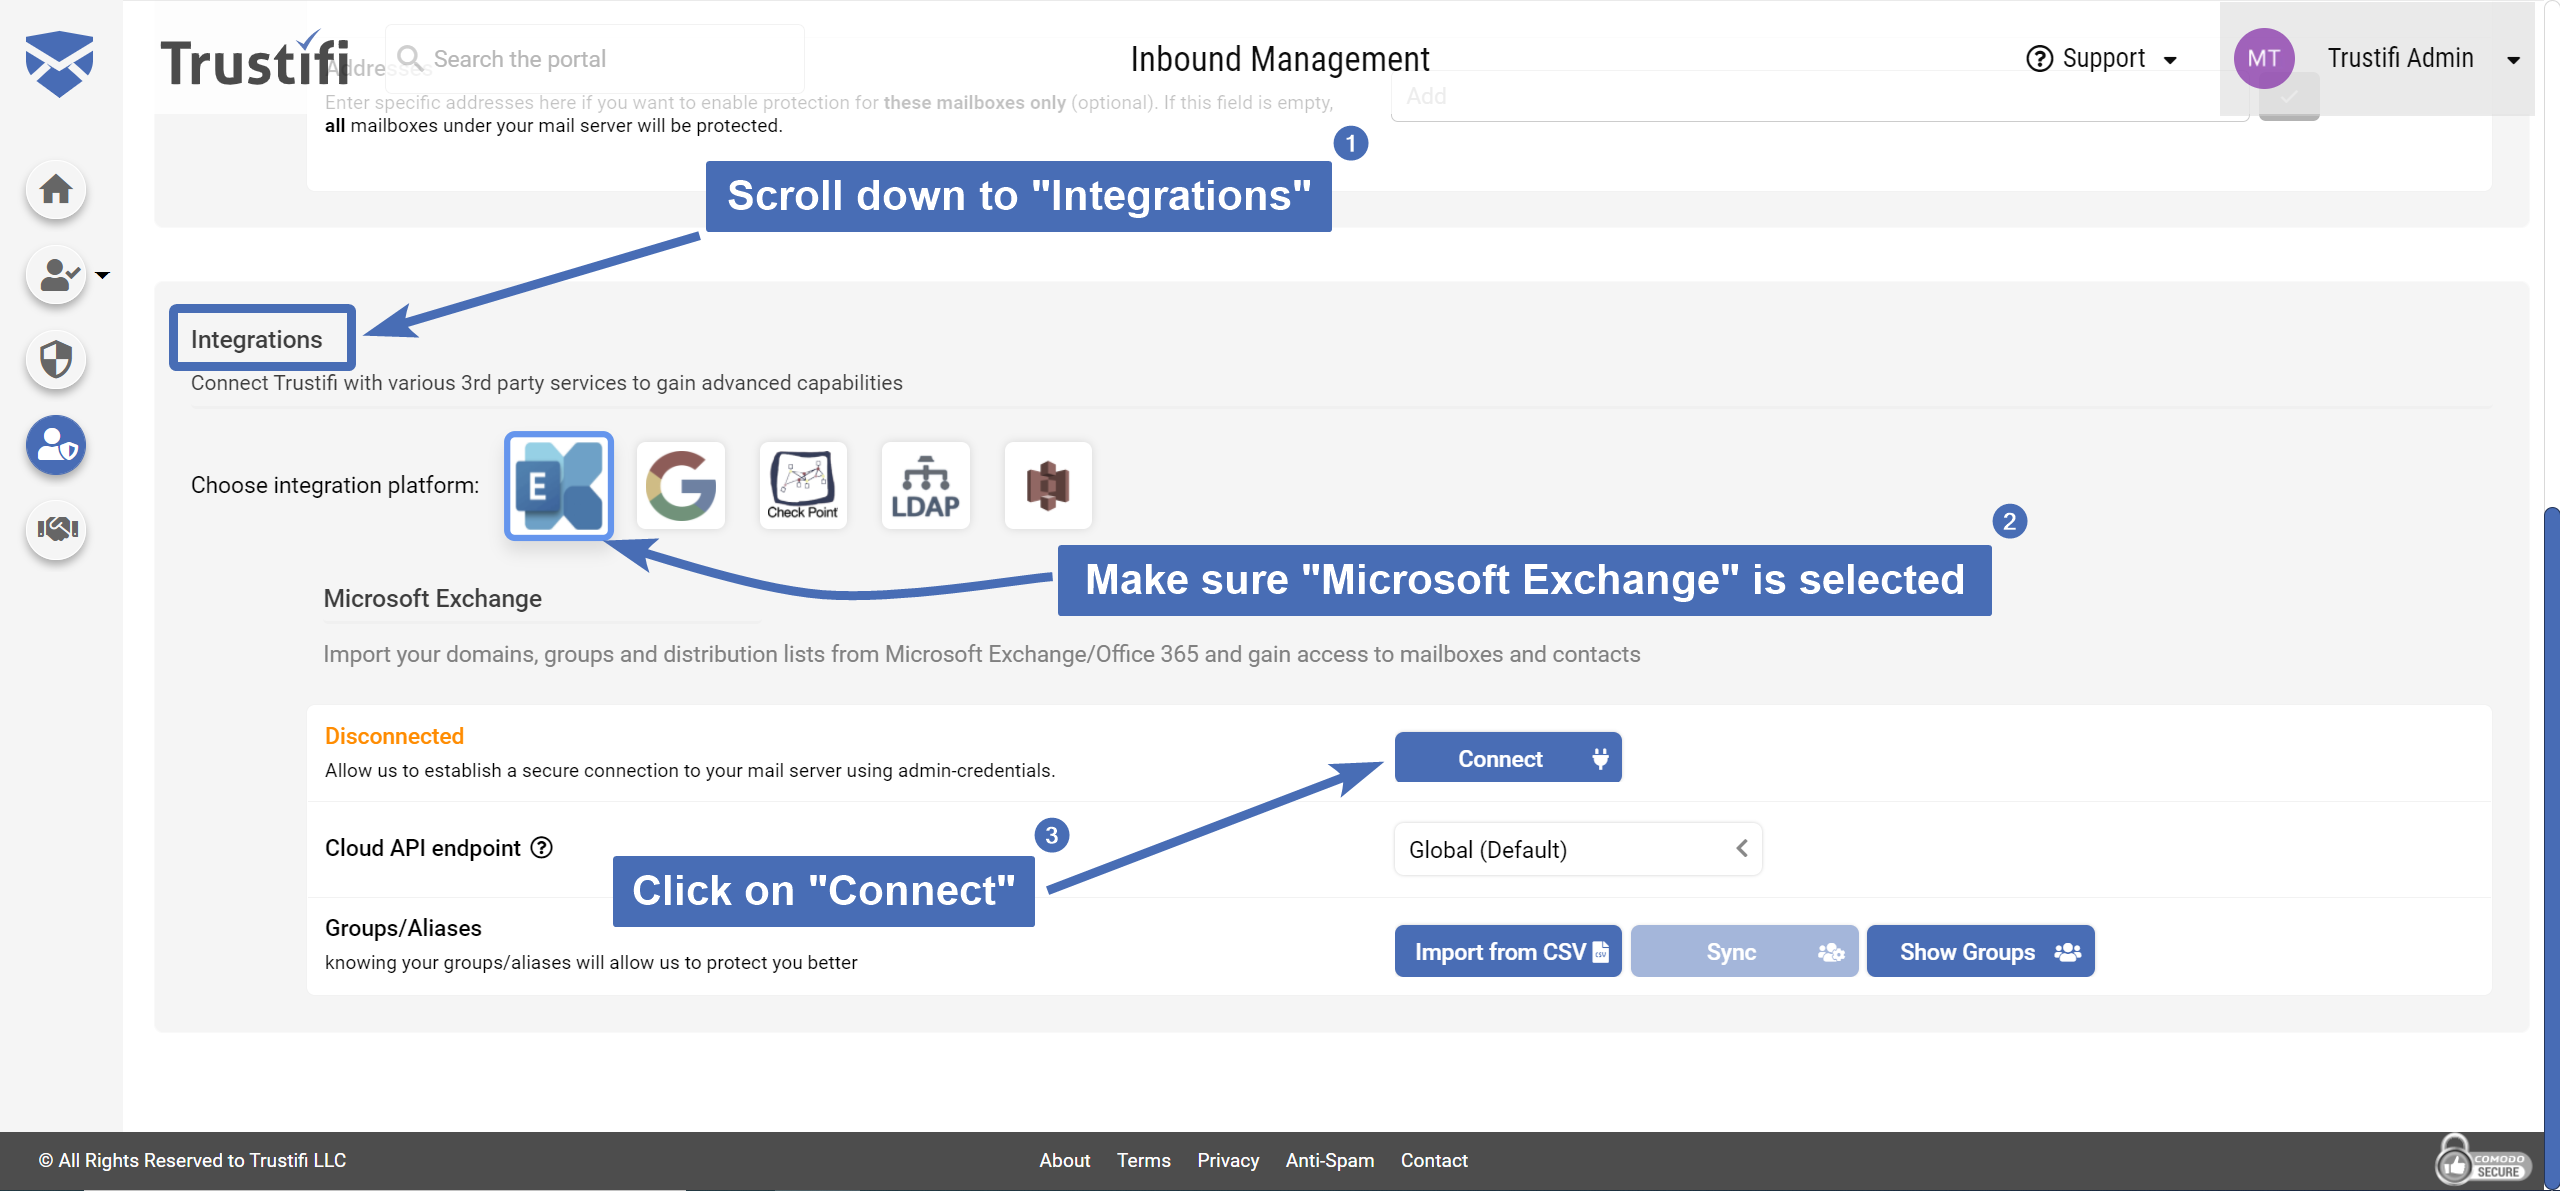
Figure 4: The “Exchange Integration” section. “Connect” button is on the right. The “Inbound Shield” section is disabled until Exchange integration has been completed.
Integration with Microsoft Exchange
After the “Connect” button is clicked, you will be prompted by Microsoft to enter your Exchange admin credentials.
You may be asked if you want to allow Trustifi access to Exchange, to continue the process you will need to allow these permissions.
You can see a full list of the required permissions in the “Access to Exchange Admin Center” section of the “Requirements” page of this document.
Note: This step is only required to be performed once. After the admin consents to grant Trustifi the required permissions, the Trustifi app will connect directly to Exchange using the Graph API. Trustifi does not store these credentials anywhere.
After your mail server has been successfully integrated with Trustifi, you will notice the integration status has been updated to “Connected” (see figure 5).
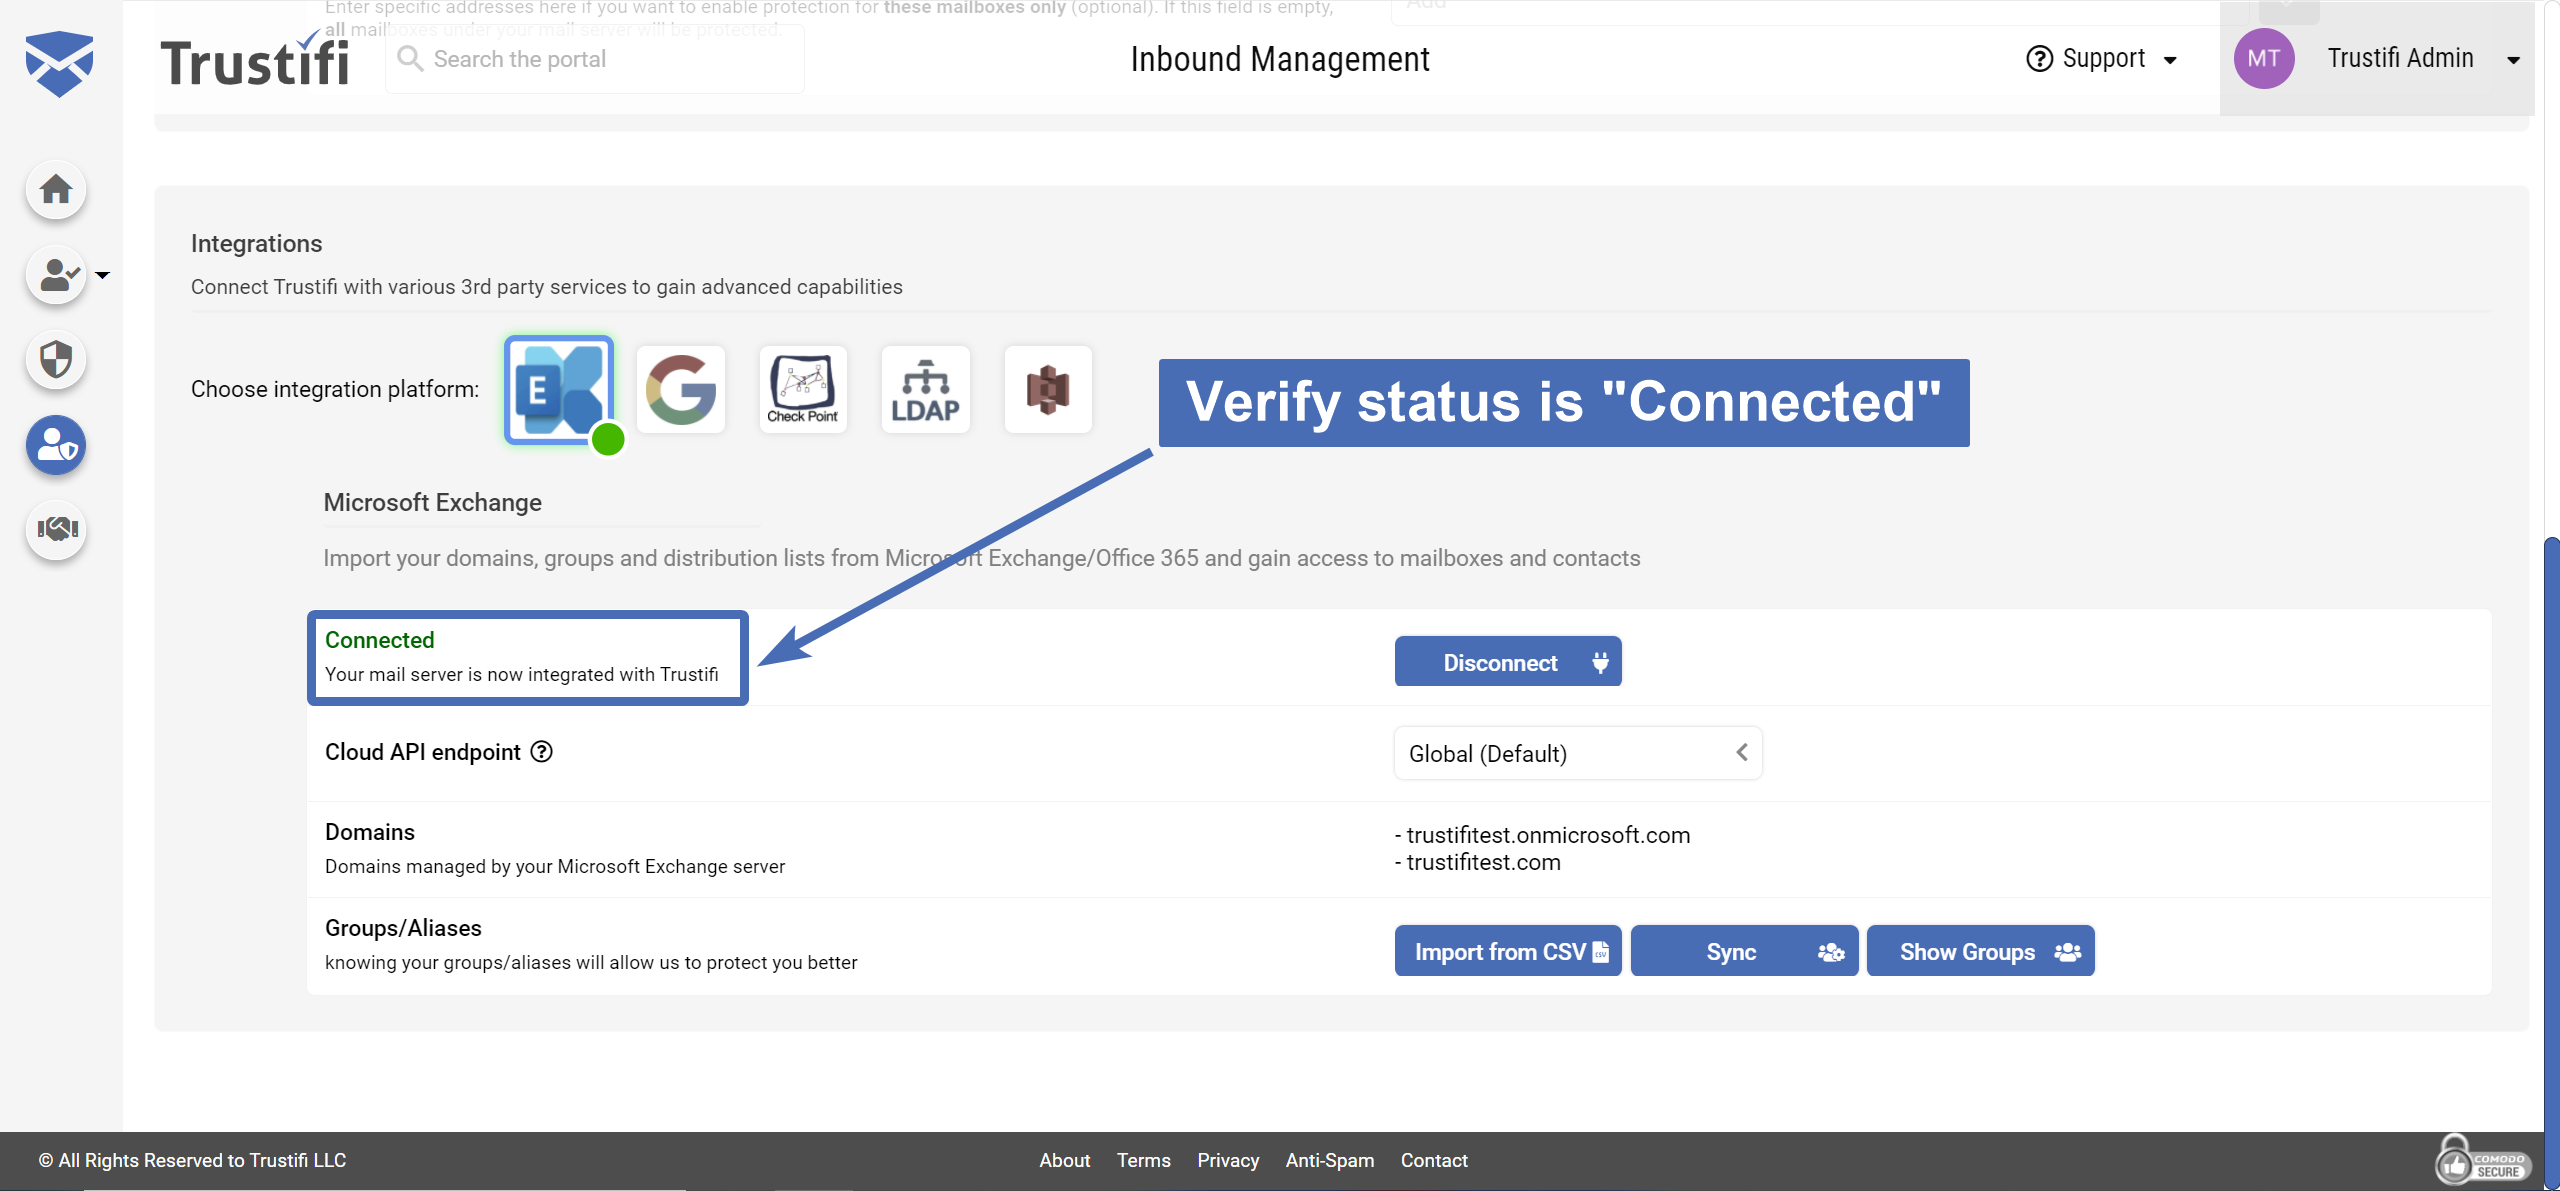
Figure 5: The “Exchange Integration” is connected.
Protecting your mailboxes
After the Exchange integration has been connected, it will now be possible to start protecting your domain’s mailboxes.
Note: Connecting to Exchange does not automatically apply protection to any of your mailboxes.
Navigating to “Mailbox Management”
The “Mailbox Management” page is where the Trustifi admin can monitor and protect all mailboxes under their domain.
To open this page, click on the “Mailbox Management” tab on the top of the page (see figure 6).
When the page is loaded, Trustifi will automatically import from Microsoft Exchange all the mailboxes which are assigned to the admin. If the list does not automatically populate, you can click on the “Get all mailboxes” button to pull all mailboxes information from your Exchange server.
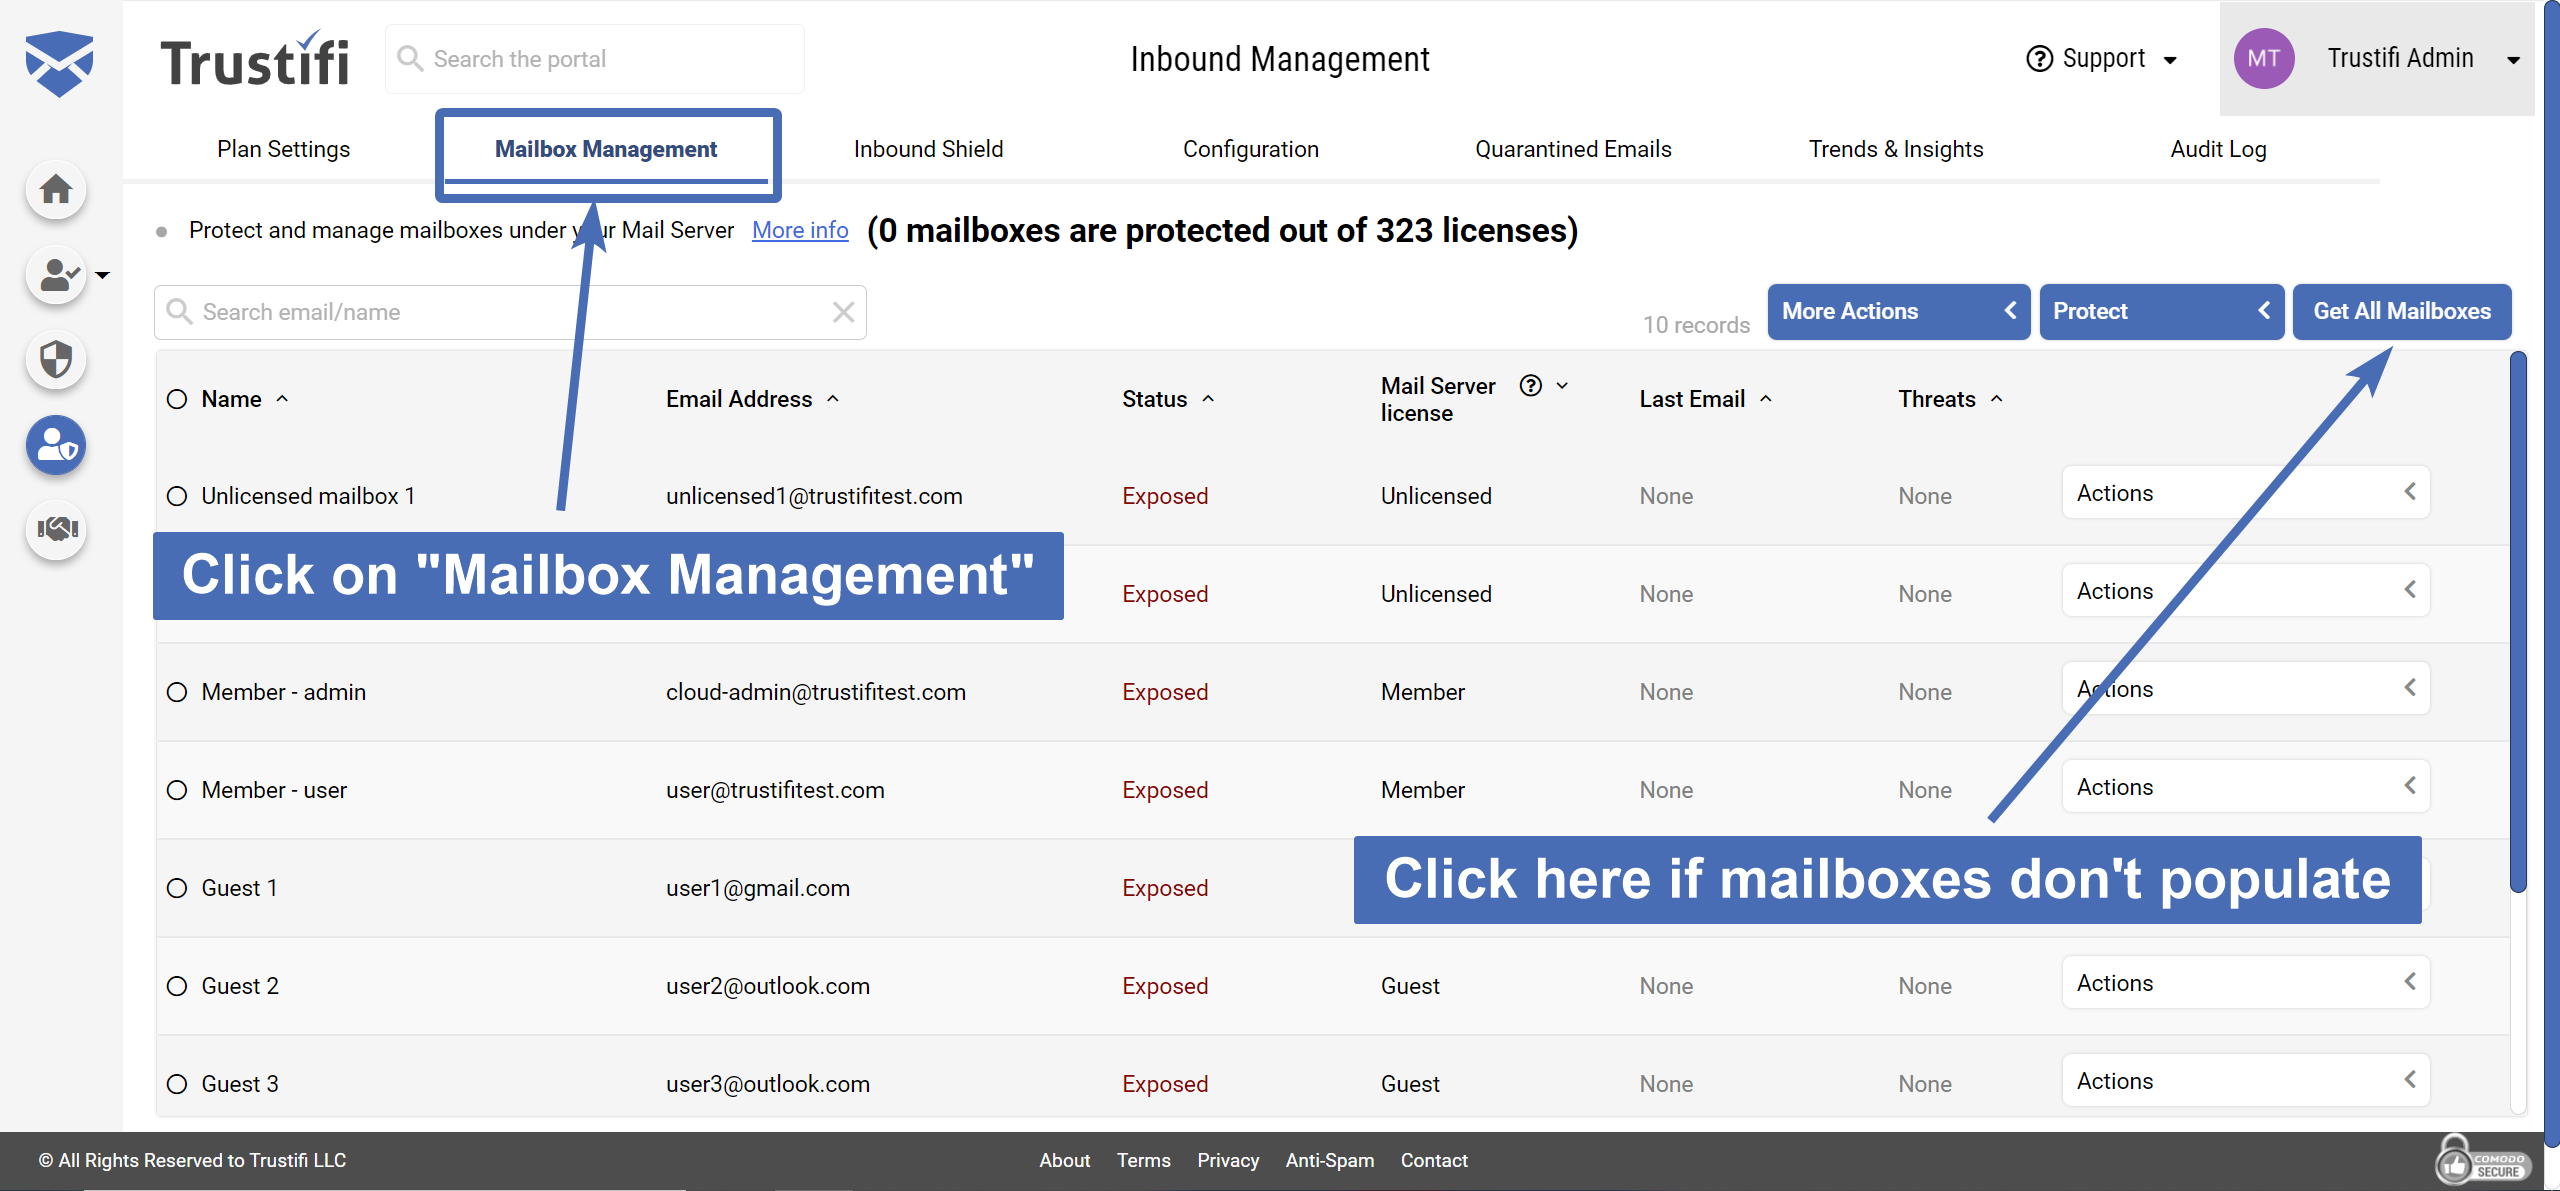
Figure 6: The “Mailbox Management” tab.
Note: Importing the mailboxes from Exchange could take some time, depending on the amount. For best results, please avoid performing actions on any mailbox until this process is finished.
Enabling Inbound Shield™ Protection
When Inbound Shield™ is enabled for a mailbox, each incoming email to that mailbox will be scanned by Trustifi in a sandbox environment, away from the recipient’s inbox.
Inbound Shield™ will look for malicious links and attachments, suspicious senders, spam content and other threats.
If a threat of any type is found, Trustifi will apply an automatic action as defined by the admin in the “Inbound Shield” tab (see section “Threat Prevention Rules” for more details).
There are several different ways to enable Inbound Shield™ protection for your mailboxes:
Individual mailbox: to enable protection for a single mailbox, click on the “Actions” menu which is next to the selected mailbox. When the “Actions” menu opens, click on “Enable Protection” (see figure 7).
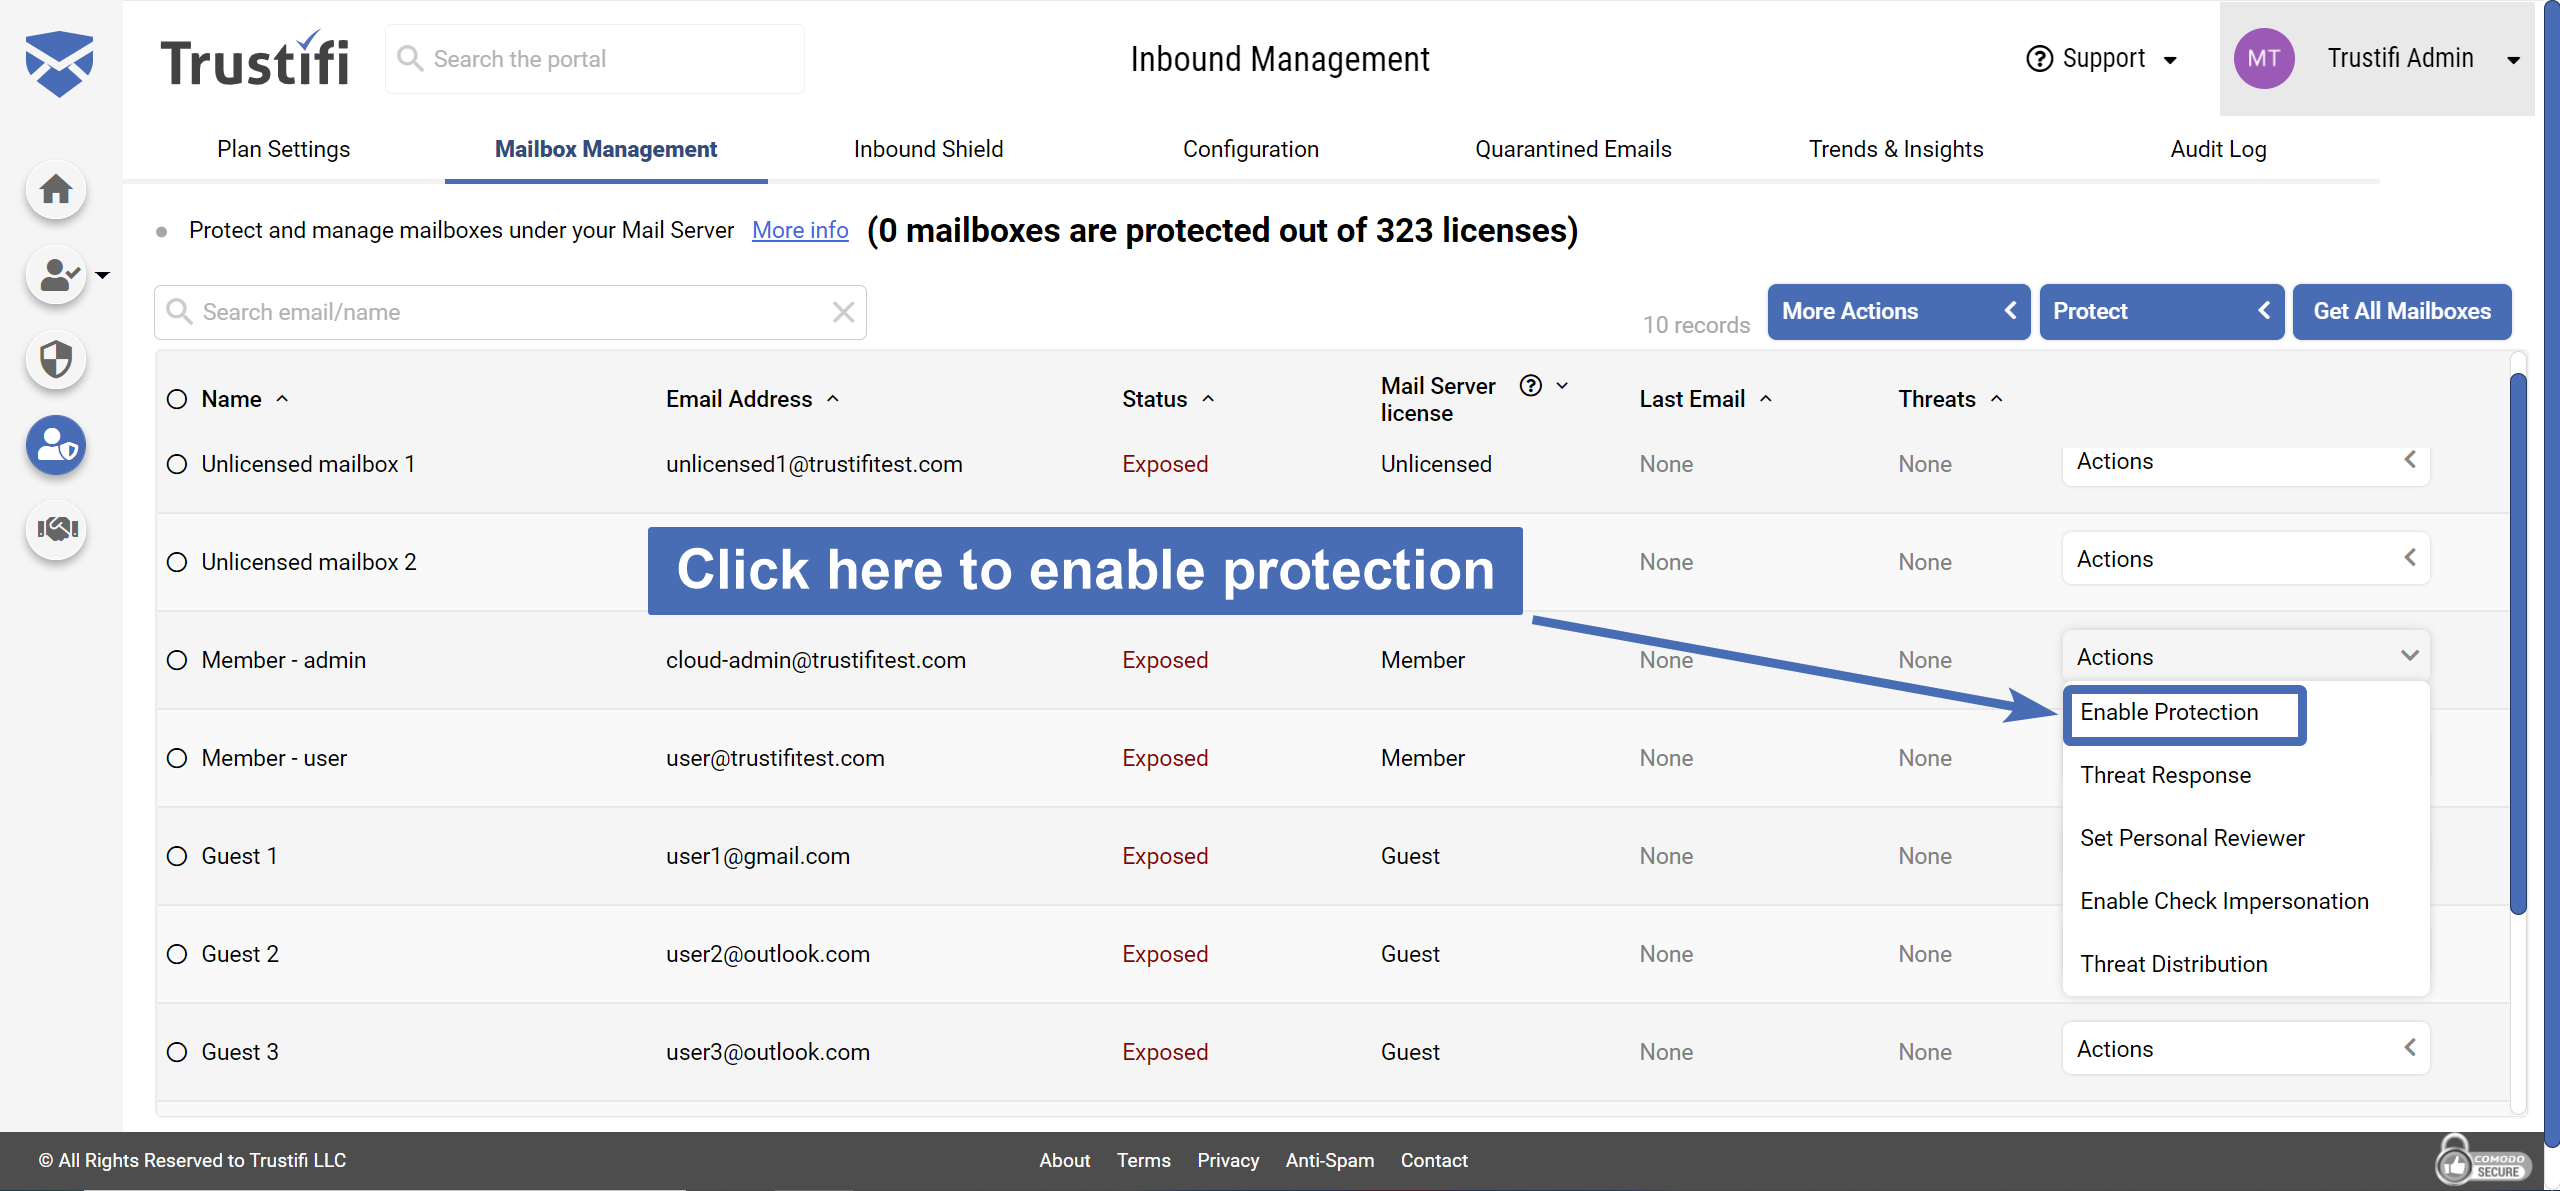
Figure 7: Applying Inbound Shield™ protection to a single mailbox.
When the action is complete, the “Status” of this mailbox will change from “Exposed” to “Protected”.
Mailbox list from CSV file: it is possible to enable protection for a custom list of mailboxes provided in a CSV file. To upload the file, click on the “Protect” button on the top row and choose “Protect from CSV” in the drop-down menu (see figure 8).
Figure 8: “Mailbox Management” page with the “Protect” menu opened. “Protect From CSV” option will open a file picker window.
After a valid CSV file is selected, Inbound Shield™ will be enabled one by one for each mailbox in the list.
All mailboxes in a group: the Trustifi admin may also choose to enable protection for specific contact groups.
To do so, click on the “Protect” button on the top row and choose “Protect Groups” in the drop-down menu.
In the pop-up window, select which group(s) you want to enable protection for and click “Protect” to apply (see figure 9).
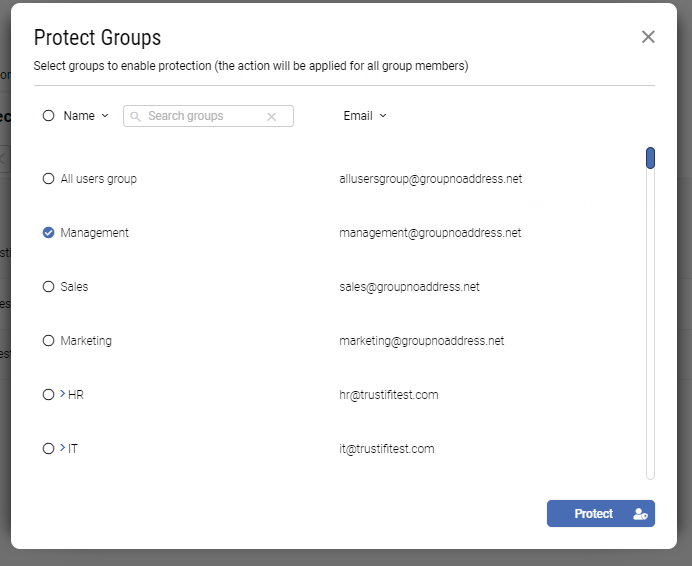
Figure 9: The “Protect Groups” window.
After the “Protect” button is clicked, Inbound Shield™ protection will be applied to each member of the selected groups one by one.