Trustifi offers a wide variety of options for advanced allowlisting and blocklisting so you can make sure only safe, trusted content arrives in your user’ mailboxes while malicious content is filtered out.
This document will go over the various options for allowlisting and blocklisting of:
-
- Senders
- Links
- Files
Senders/links/files that are added to the allowlist will always be considered safe, while senders/links/files that are added to the blocklist will always be considered malicious.
Emails sent from blocklisted senders will be quarantined without keeping a record in your “Quarantined emails” list – this is to stop spammers/attackers from flooding you with quarantined emails.
The document will also cover how to manage the global allow/block lists and these lists for individual users.
Sender allowlists and blocklists
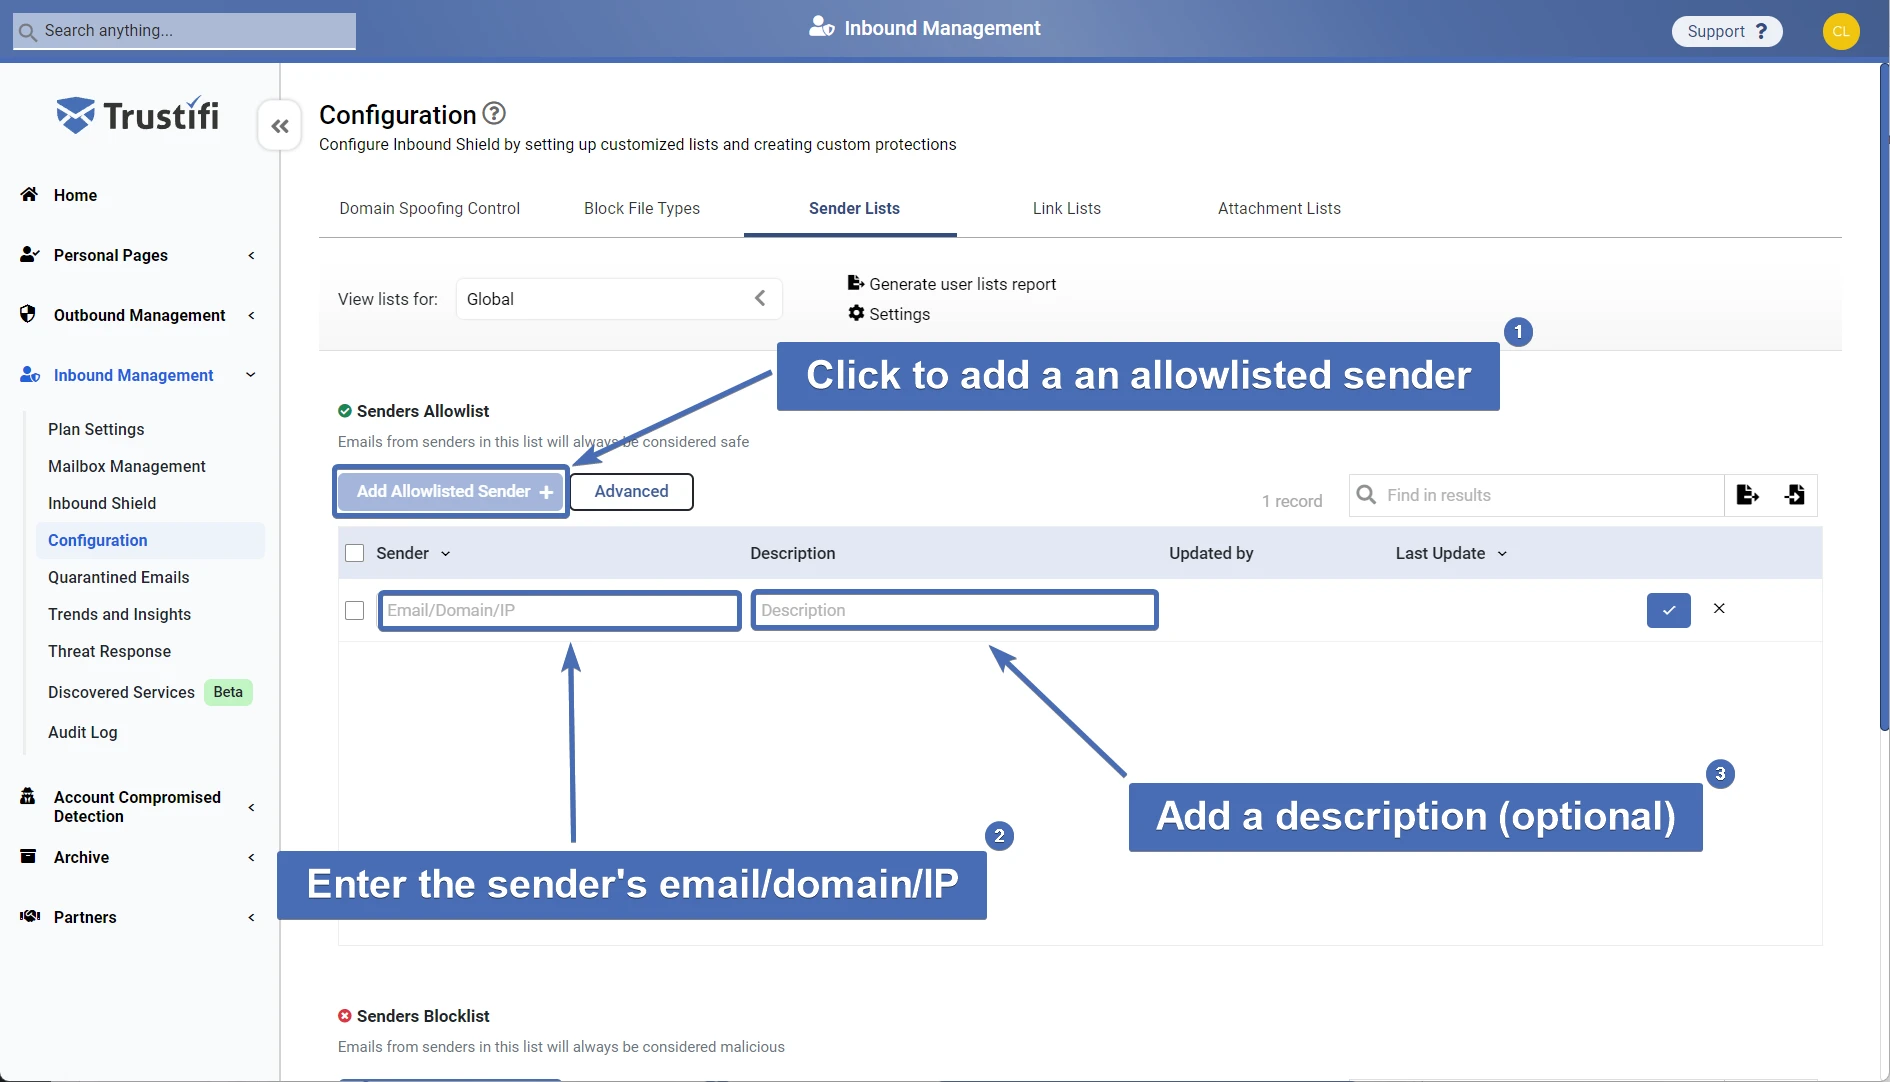
To add a sender to the sender allow/block list, navigate to “Inbound Management” > “Configuration” and click on the “Sender lists” tab.
The sender allowlist should be immediately available at the top of the page and the blocklist is directly below it.
In the sender allowlist, click on the “Add allowlisted sender” button and then simply add the sender and an optional description which can be used to explain why this sender is allow or block listed. Then, click on the blue checkmark button or press enter to add the sender.
Senders can be added by:
-
- A specific email address
- A domain
Note: allowlisting entire domains is considered dangerous and Trustifi will show a confirmation notification before allowlisting a domain. - An IP address
Senders added to the allow/block list will appear in a table format, and will each have an “Actions” menu for editing, removing, or taking other actions on the sender.
 Next to the search bar of each list, you will find the following actions:
-
- Export to CSV – to export the existing list to a CSV file
- Import from CSV – to import items to the list from an existing CSV file
Allowlist advanced options
Above the sender allowlist, you will find an “Advanced” button that will display advanced control options for allowlisted senders.
 These options allow you to check boxes to enable the following:
-
- “Block malicious links” – by default, emails from allowlisted senders will be considered safe even if a malicious link is found within (this will still be displayed in the email analysis view).
If you want to block emails from allowlisted senders if they contain malicious links, check this box. - “Block malicious files” – similar to the “Block malicious links” setting – check this box if you want to block emails from allowlisted senders if they contain malicious files.
- “Block files according to admin preferences” – this setting refers to the “Block file types” configurations. By default, emails from allowlisted senders will not be blocked if they contain a blocked file type. Check this box block emails from allowlisted senders if they contain blocked file types.
- “Allow all sources” – by default, Trustifi will use “Smart Allowlisting” – a process in which a unique digital signatures are created for allowlisted senders, and incoming emails are compared to this signature.
If you wish to allow emails from all sources (and skip the “Smart Allowlisting” process), check this box.
If you wish to learn more about the “Smart Allowlisting” process, see the complete guide here. - “Notify recipient immediately for quarantined emails” – if this box is checked, recipients will receive immediate notifications if an email sent to them from an allowlisted sender is quarantined. If this box is not checked, notifications of quarantined emails from allowlisted senders will follow the default notification options for recipients (e.g. – “Notify every hour”).
- “Block malicious links” – by default, emails from allowlisted senders will be considered safe even if a malicious link is found within (this will still be displayed in the email analysis view).
Link allowlist and blocklist
The link allowlist and blocklist are located on the same page (“Configuration”), at the “Link Lists” tab.
 Match types – links can be added to the allow/block lists not only as full URLs, but according to different match types:
-
- “Exact Match” – will only match for a full, exact URL. Must start with http:// or https://
- “Starts With” – will match for any link that starts with the provided URL, the rest of the link can be anything else. Must start with http:// or https://
- “Ends With” – will match for any link that ends with the provided URL
- “Contains” – will match for any link that contains the provided value anywhere in the URL
Similarly to the sender lists, the links allow and block lists also support importing from a CSV file and exporting an existing list to the same format.
File allowlist and blocklist
The file allowlist and blocklist are located at the “Attachment lists” tab. Files can be added to these lists in 2 ways:
-
- Adding the actual file – by dragging and dropping a file from your computer onto the allowlisted files section
- Providing the file SHA-256 hash and name in the relevant fields
 Note: unlike the links and senders allow/block lists, the files lists do not support importing from a CSV file as the actual files are needed to be saved.
Viewing and managing user personal allow and block lists
Trustifi users have the ability to manage their own allow and block lists for senders, links, and files similarly to admins.
These lists are personal and only affect the individual user, as opposed to the global allow and block lists which affect all users in the plan. If there is a conflict between the global list and a personal list, (e.g. – a user has allowlisted a sender that is in the global blocklist), the global list will always take precedence over the personal user list.
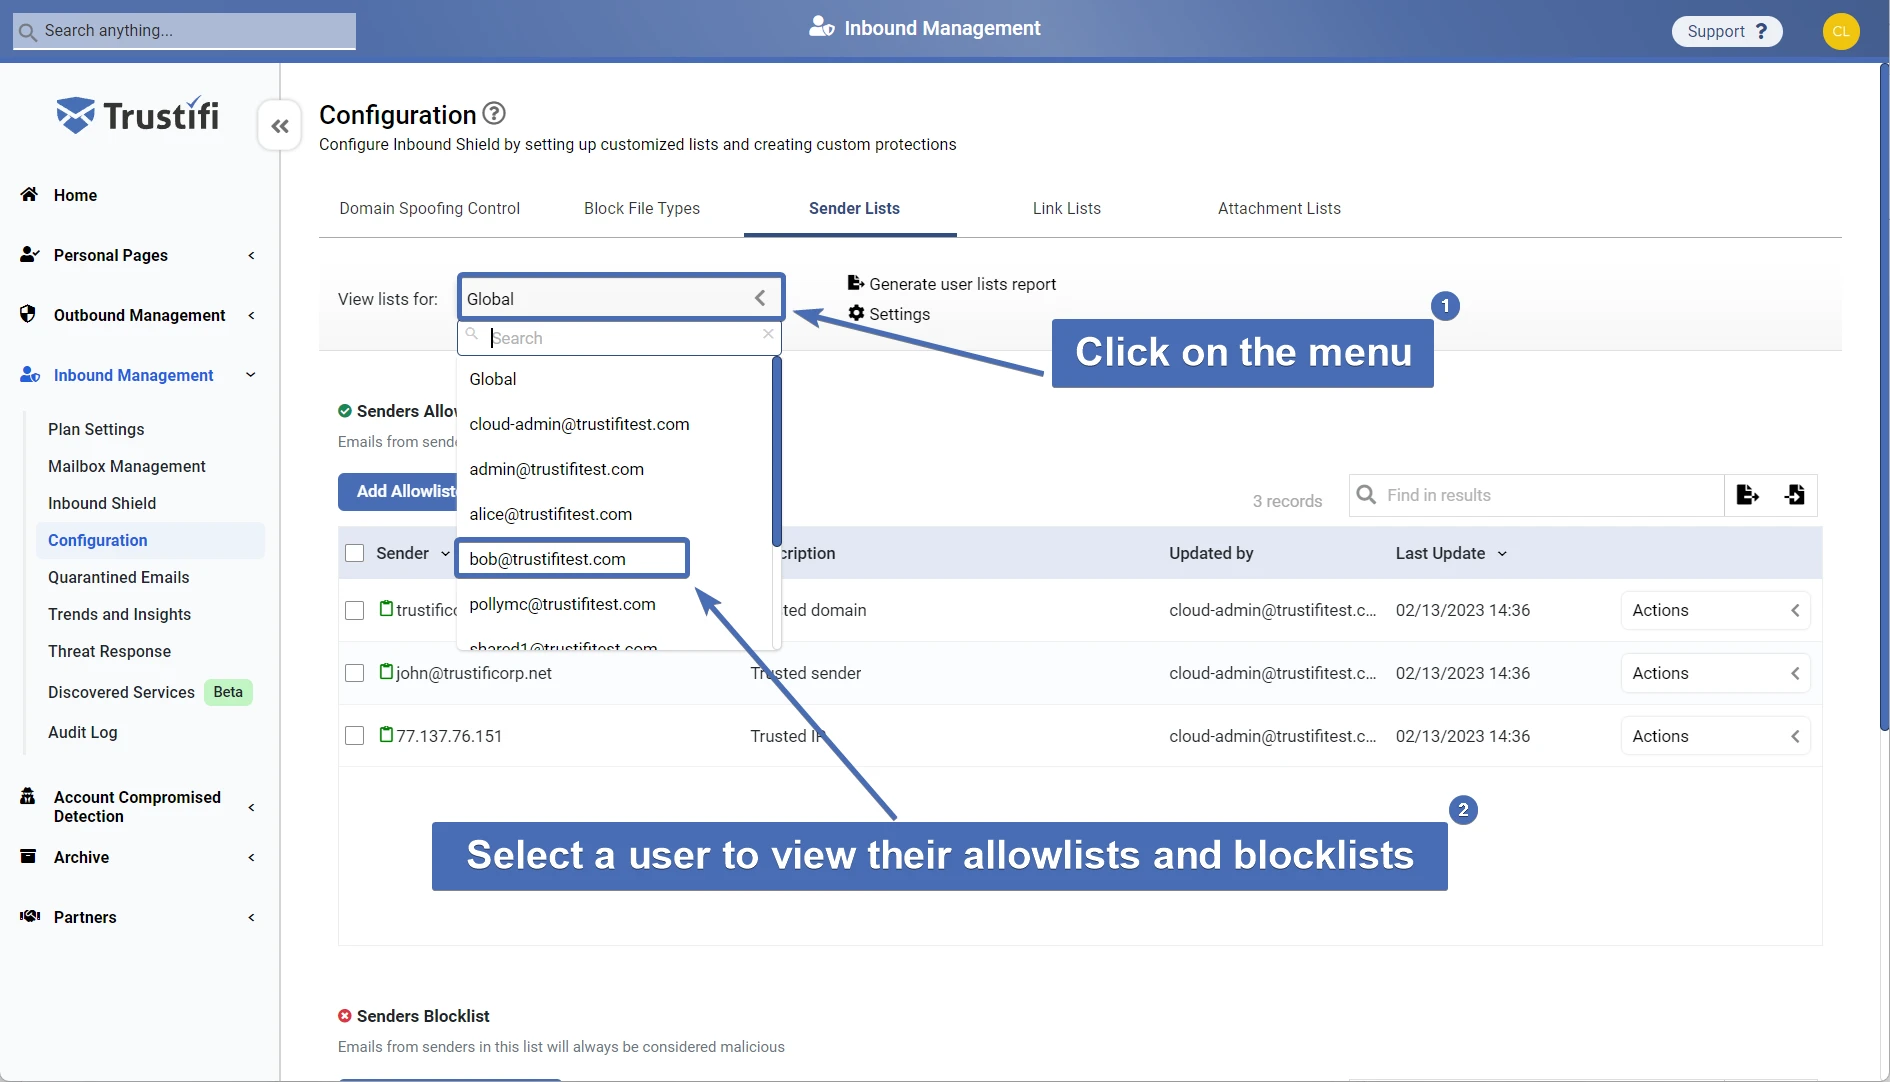
Admins can view and manage each user’s personal lists by clicking on the “View lists for” menu directly above the sender/link/file allowlist.
A drop-down menu will list all users, and you just need to click on a user to view and manage their personal lists. To return to the global list, you can select “Global” (the first entry in the list).
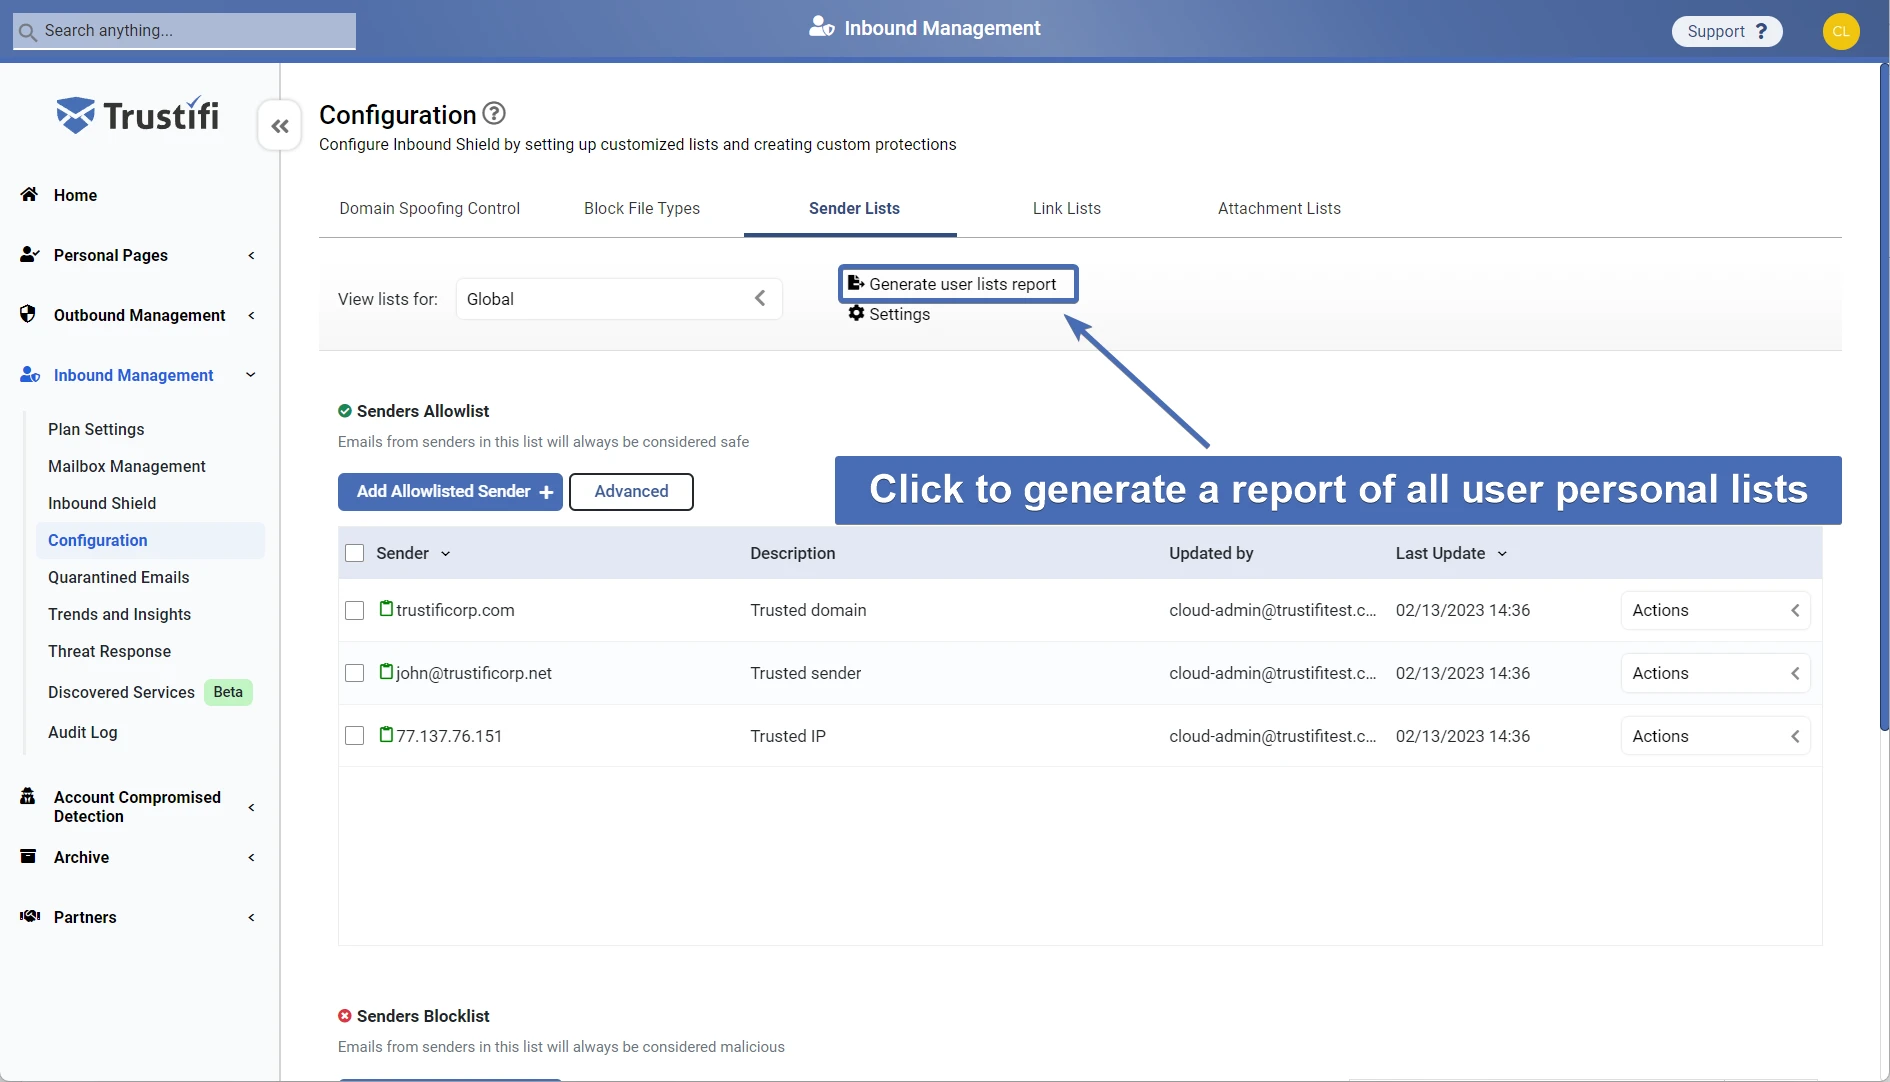
Admins can also export a report of all user personal lists in CSV format by clicking on the “Generate user lists report” button.
List management settings
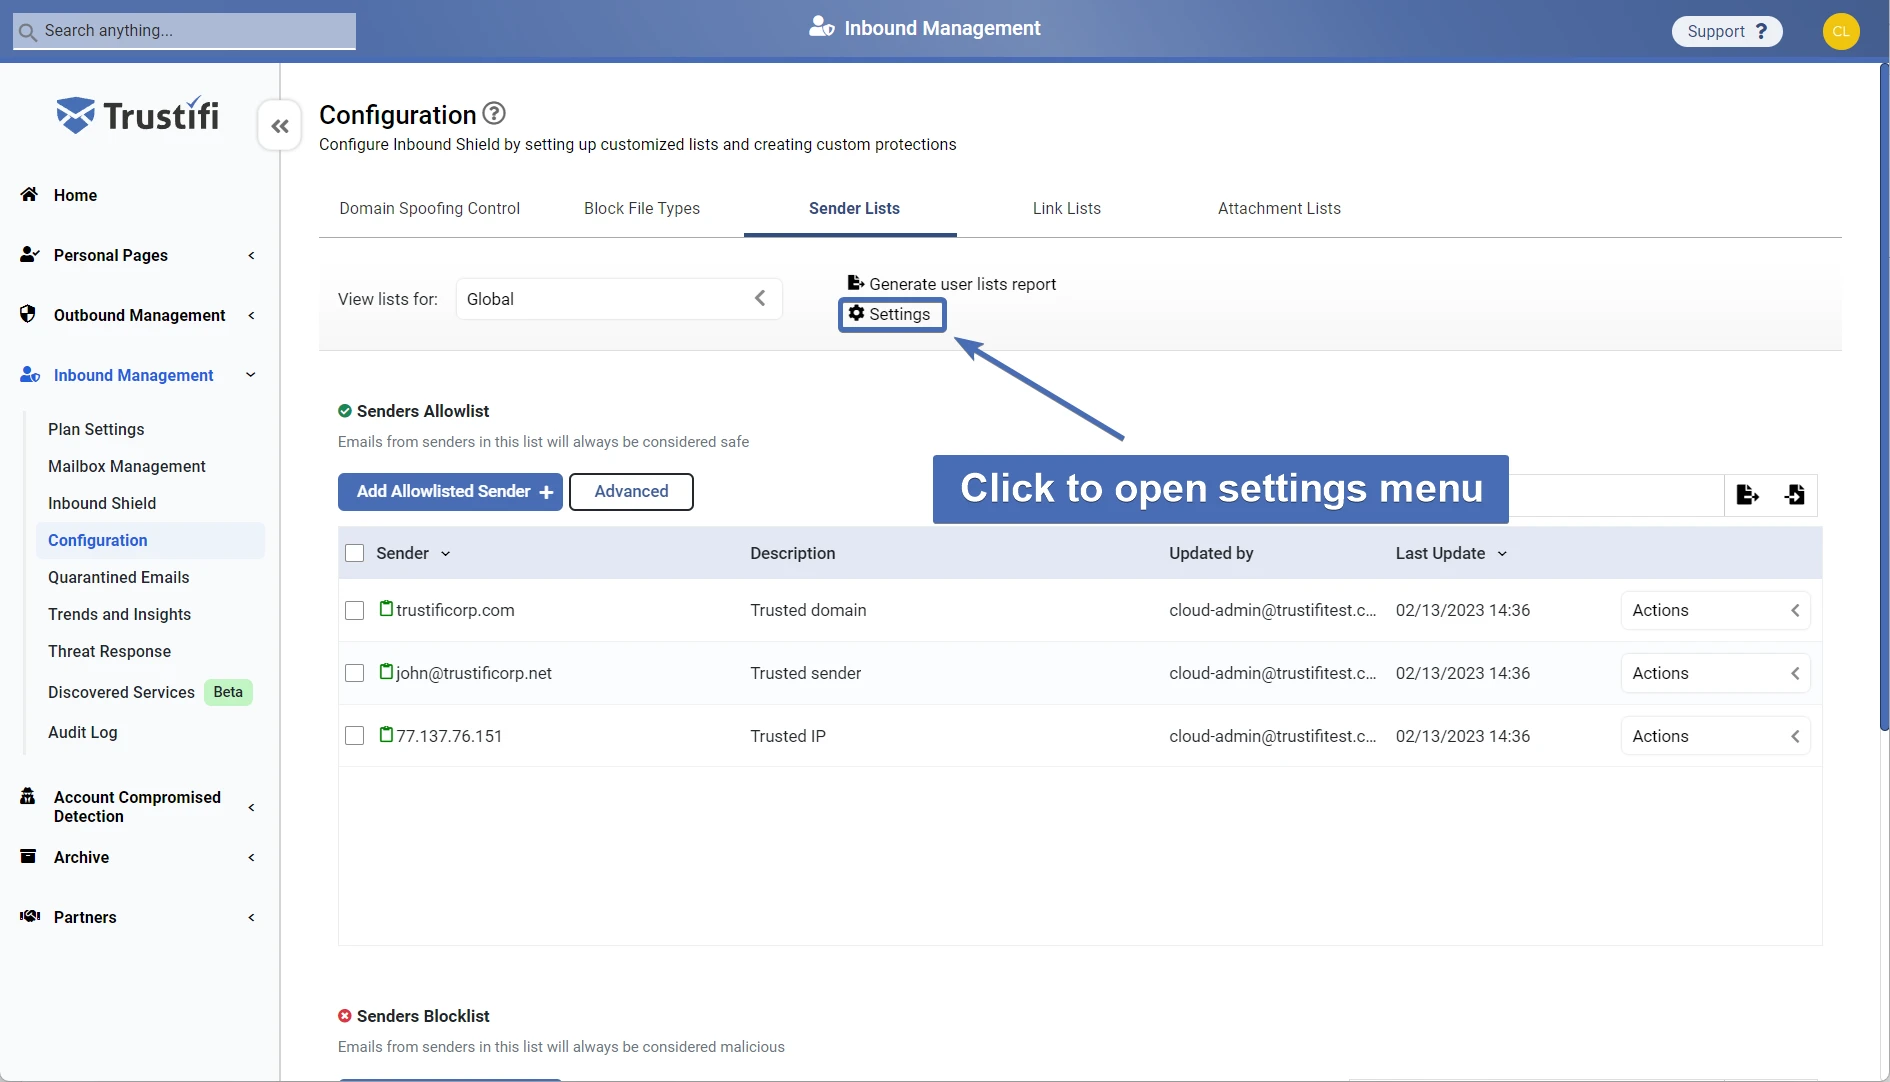
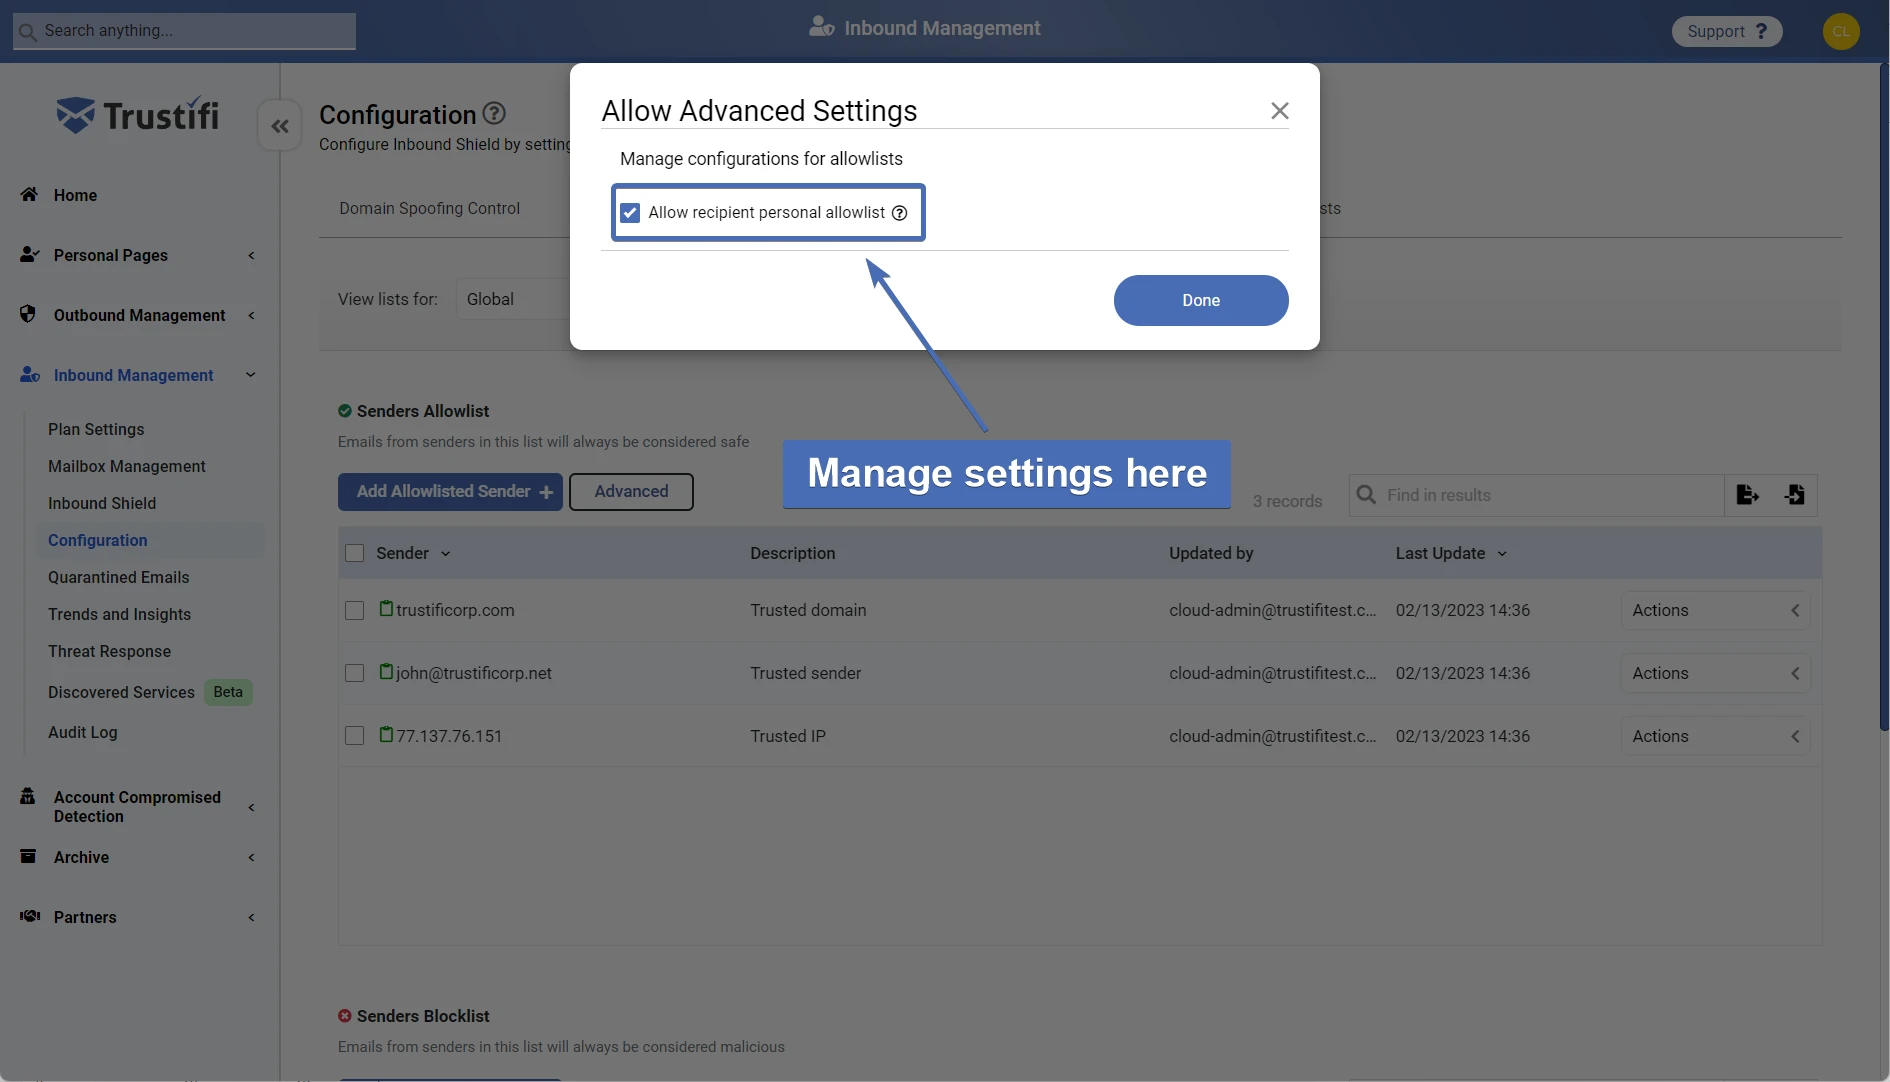
By default, all users can add senders, links, and files to their personal allowlists. However this can be controlled by the admins – if you want to disable this ability for users, click on the “Settings” button next to “Generate user lists report” and un-check the box for “Allow recipient personal allowlists“.
