If you are not connected to either of the Trustifi email relays, and you are on Office365, you can still use the Trustifi archiving feature by setting up a journaling rule. Follow the steps below to complete this:
- Go to the “Configurations” page under the “Archive” section and make sure the archive is enabled.
If it isn’t, simply click on the “Enable” toggle and confirm. - Make sure you can view your journaling email address in the “Journal Rule Settings” section. Then, click on the copy icon next to it to copy the journaling email address.

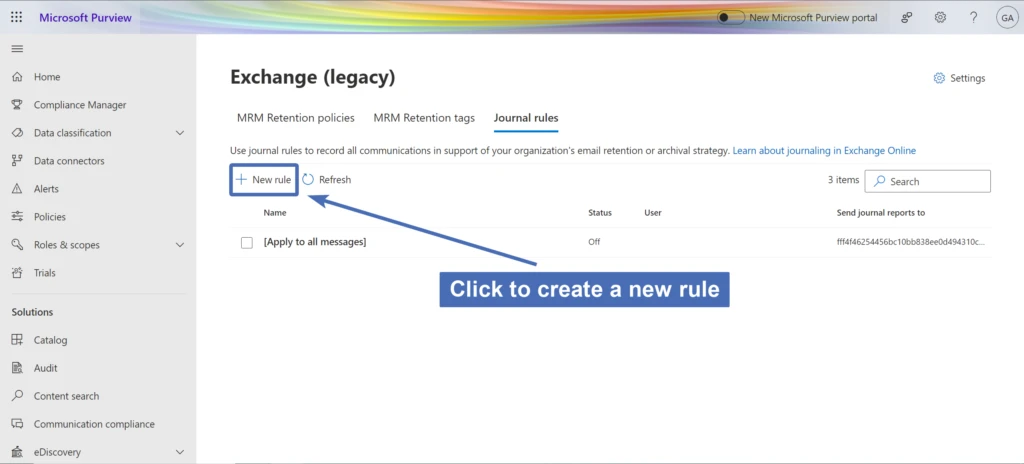
3. In the Microsoft compliance section, open the “Journal rules” section. Then, click to create a new rule:
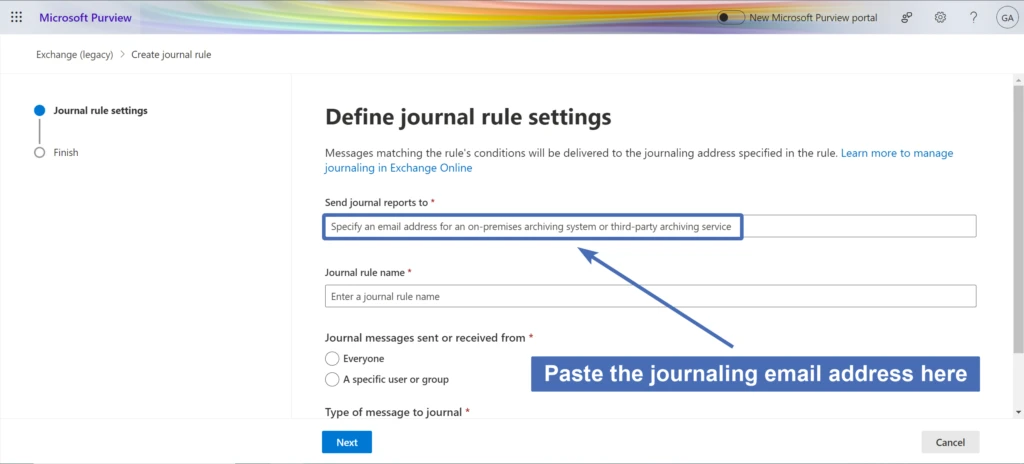
4. Under “Send journal reports to“, paste the journal email address you’ve copied from the Trustifi portal earlier.
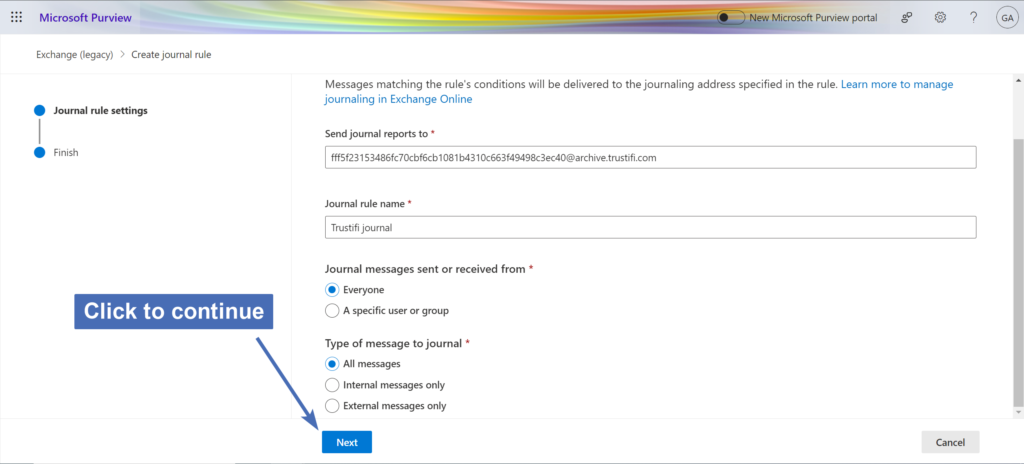
All journaled emails will be sent to this address, and as a result they will be stored in the Trustifi archive.
5. Under “Journal rule name“, enter any name you like. For example: “Trustifi archiving”.
6. Under “Journal messages sent or received from“, you can select if you want to journal all email traffic, or only emails sent to or from specific users or groups.
7. Under “Type of message to journal“, you can select if you want to journal all emails, or only external/internal emails.
8. Click on “Next” at the bottom left to continue.
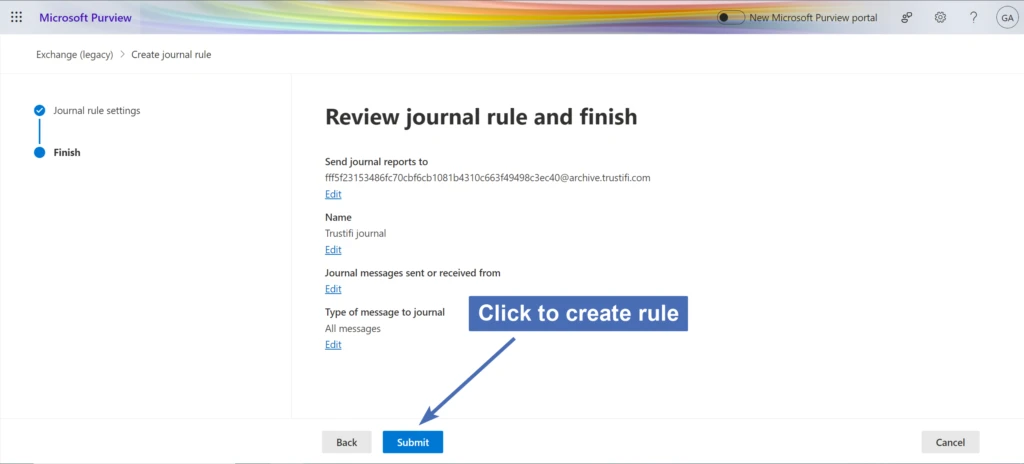
9. Review the rule to make sure all of the settings are correct. Then, click on “Submit” at the bottom to create the rule.
Once this journaling rule is created and enabled, all of the email traffic that was configured to be journaled will be saved in the Trustifi archive.