Conducting a successful security awareness campaign requires full, uninterrupted delivery of the phishing simulation emails to all recipients.
This guide will outline the necessary settings to modify in Microsoft Defender to make sure the simulation emails will be delivered and not quarantined by Defender or sent to “Junk”.
Navigating to “threat policies”
First, log into the O365 security portal.
Then, select “Policies & rules” from the left side navigation, and click on “Threat policies“.

Navigating to “tenant allow/block lists”
In the “Threat policies” page, scroll down to the “Rules” section, and click on “Tenant allow/block lists“.

Adding an allow list
Under “Tenant allow/block lists“, click on the “Spoofed senders” tab and then click on the “Add” button to add an allow list.

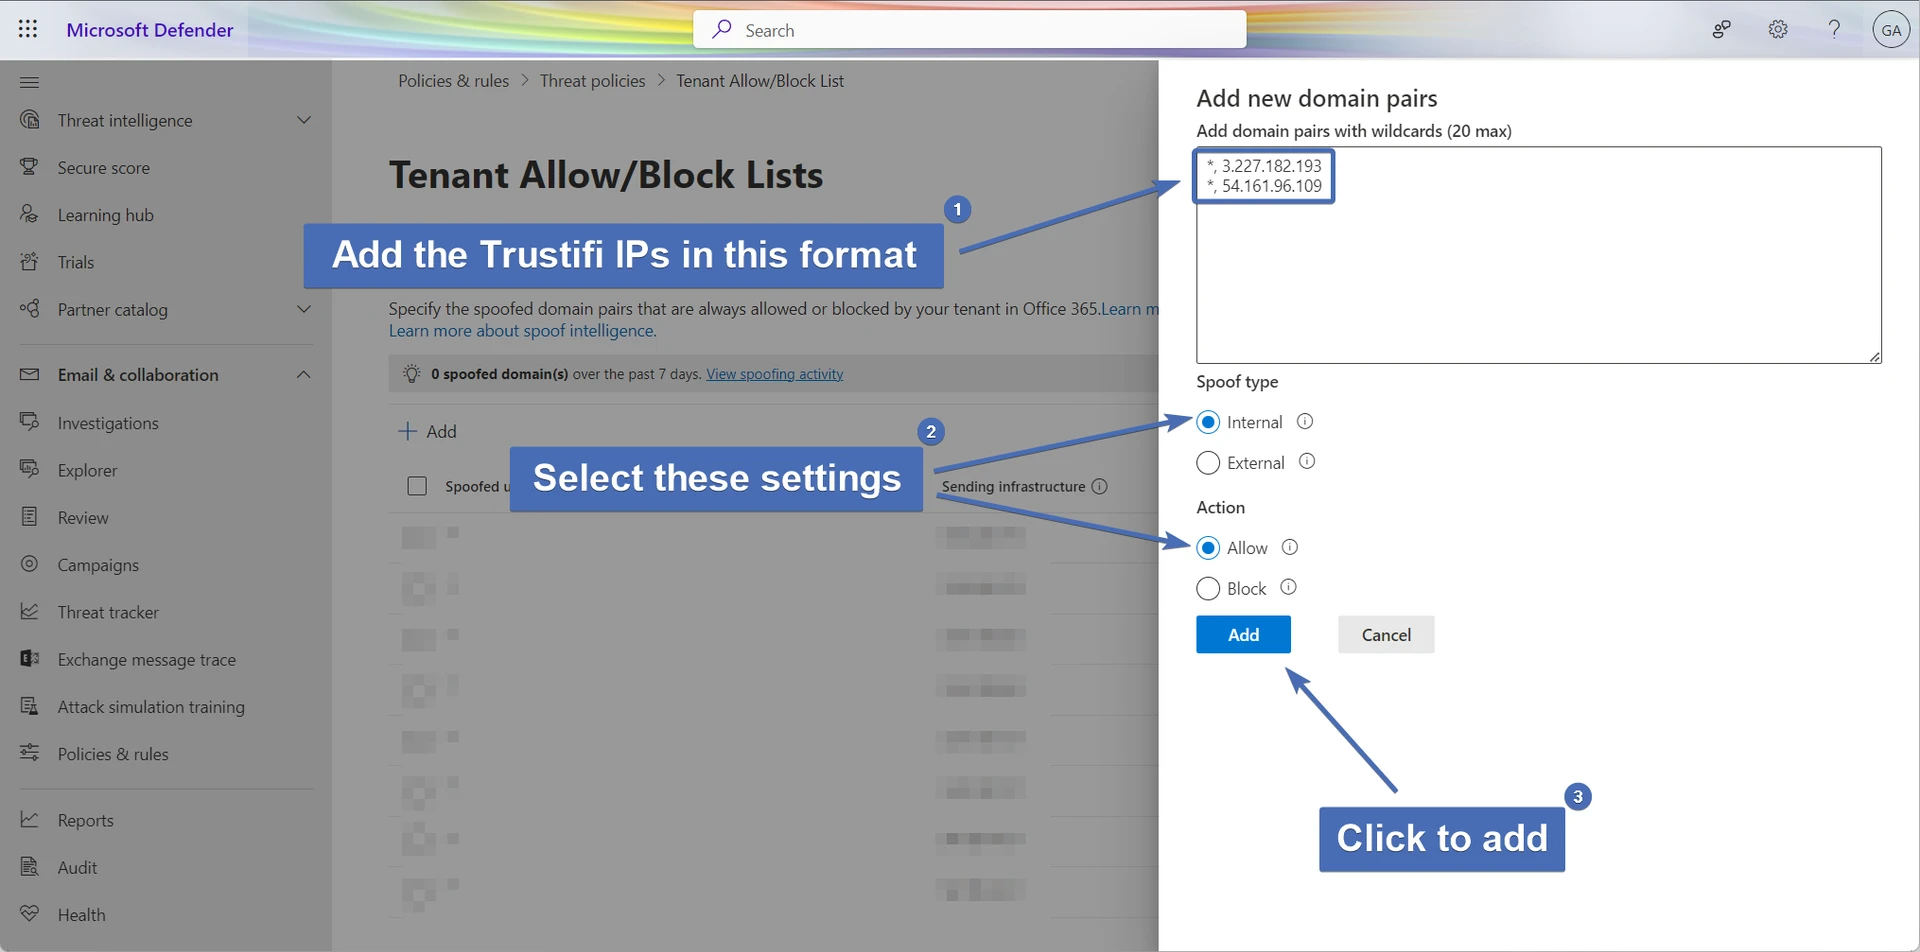
Configuring the internal allow list
In the pop-up, perform these actions:
- Add the Trustifi IPs in the following format: wildcard (asterisk), then comma, then a space and the IP. For example:
*, 3.227.182.193
Add each Trustifi IP like this in a new line. Screenshot below.
A total of 2 IPs need to be added: 3.227.182.193 , 54.161.96.109
Note: Once all the IPs have been added, copy all of the rows since we will be creating a similar policy in the next step. - Under “Spoof type“, select “Internal“.
- Under “Action“, select “Allow“.
- Click on “Add” to finish.


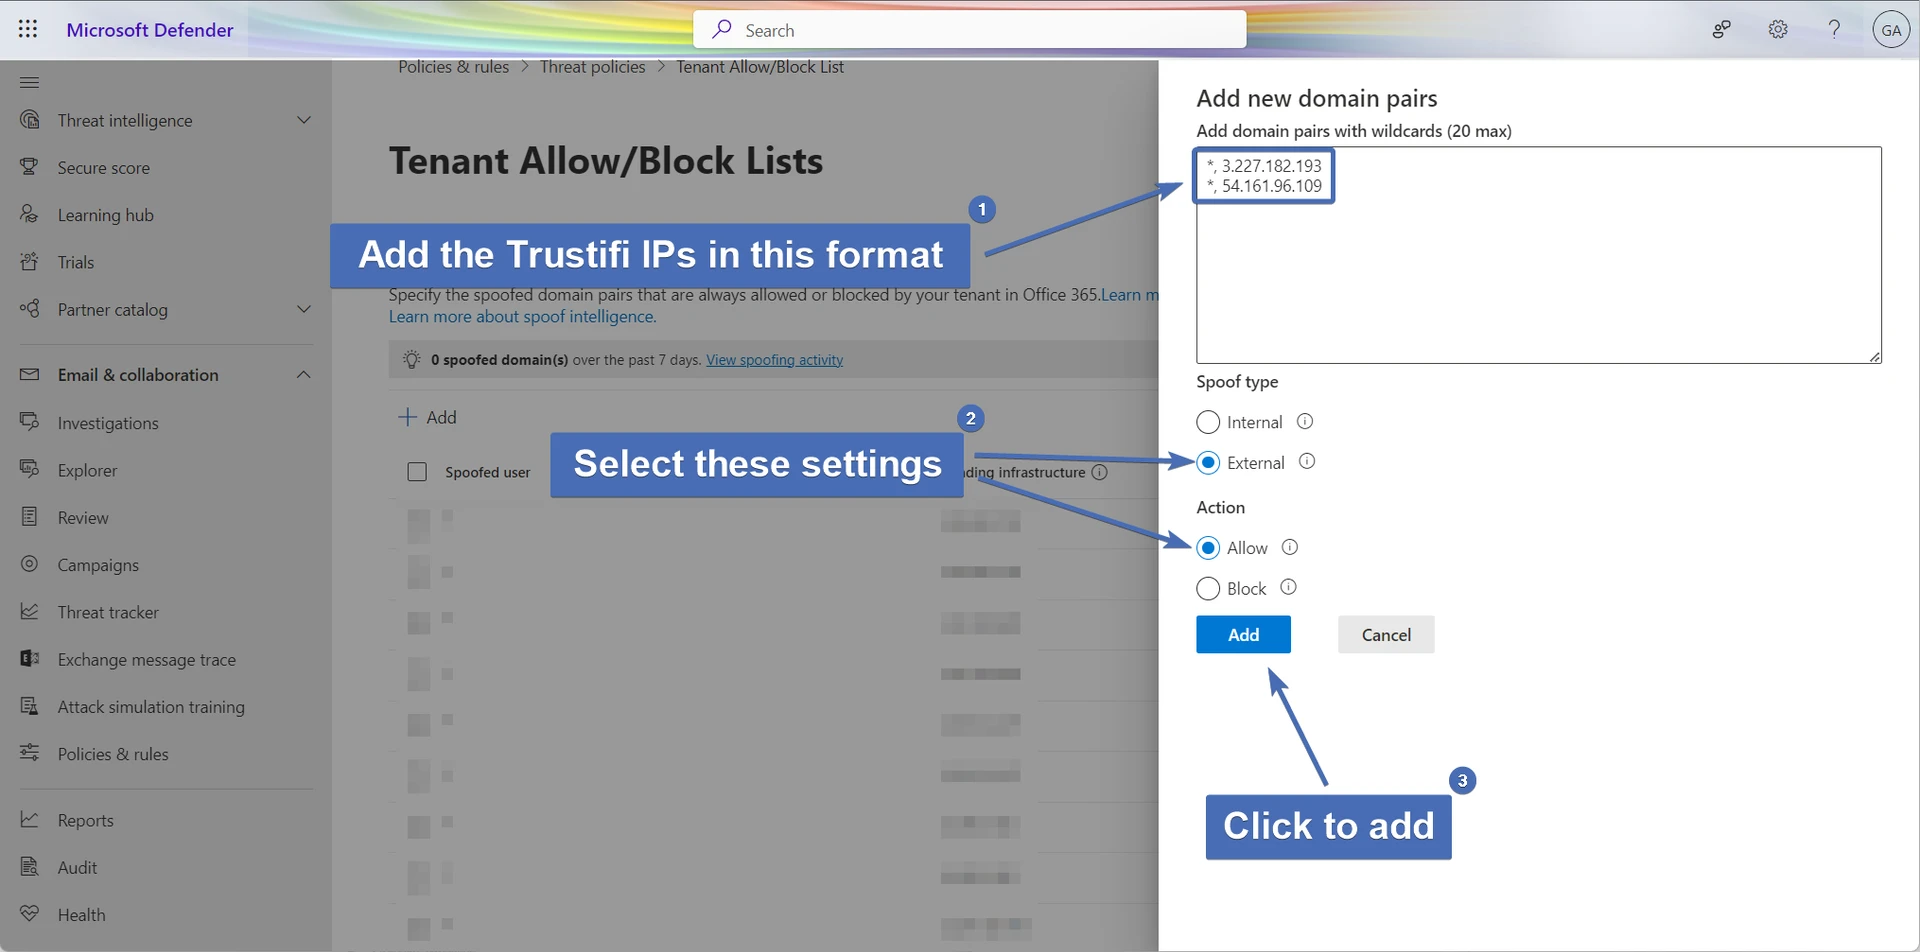
Configuring the external allow list
Click on the “Add” button to add a new allow list.
In the pop-up, perform the same steps as before with one exception:
In the “Spoof type” section, select “External” instead of “Internal“.
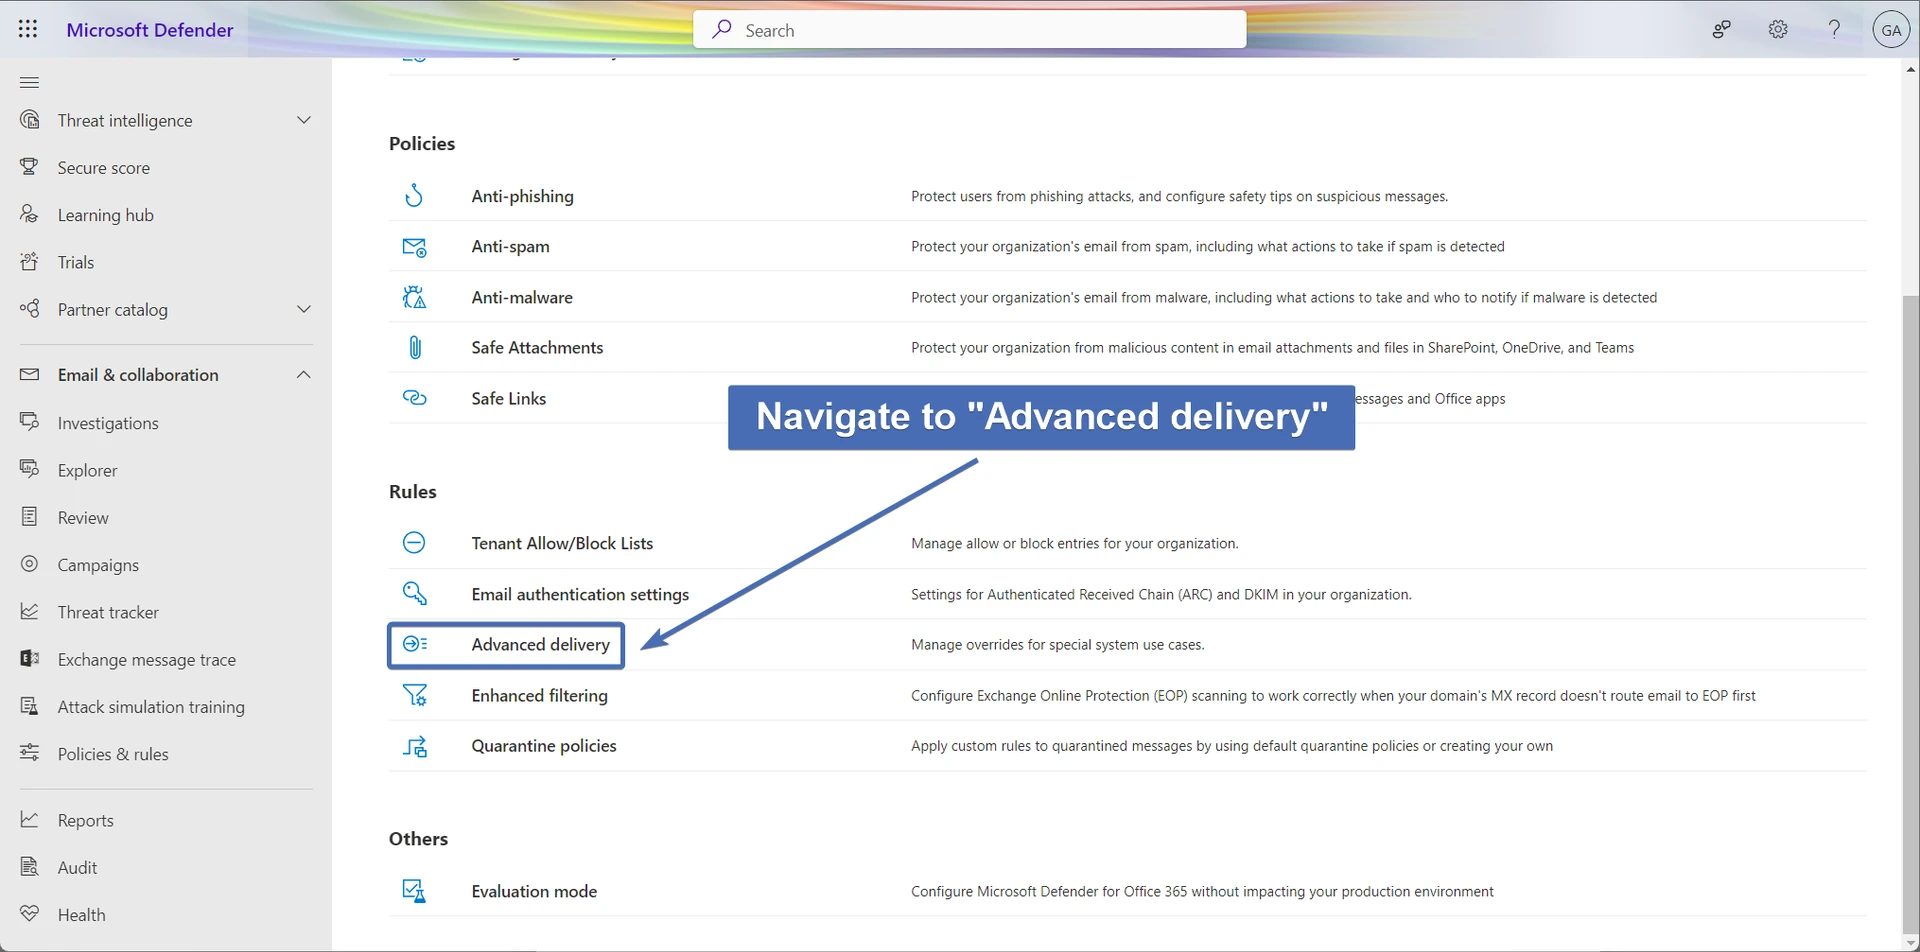
Navigating to “Advanced delivery”
Go back to the “Policies & Rules” page, and click on the “Advanced delivery” section.
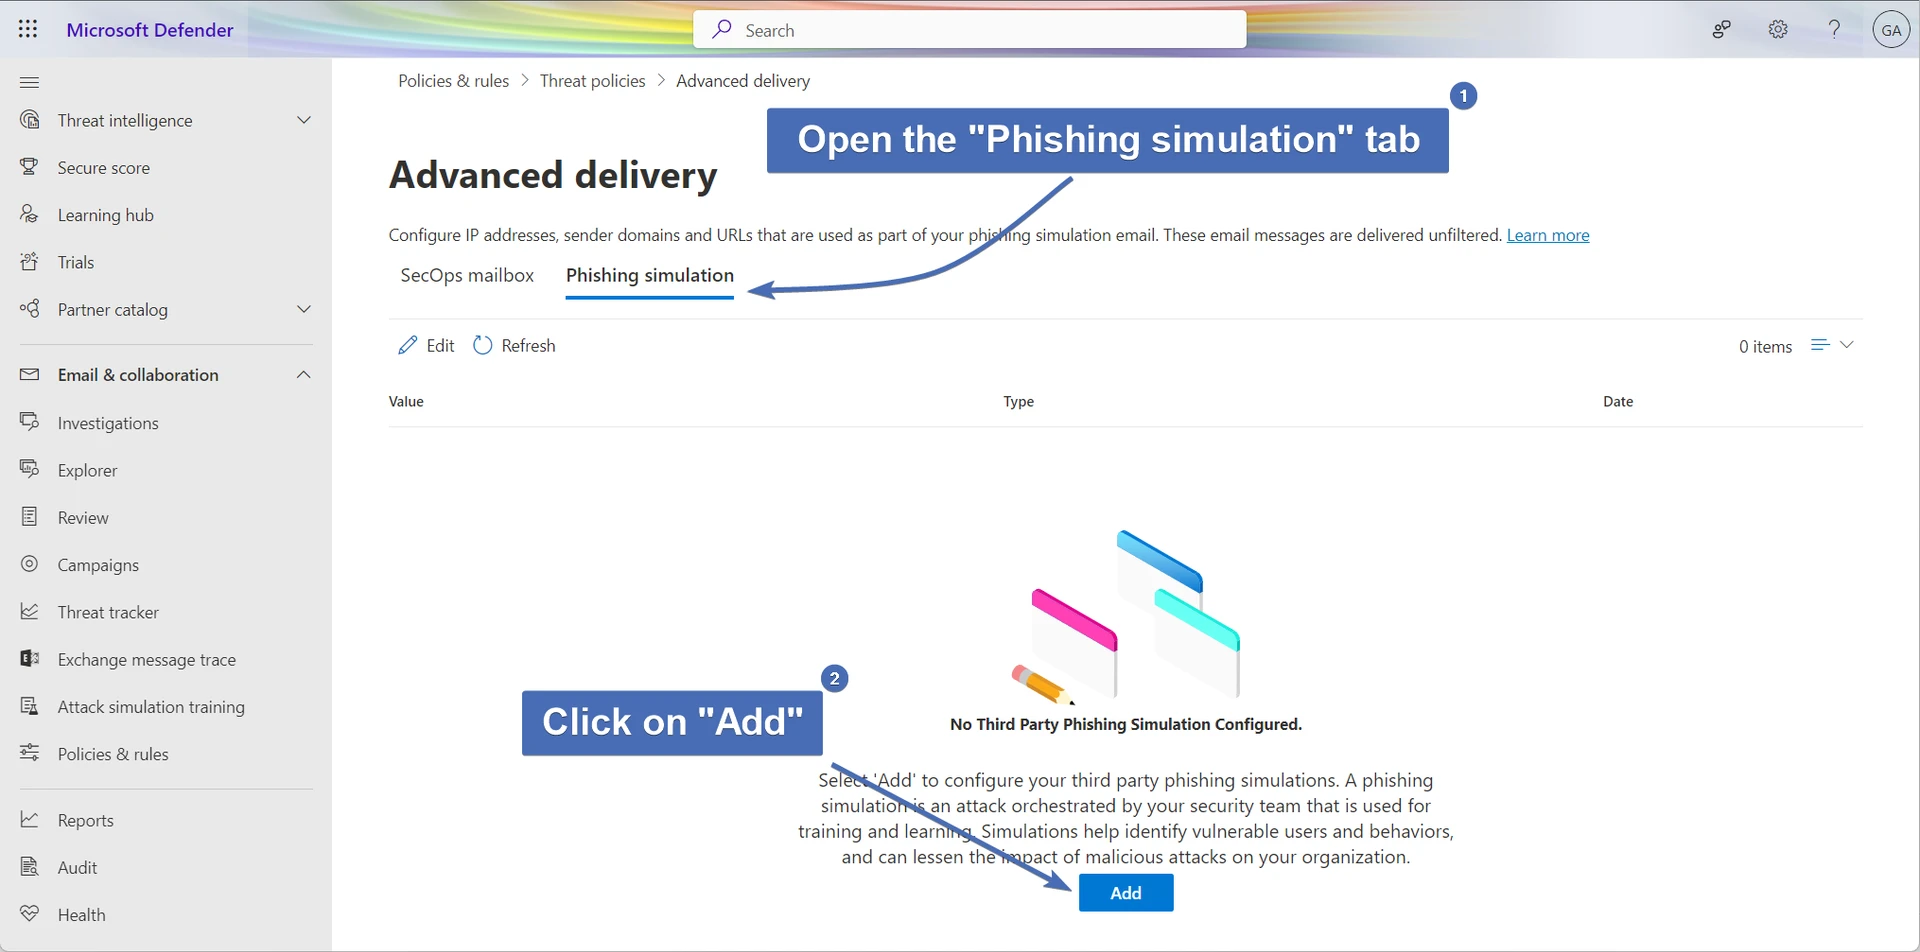
Creating new phishing simulation identities
In the “Advanced delivery” section, click on the “Phishing Simulation” tab and then click on “Add“.
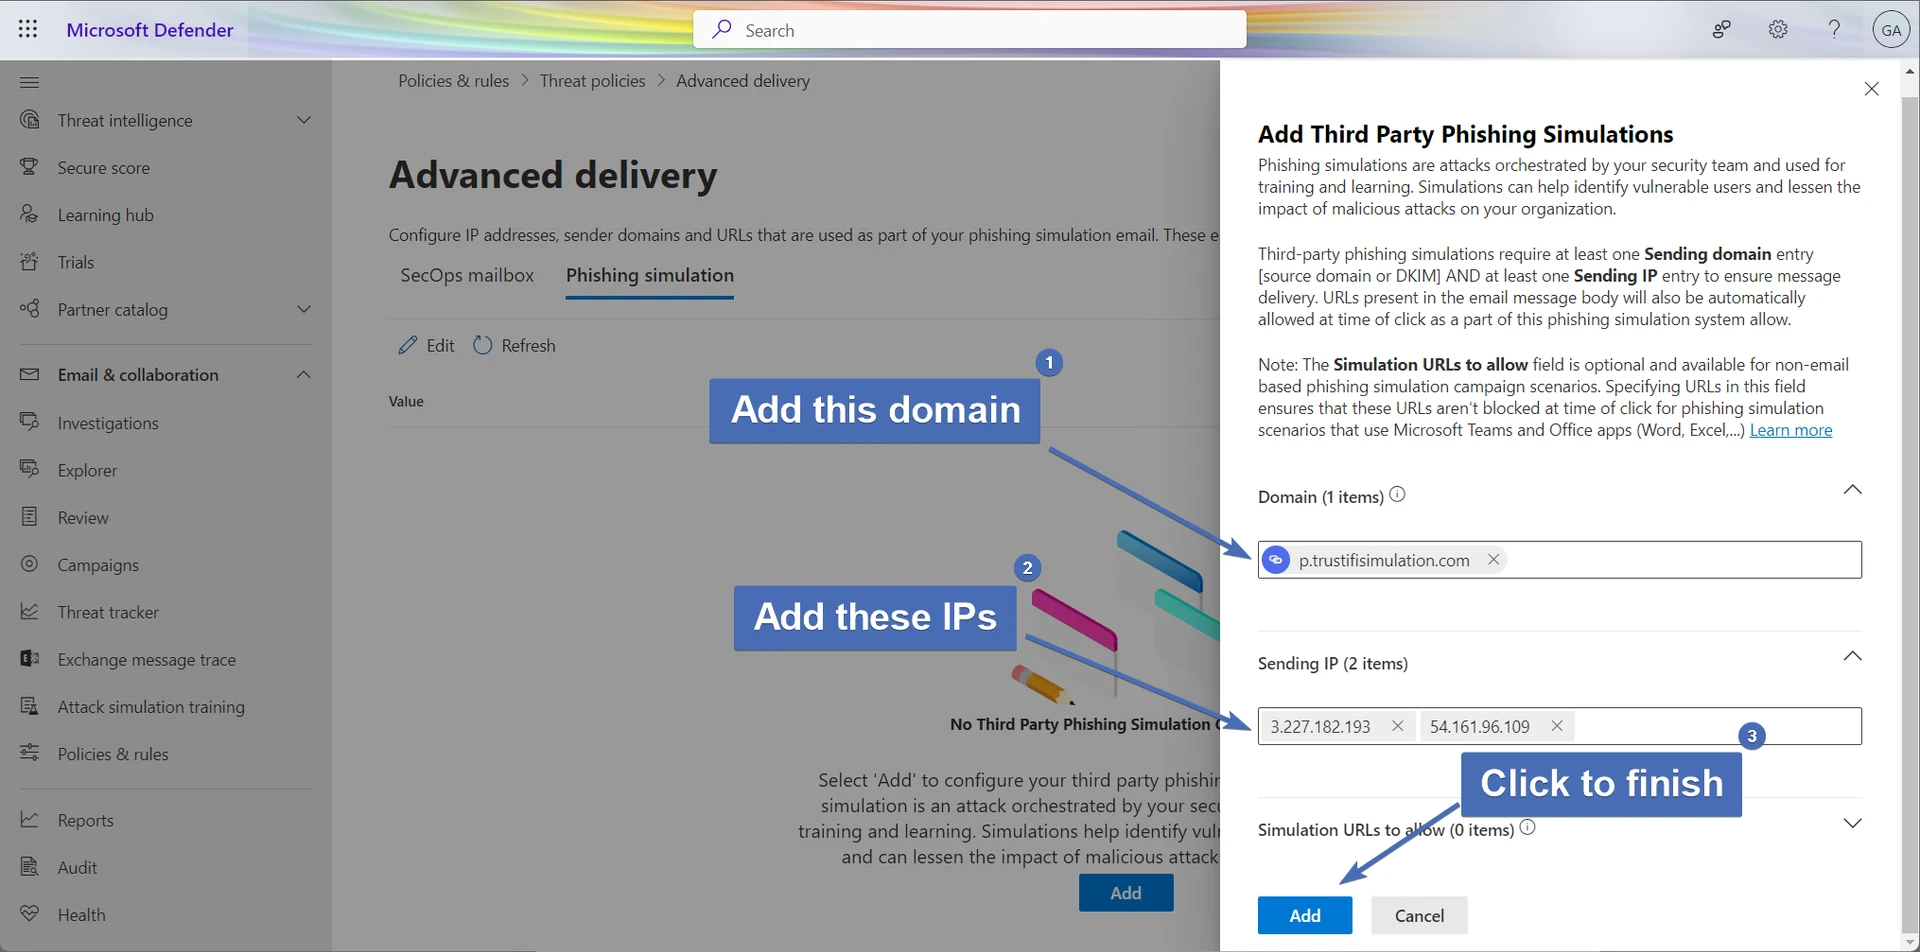
Adding the Trustifi values
Under “Domain” add the following: p.trustifisimulation.com
Under “Sending IP” add the Trustifi simulation IPs: 3.227.182.193 and 54.161.96.109
To finish, click on “Add“.
Navigating to “Mail flow rules”
If you are using the Trustifi inbound relay, you will need to add the Trustifi simulation IPs as an exception in the Trustifi inbound mail flow rule.
First, open the Exchange Admin Center and navigate to the Mail Flow Rules page.
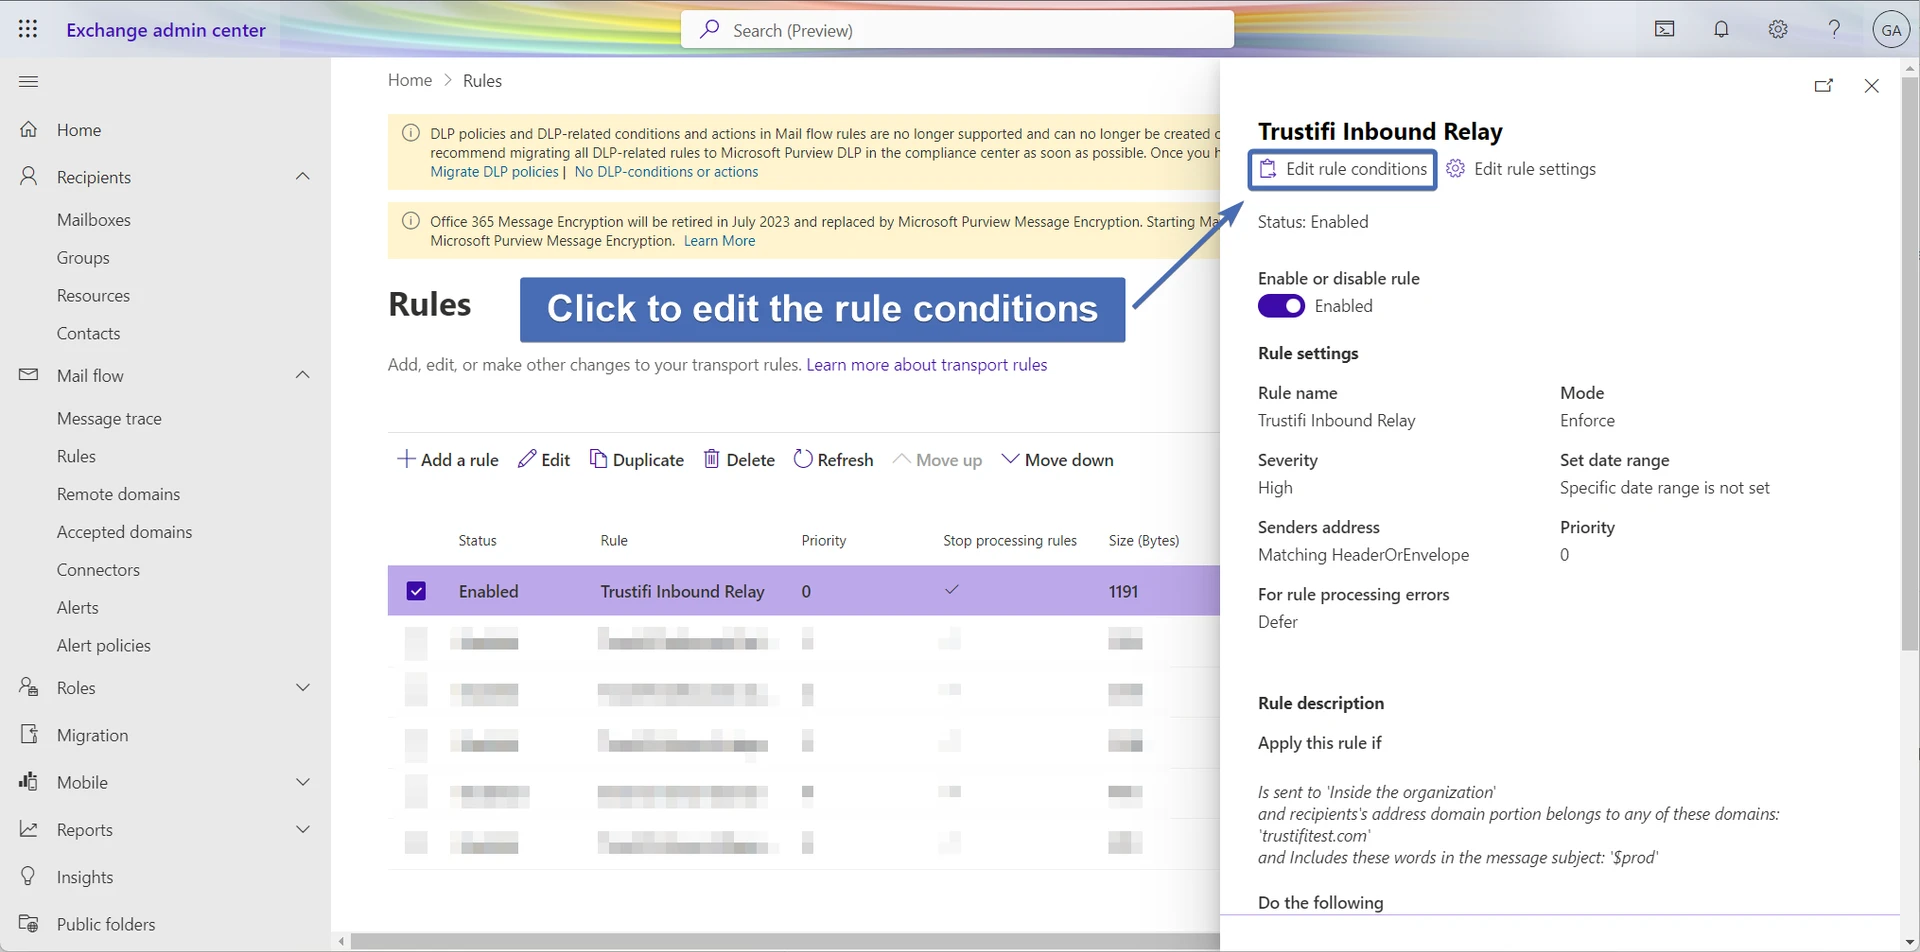
Editing the Trustifi inbound rule
Find the mail flow rule for the Trustifi inbound relay, click on it, and then click on “Edit rule conditions”.
Modifying the rule exception IPs
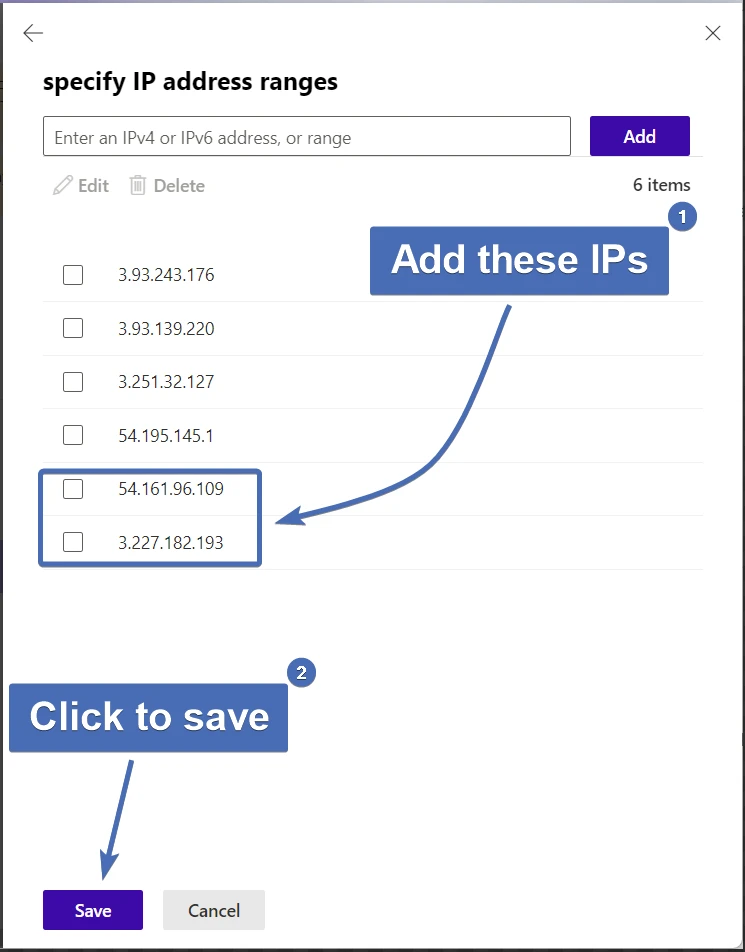
Scroll down to the bottom of the rule conditions and find the IP-based exception.
Now click on the pencil icon next to the IPs to modify them.
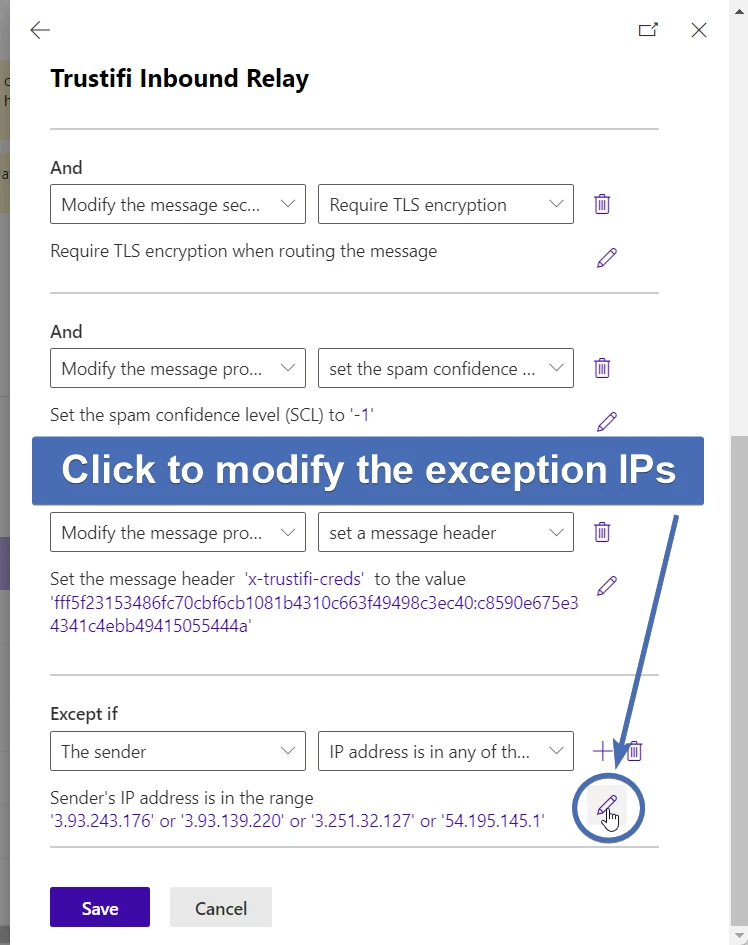
Adding the Trustifi simulation IPs
Add the Trustifi simulation IPs to the exception IP list (54.161.96.109 and 3.227.182.193) and click on “Save“.