This short guide will explain how to create an SSO (Single Sign-On) integration for Trustifi with Okta using Open ID Connect. Creating this integration will allow your users to log into Trustifi using their Okta accounts.
Step 1 – Navigating to “Applications”
In your Okta admin portal, click on “Applications” on the left-side navigation bar and then click once again on “Applications” in the drop-down menu.


Step 2 – Creating an app integration
In the “Applications” page, click on “Create an app integration”.

Step 3 – App integration settings
Under “Sign-in Method” select “OIDC – OpenID Connect”, and udder “Application type” select “Web Application”. Then click on “Next”.

Step 4 – App integration general settings
Perform the following steps:
-
- Give the app integration a name
- Under “Grant type” > “Client acting on behalf of a user”, select both “Authorization Code” and “Implicit (hybrid)
- Under “Sign-in redirect URIs” and “Sign-out redirect URIs” add the following URL: https://app.trustifi.com/redirect.html

-
- Under “Assignments”, select your preferred setting. When ready, click on “Save” to save the app integration.

Once saved, the “Trustifi” app integration should appear in your admin dashboard.
Enabling the integration in Trustifi
Step 5 – Opening the connection window
In the Trustifi admin portal, navigate to either “Outbound Management” or “Inbound Management“, and scroll down to the “Integrations” section.
There you will find the OICD icon, click on it and then click on the “Connect” button.

Step 6 – Adding the necessary information
The connection window will display instructions on how to create the OICD integration. To create the integration in Trustifi, you will need to input some information from your Okta admin portal.
Discovery Document (“well-known”) Endpoint: To find this, click on “Security” > “API” in the navigation pane and then copy the value from the “Issuer URI” column.
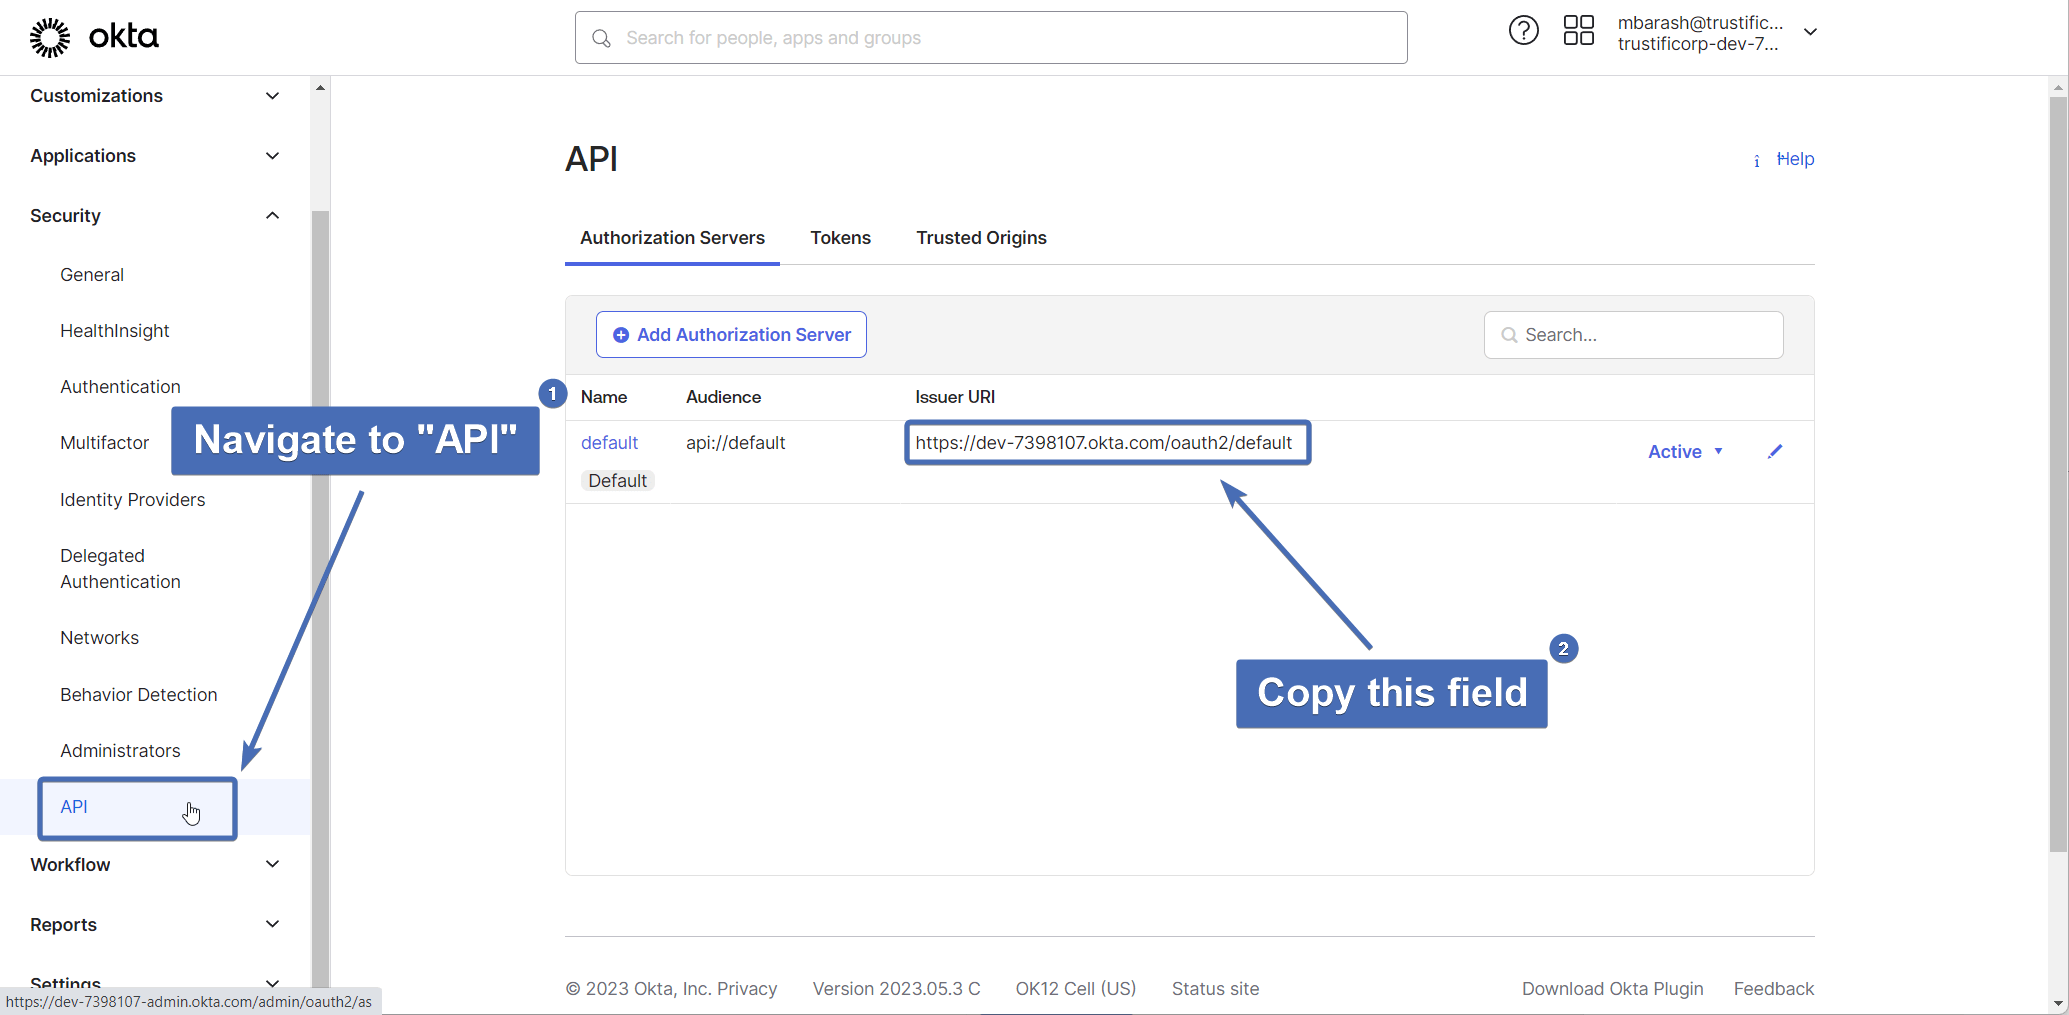
Add the following to the “Issuer URI”:
/.well-known/openid-configuration
The full endpoint URL should look like this: https://your-domain.okta.com/oauth2/default/.well-known/openid-configuration
Client ID: To find this:
-
- In the navigation pane, click on “Applications” > “Applications“
- Click on the Trustifi application you created for this integration
- In the “General” tab, find the client ID in the section “Client Credentials“

Domains: Here you simply need to list the domains that will be used in this integration. If there is more than one domain, separate them with a comma.
Step 7 – Confirming and verifying
Confirm all the necessary information has been added and is correct, and click on “Confirm” at the bottom right to continue.

After clicking on “Confirm“, you will need to sign in with your Okta admin credentials to verify the connection.

After you’ve successfully logged in, the OICD integration should be displayed as “Connected“.
