Requirements
An existing Trustifi admin (“pro”) account with sufficient available users“Shared Plan” is enabled (this option is enabled by default unless you disable it)Organization’s domain is verified with Trustifi (optional, but highly recommended)
The Onboarding Process
The admin needs to log in to the Trustifi web app using their admin credentials.
To invite users, they will now need to (1) navigate to “Outbound Management”, (2) open the “User Management” tab, (3) click on the “Add Users” (see figure 1).
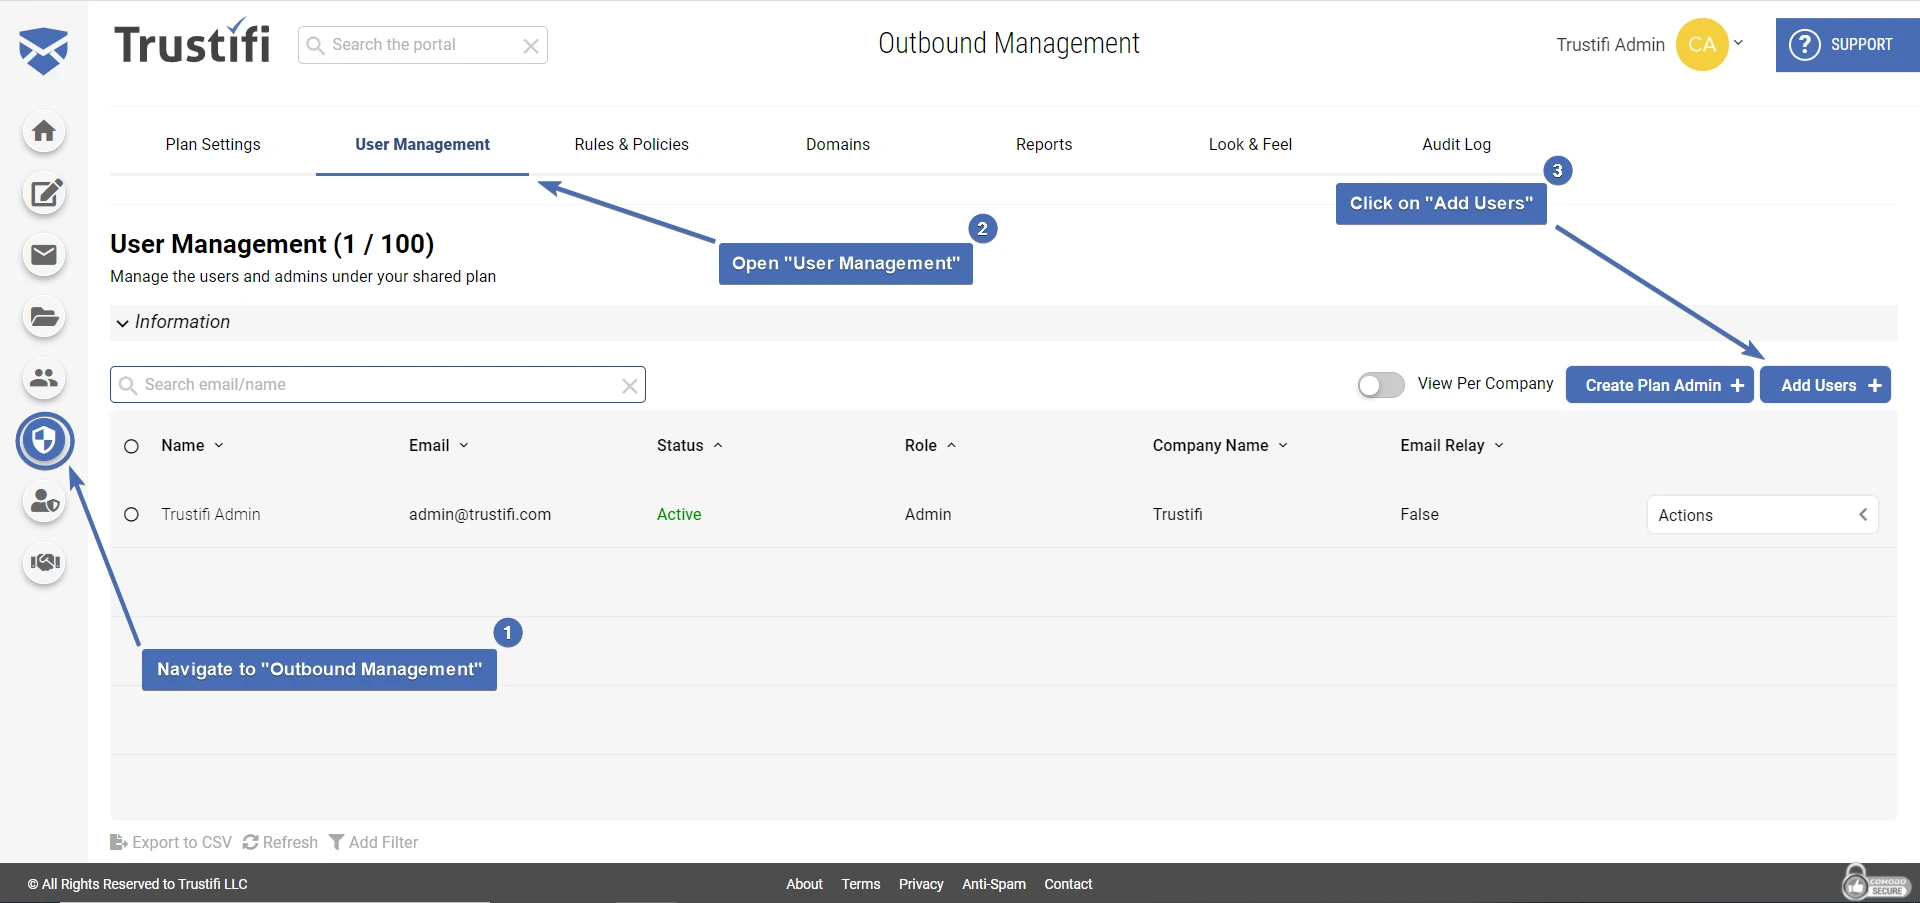
Figure 1: The “User Management” page. The numbered steps in the picture correspond with the steps mentioned above.
In the pop-up window that opened, the admin can enter the email addresses of the user they wish to add, as well as view and edit the content of the invitation email that will be sent (see figure 3).
Important tip: to automatically see the users’ addresses you should “import contacts” before this process.
To do so, click on the “Import contacts” icon (see figure 2) from the Outlook/Gmail add-in.
From the Trustifi web app you can import contacts from an existing address book or a CSV file.
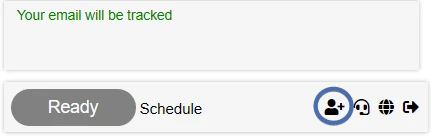
Figure 2: The “Import contacts” icon which appears at the bottom of the Trustifi Outlook/Gmail add-in.
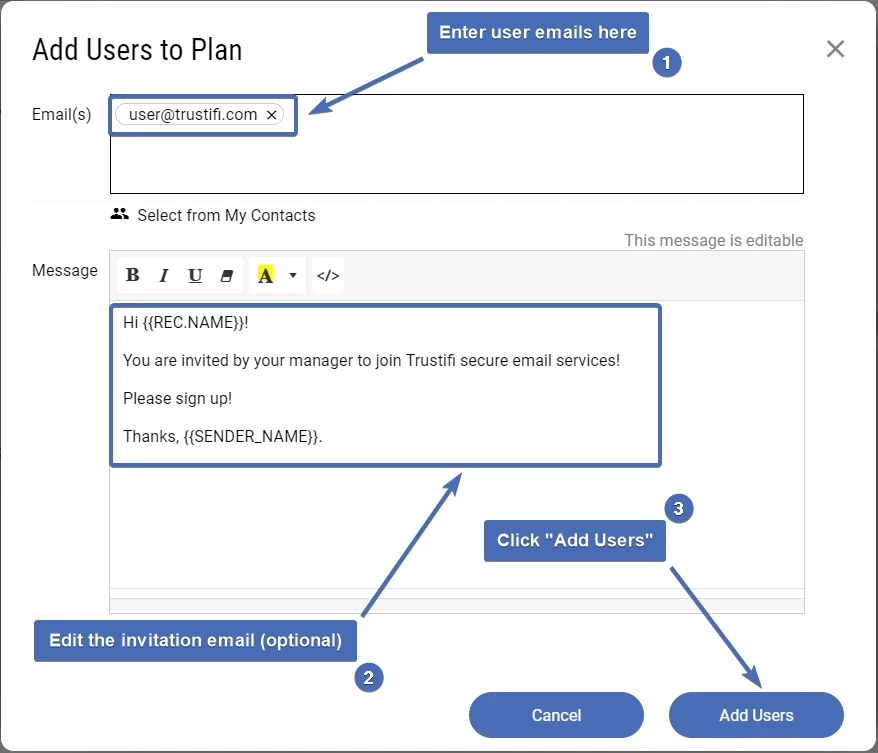
Figure 3: The “Add Users” interface. 2 new user addresses have been added in the top input field. In the bottom, the invitation email body can be seen.
Information! The values which appear {{LIKE_THIS}} are called dynamic fields. Their value changes according to the sender/recipient of the email. For example, the field {{REC.NAME}} will change to the recipient’s name when the email is sent.
After the “Add Users” button is clicked, the newly invited users will appear in the user list under “Invitation Sent” status – at this point they are not active users.
To complete the onboarding process, each newly added user will need to open the invitation email and complete the sign-up process to create their account (see figure 4).
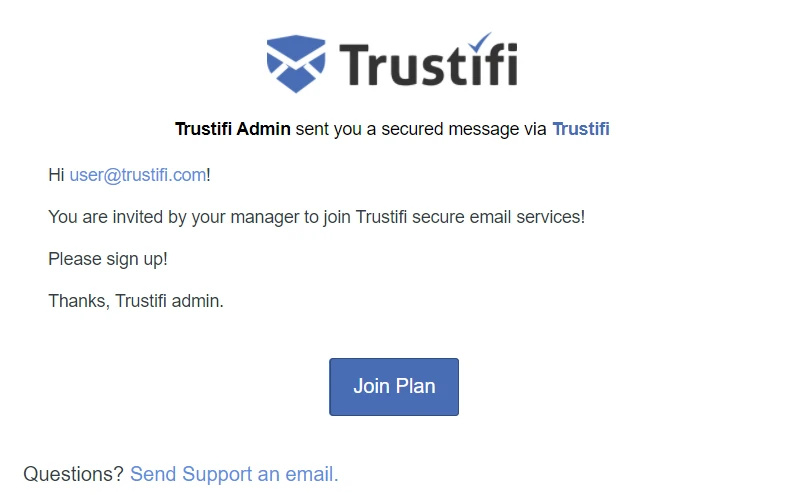
Figure 4: The Trustifi invitation email as it appears in the recipient’s inbox
Invited users simply need to click on the “Join Plan” button which will take them to a new browser window.
From here, they will need to complete a short sign-up form to activate their account and join the admin’s plan.
From the “User Management” page on the Trustifi web app, the admin can see which users have completed the sign up as their “Status” will change to “Active”.
Pros
The admin has full control over the process without needing to configure anything or involve support.The admin can see which users have completed the sign-up process and which haven’t.
Cons
Some work is required from the admin, as they will need to manually send the invitations.If the organization’s domain is not verified with Trustifi, there is a chance that the invitation emails will be labeled as spam and users will miss them.
Appropriate for
Organizations with a relatively small number of usersOrganizations that don’t plan to connect to the Email Relay and only use the add-in