Trustifi admin portal
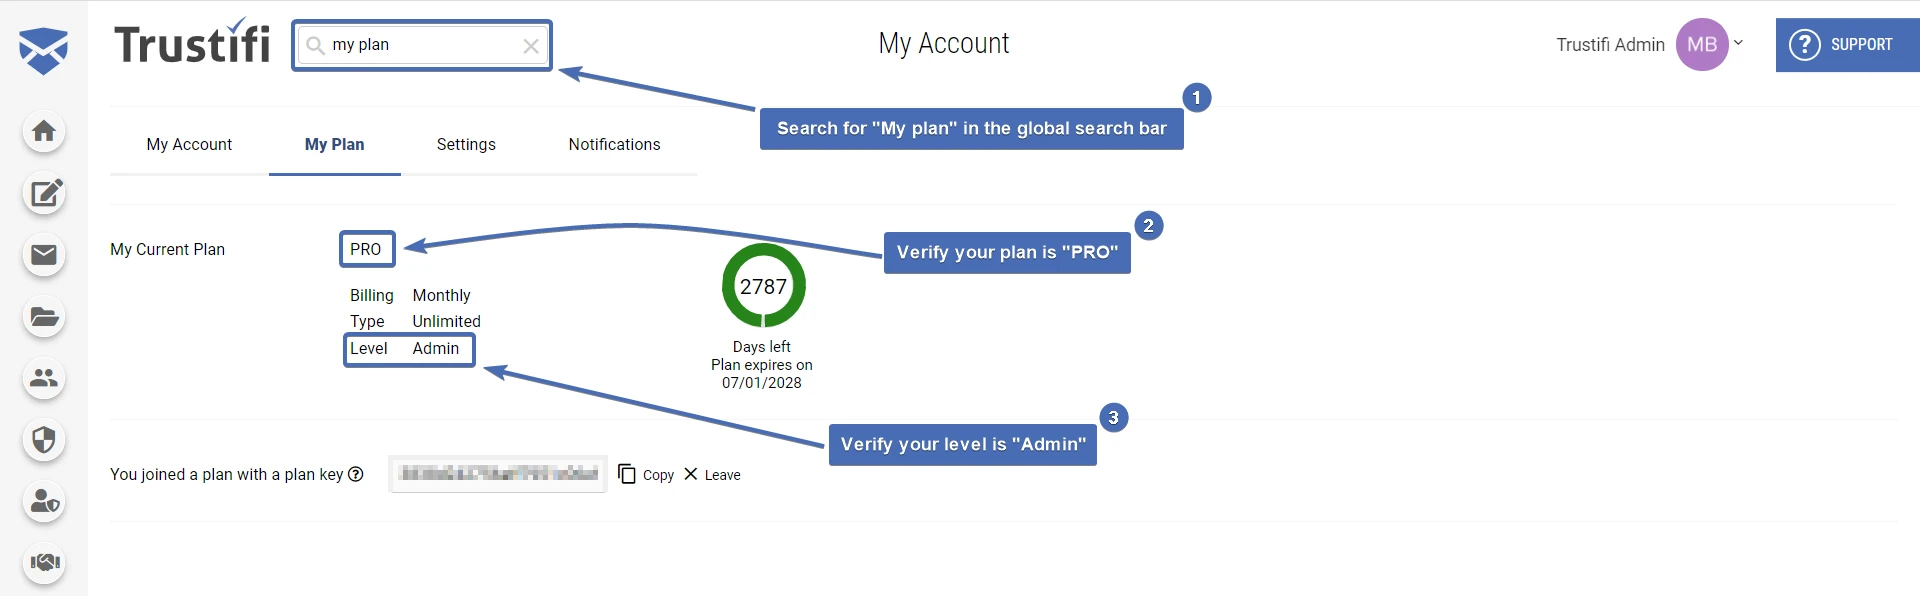
Step 1 – Verifying the plan and user type
⚠ NOTE! In case that you aren’t running under “Pro” plan and your user type isn’t an “Admin”, you will have to upgrade your plan to “Pro”.
Navigate to “My Plan” page and verify that your plan type is “PRO” and your level is “Admin”.
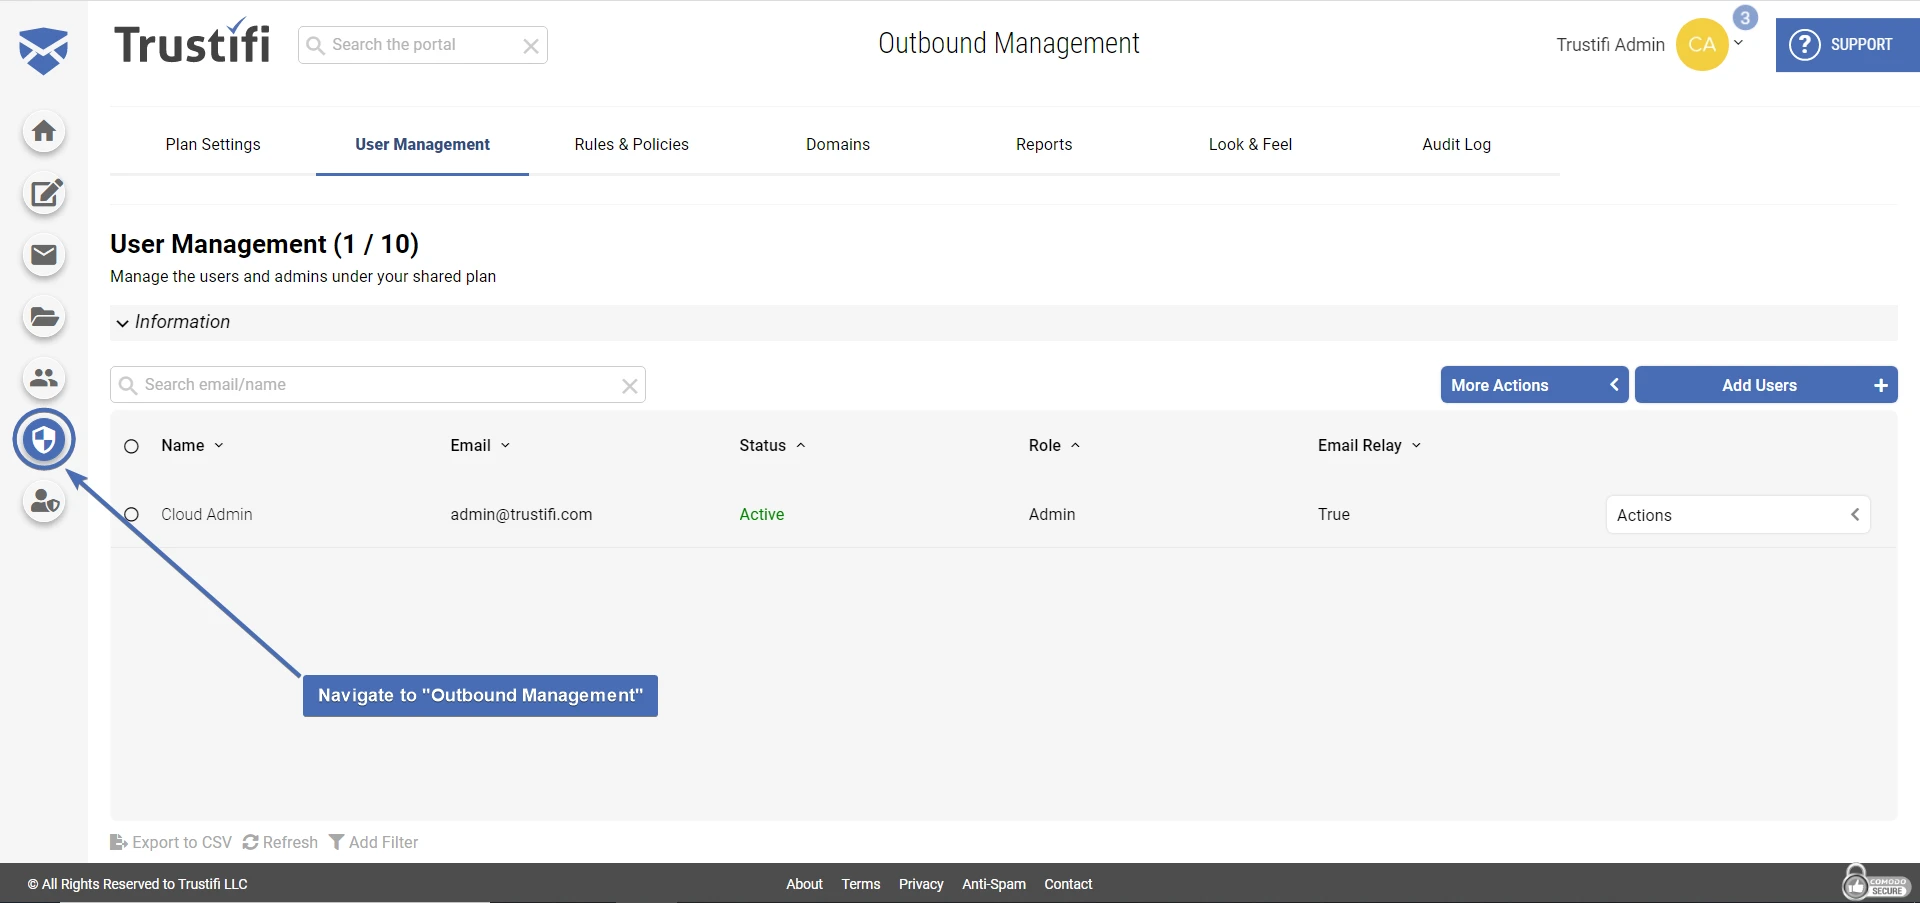
Step 2 – Navigating to Outbound Management
Navigate to “Outbound Management” (Shield icon)
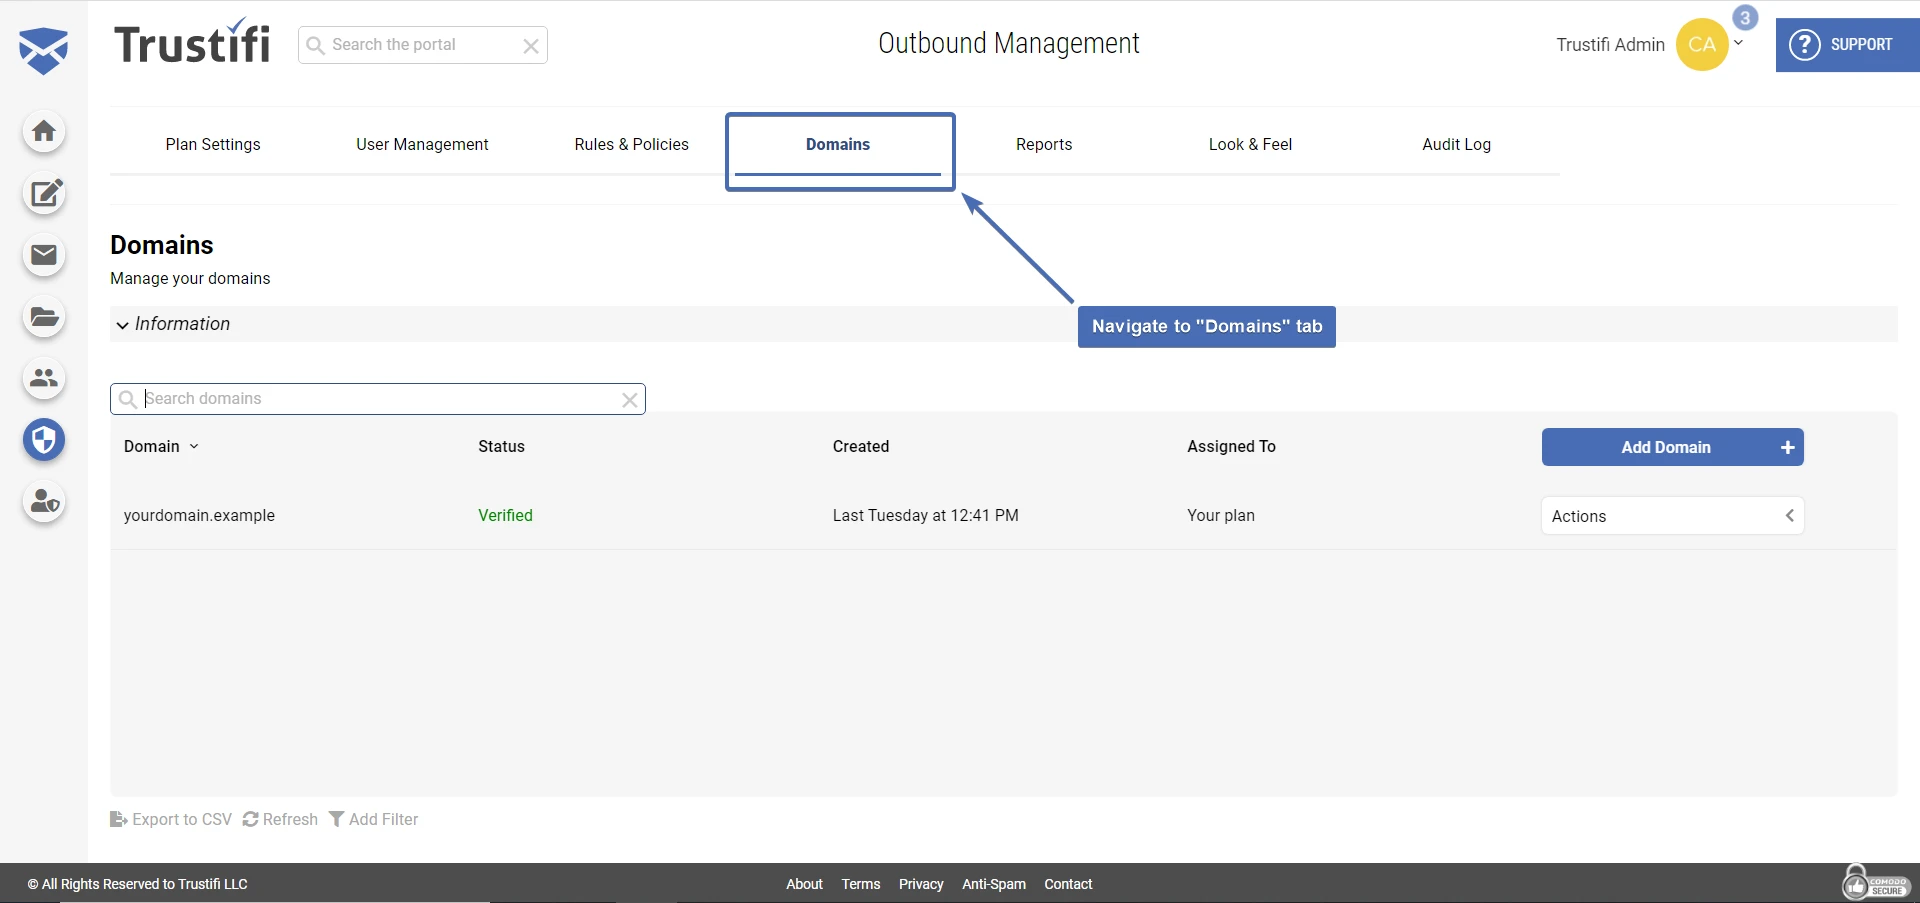
Step 3 – Navigating to the domains tab
The email relay section will be locked because you have no verified domains yet. Click on the “Domains” tab to continue.
Adding new domain
This is a quick overview of the domain verification process. To view the full guide click here – https://trustifi.com/docs/general/domain-verification/
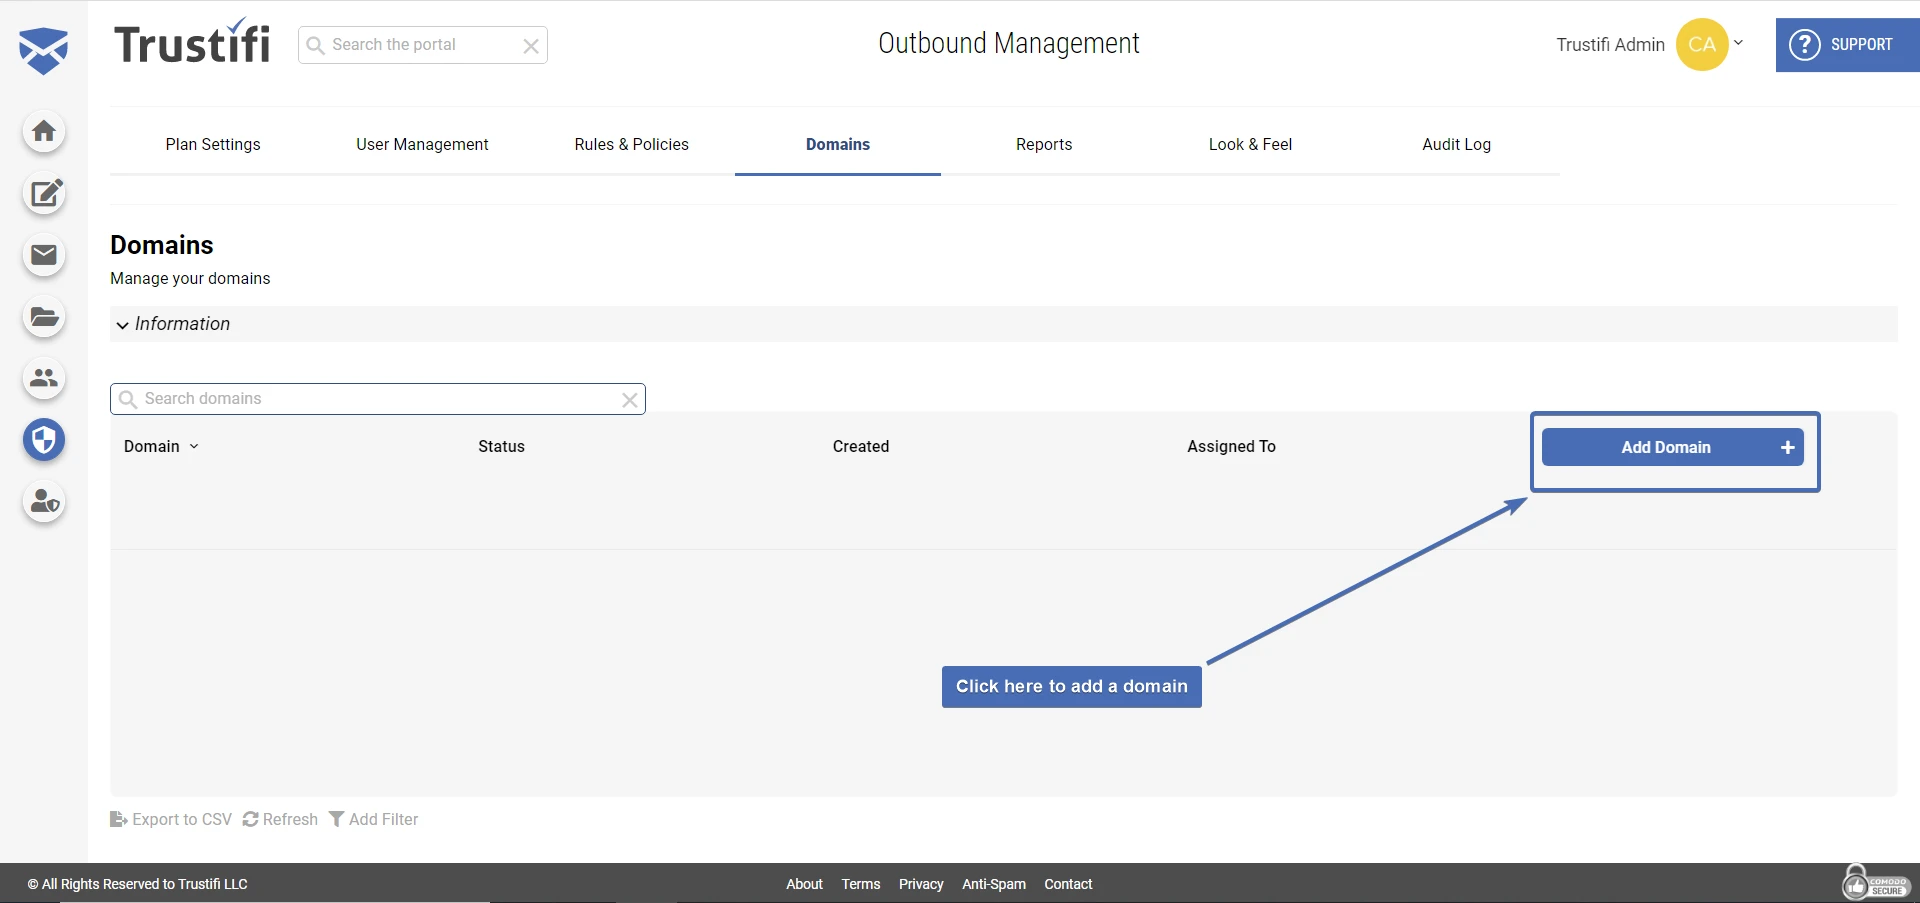
Step 4 – Adding a new domain
Now, we will need to add the domain used to send emails. Continue by clicking on the “Add Domain” button.
Step 5 – Verifying the domain
After adding the domain, you will have to copy and import the records to your DNS provider (e.g. DNS Made Easy, GoDaddy). Continue to the next step after all the DNS records have been imported to your DNS environment.
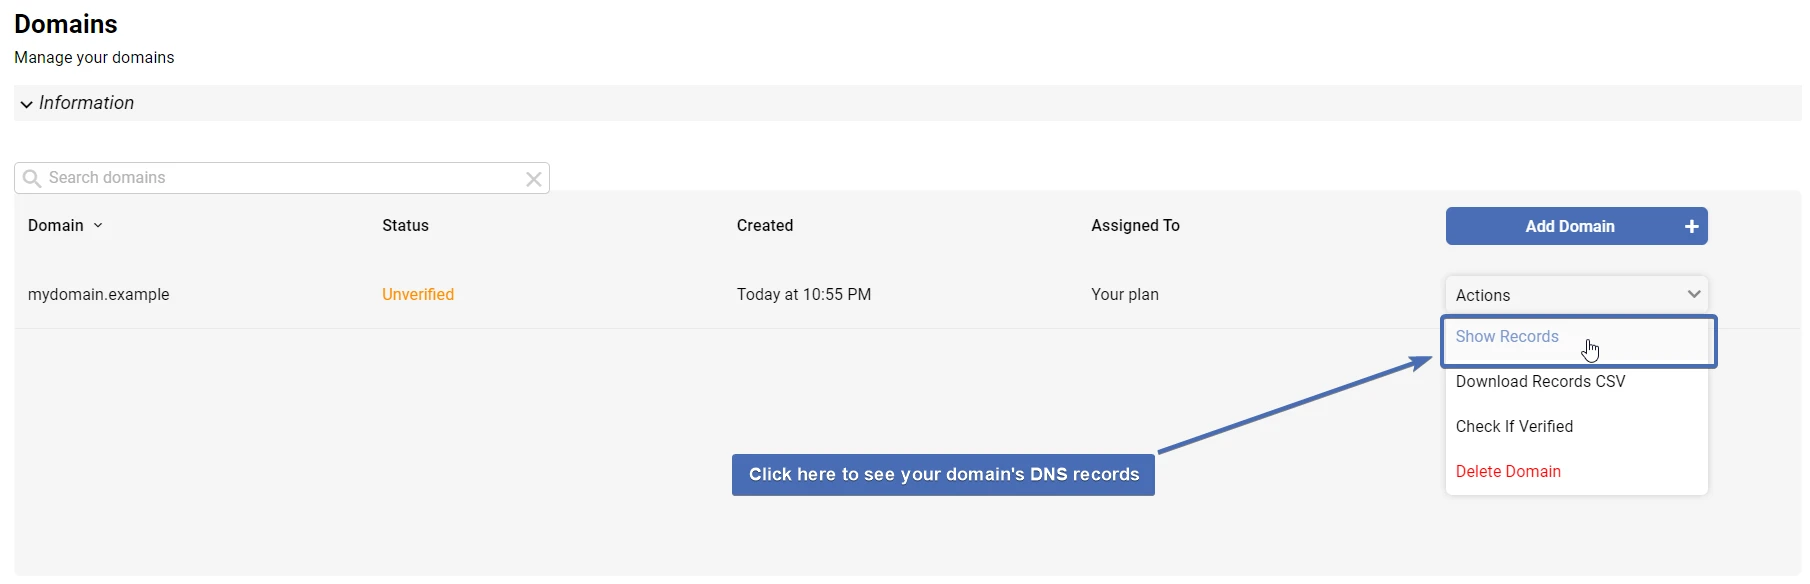
Note: You can also click on “Download records CSV” from the “Actions” menu to save these records as a CSV file.
Step 6 – Verifying the domain and navigating to the Plan Settings tab
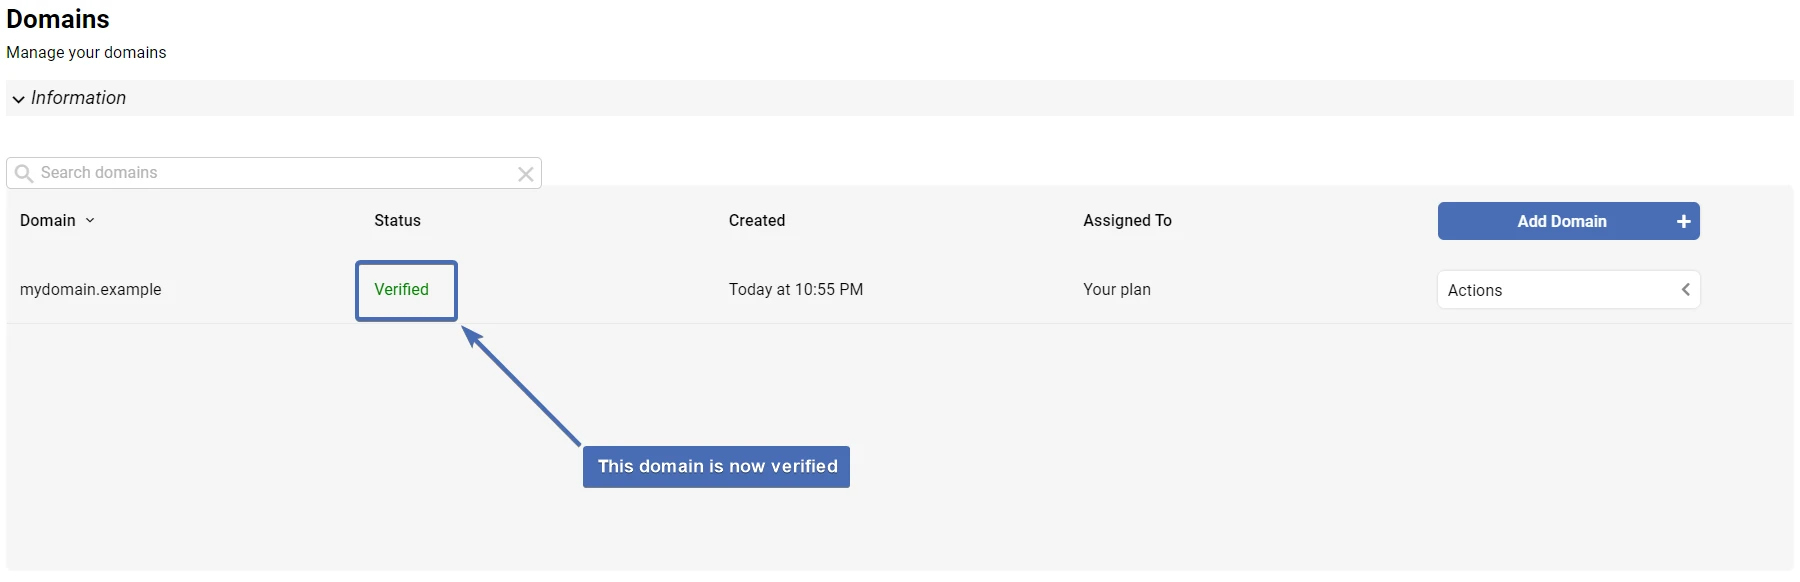
After you have added all the DNS records to your domain, click on “Check if verified” to see if the status changes to “Verified”. Continue to the next step only if the domain has been verified.
Note: Depending on your DNS system, your domain may take up to 24 hours to update DNS records.
Step 7 – Enabling and generating the email relay secret key
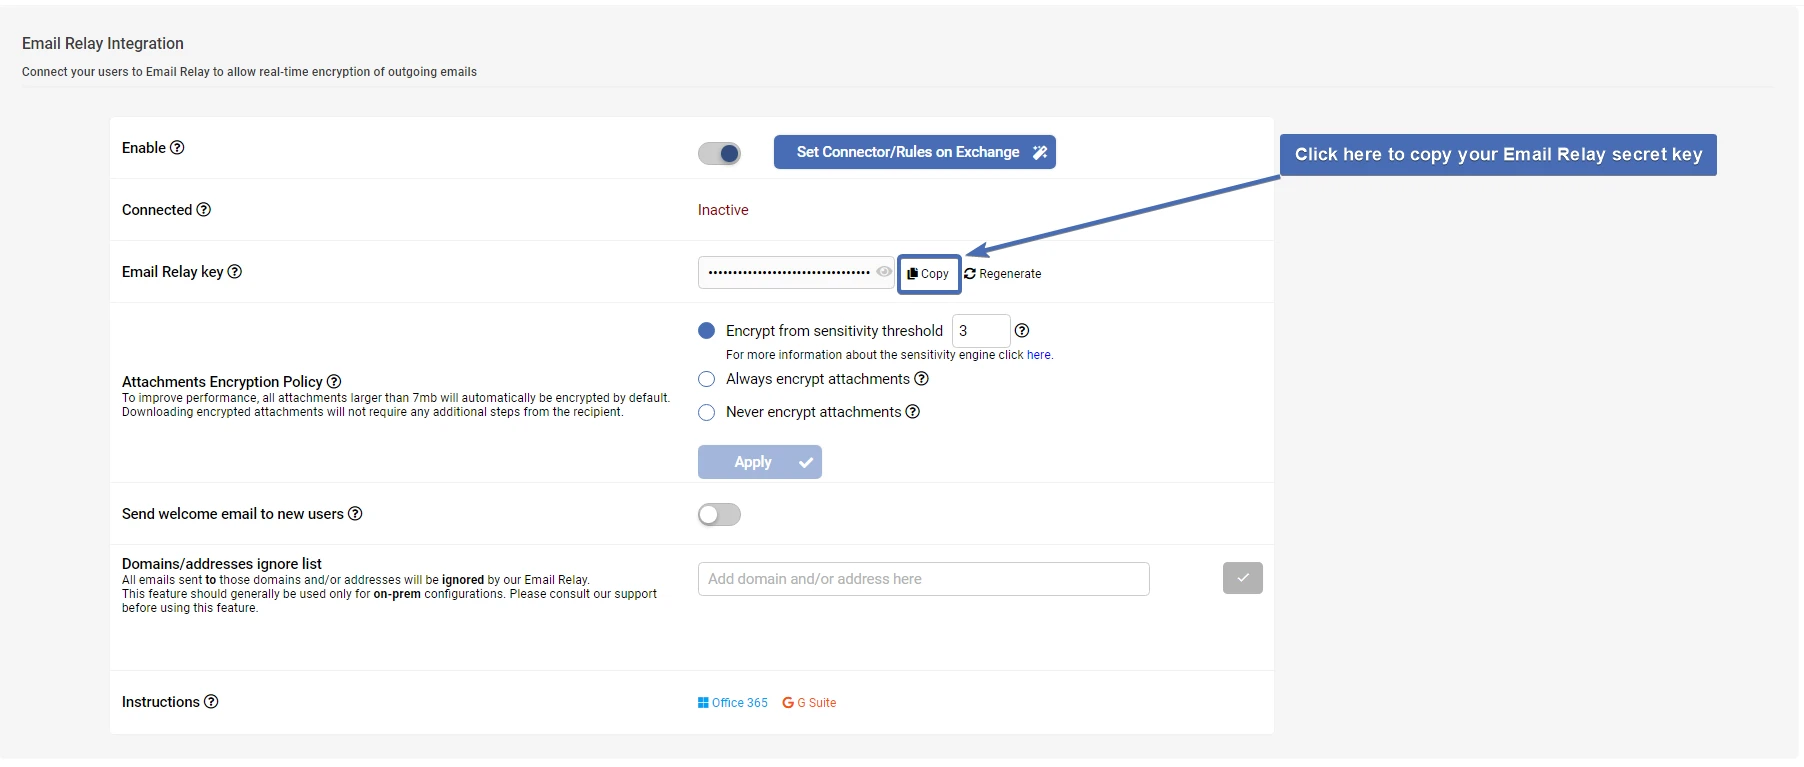
In this part, you will need to enable the Email Relay toggle, and copy the “Email Relay key” which is the secret key that will be used to authenticate the transport flow of your emails.
At the “Plan Settings” tab, scroll to the “Email Relay Integration” section and click on the toggle to enable.

After the integration was enabled, your secret key will be generated. You can click on the “copy” button to copy the Email Relay secret key for later use.
Microsoft Exchange Admin Center
Step 8 – Navigating to the Exchange Admin Center – Mail flow connectors
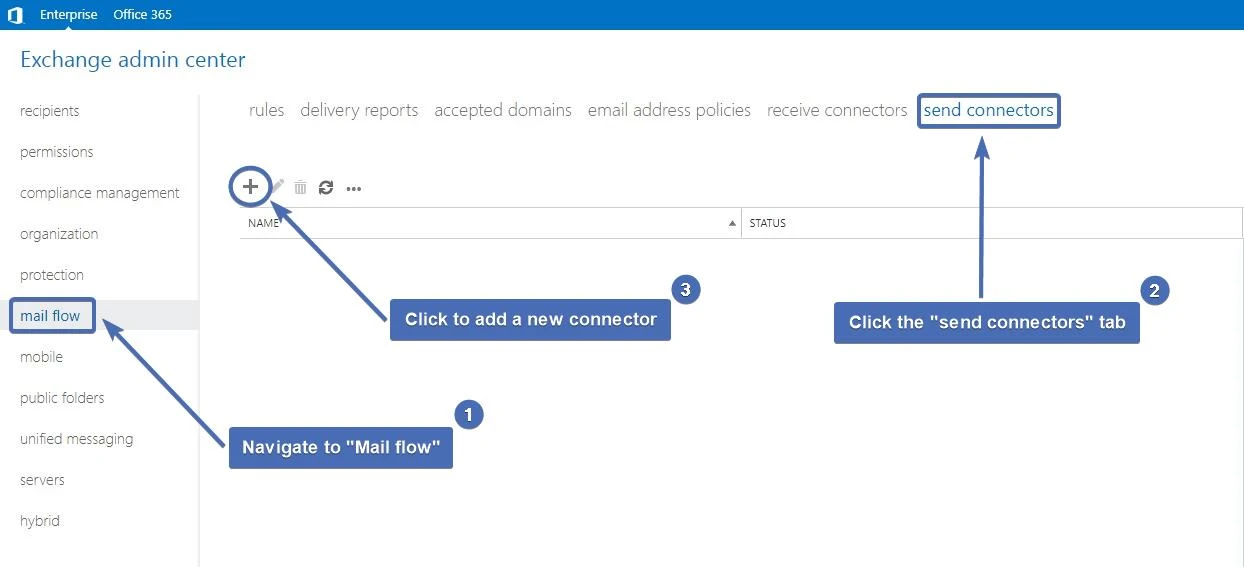
First, you will need to log into your Exchange admin center using your admin credentials.
Once logged in, navigate to the “Mail flow” section and open the “Send connectors” tab.
Click on the “+” sign to add a new connector.
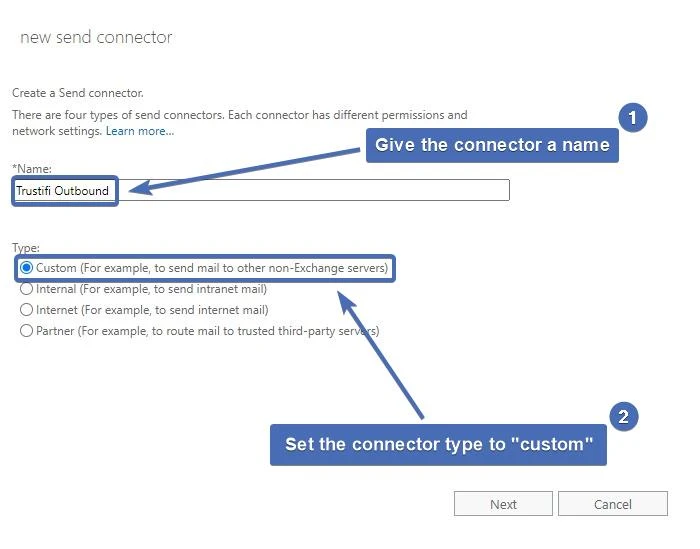
Step 9 – Setting the connector’s name and type
Give the connector a meaningful name, for example “Trustifi Outbound”.
Then, set the connector type to “Custom”.
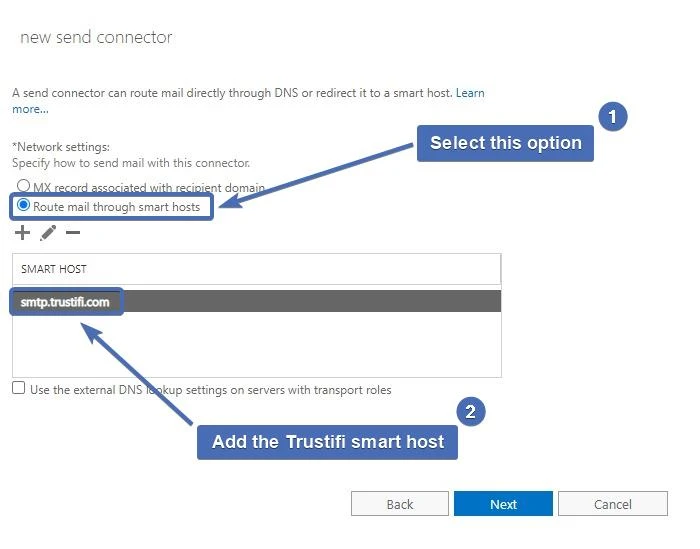
Step 10 – Selecting the connector’s routing type
For this part, you will need to select “Route mail through smart hosts”.
Then, click the “+” sign to add the Trustifi smart host – smtp.trustifi.com and confirm.
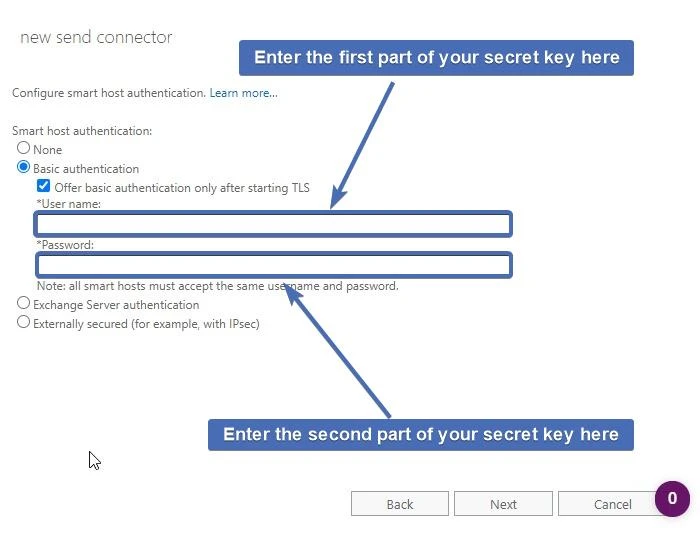
Step 11 –Configuring the smart host’s authentication
Once the smart host has been defined, you will need to configure how emails arriving to this smart host are authenticated.
First, select “Basic authentication” and check the box for “Offer basic authentication only after starting TLS”.
For the username and password, you will need to use the secret key you have copied in step 7 from the Trustifi portal.
The first part of the secret key (before the colon) is the user name and the second part (after the colon) is the password. The colon itself should not be included in either part.
For example, if your secret key is:fff5f660564a66c35ae86db10d124310c663f2c4c9c8e94f:f3e231f3b018e59f71610f1e5b867c04
Then the user name will be – fff5f660564a66c35ae86db10d124310c663f2c4c9c8e94f
And the password will be –
f3e231f3b018e59f71610f1e5b867c04
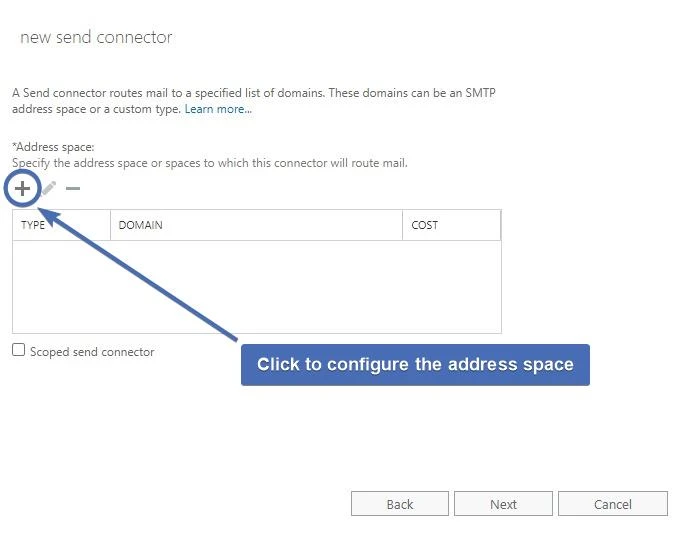
Step 12 – Setting the connector’s address space
The “Address space” dictates which domains should be used to send emails through this send connector.
To configure the address space, click on the “+” sign.
Step 13 – Configuring the address space
In the new window, add the following values:
Type: SMTP
FQDN: *(this will apply to all domains)
Cost: 1
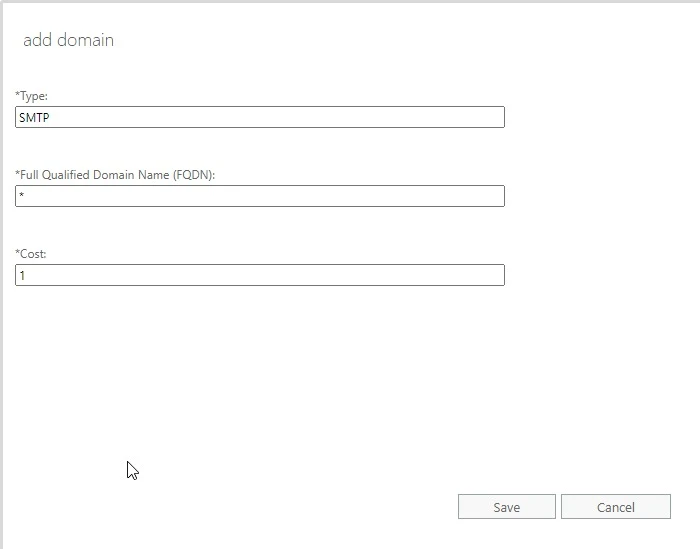
Once these values have been added, click “Save”.
Step 14 – Configuring the address space
Confirm the address space has been configured according to the instructions above and click “Next” to continue.

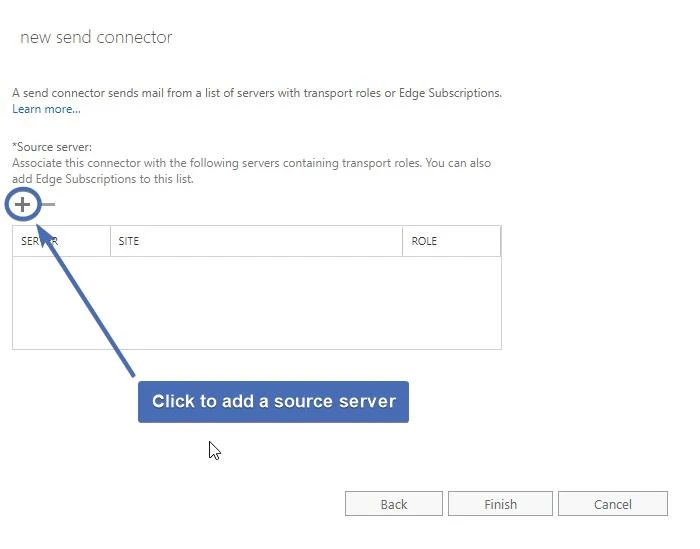
Step 15 – Adding a source server
Now you will need to specify the source server for this send connector.
To add a source server, click on the “+” icon.
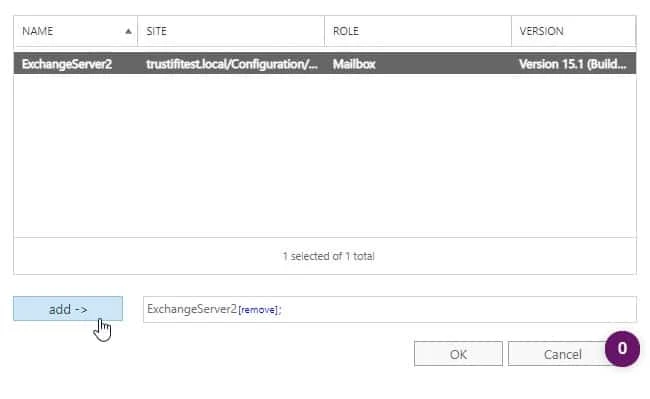
Step 16 – Selecting a source server
Select the relevant source server for this send connector and click “Add”.
When finished, click “OK” to continue.
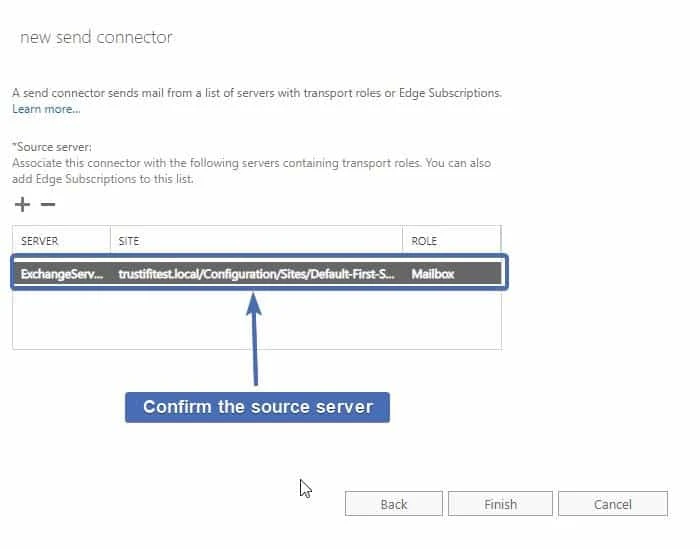
Step 17 – Verifying the source server
Verify the selected source server is correct and click “Finish” to create the send connector.
Step 18 – Adding your domain(s) to the “domain ignore list”
To avoid duplications and other mail flow issues with internal emails, an exception needs to be set up in Trustifi for internal emails.
To do this, first navigate to “Outbound Management” > “Plan Settings” in the Trustifi admin portal and then scroll down to “Email Relay Integration”.
Find the section titled “Domains/addresses ignore list” and add your domain(s) to this list.
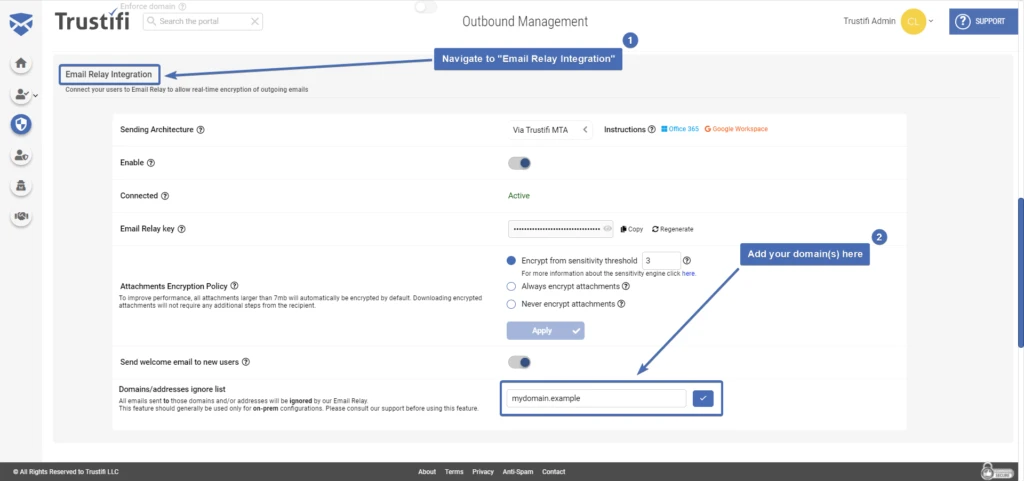
This will make sure your internal emails are always delivered directly.