When your email traffic is being routed via Trustifi, you may want to exclude specific email addresses from the Trustifi routing based on your organization’s needs (for example, printer and fax emails are usually excluded).
To create such an exception, please follow the steps listed below:
Step 1 – Editing the Trustifi outbound rule
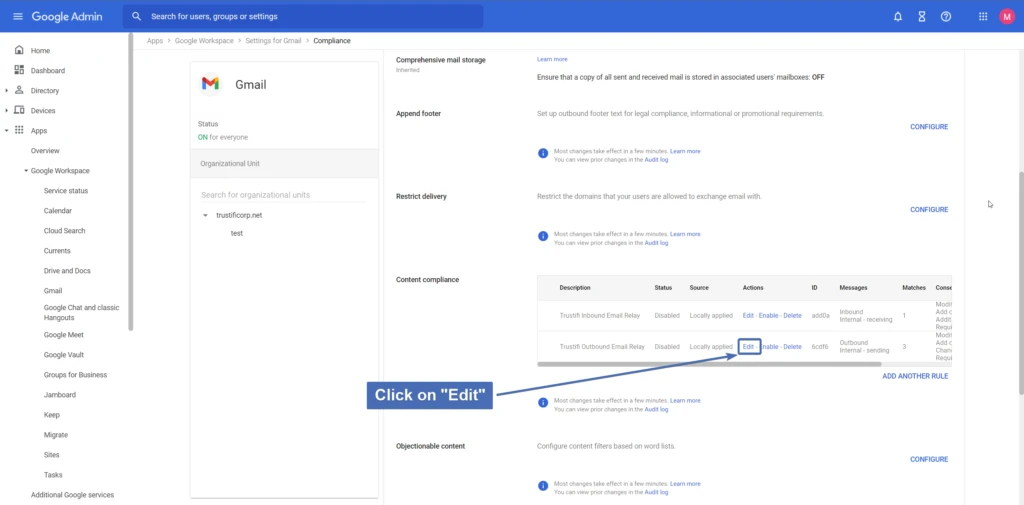
In the Google admin center, navigate to the page where the Trustifi outbound rule is configured – this may be either under the “Routing” page or the “Content Compliance” page.
Find the Trustifi outbound rule and click on “Edit“.
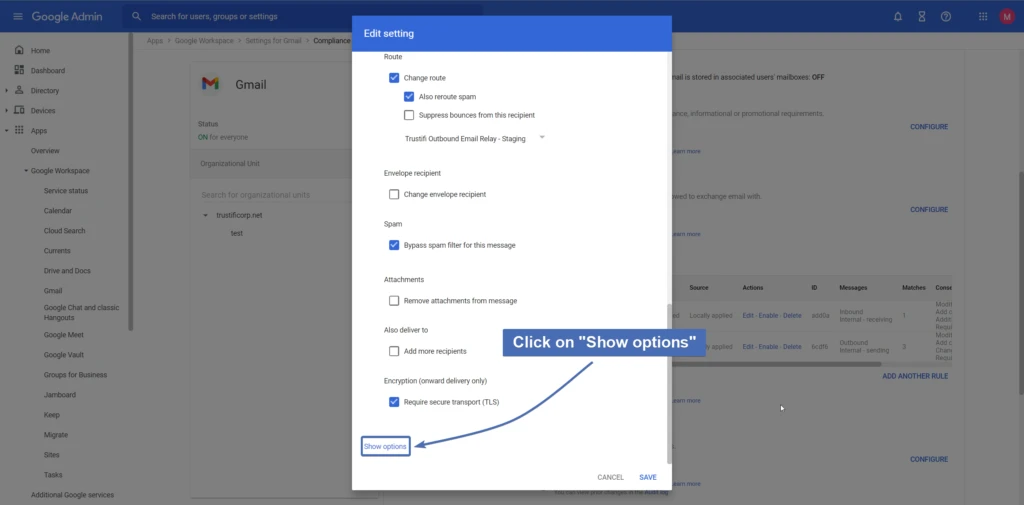
Step 2 – Showing more options
Scroll all the way down and click on “Show options“.
Step 3 – Editing the “Address list” setting
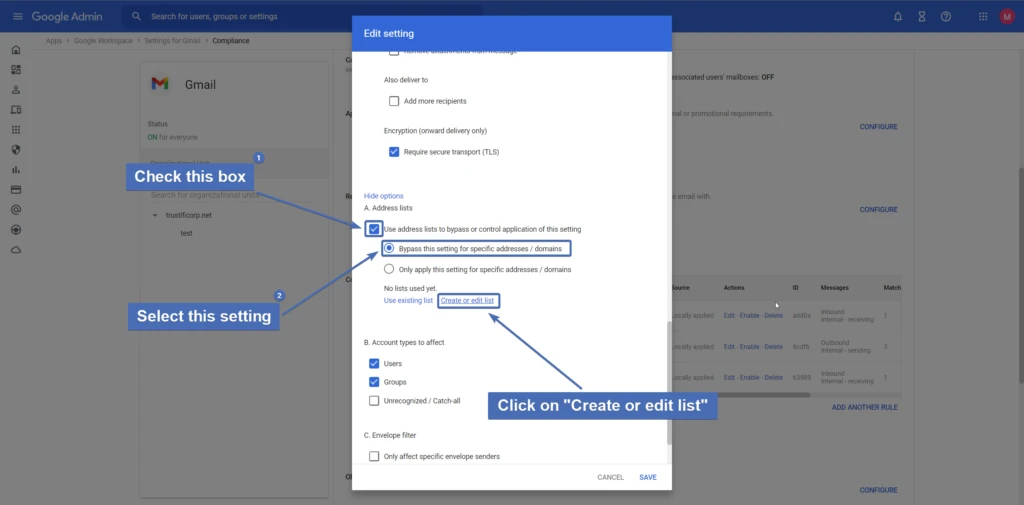
Find the “Address list” setting and perform the following:
-
- Check the box for “Use address lists to bypass or control application of this setting“
- Select “Bypass this setting for specific addresses / domains“
- Click on “Create or edit list“
Step 4 – Adding an address list
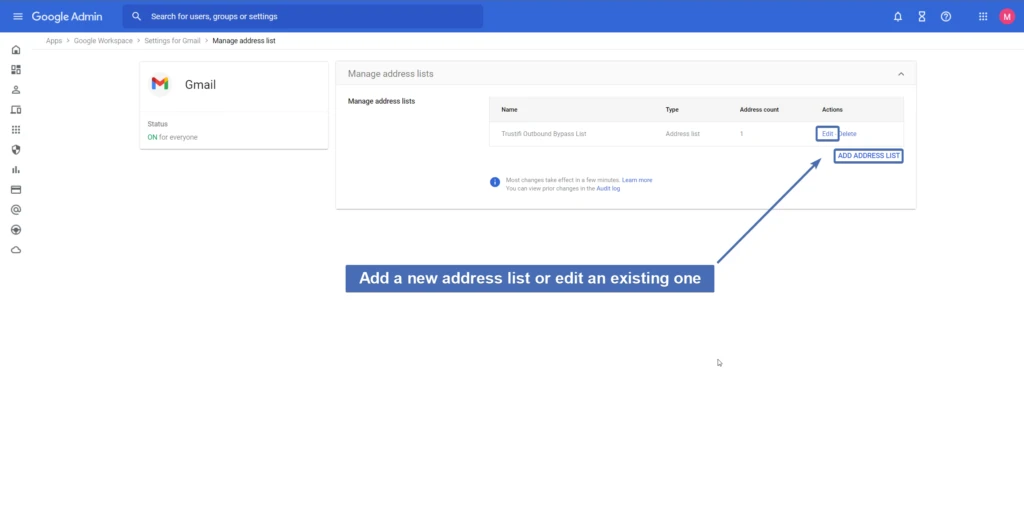
A new tab will open, where you will have the option to either create a new address list, or edit an existing one.
Step 5 – Adding addresses to the list
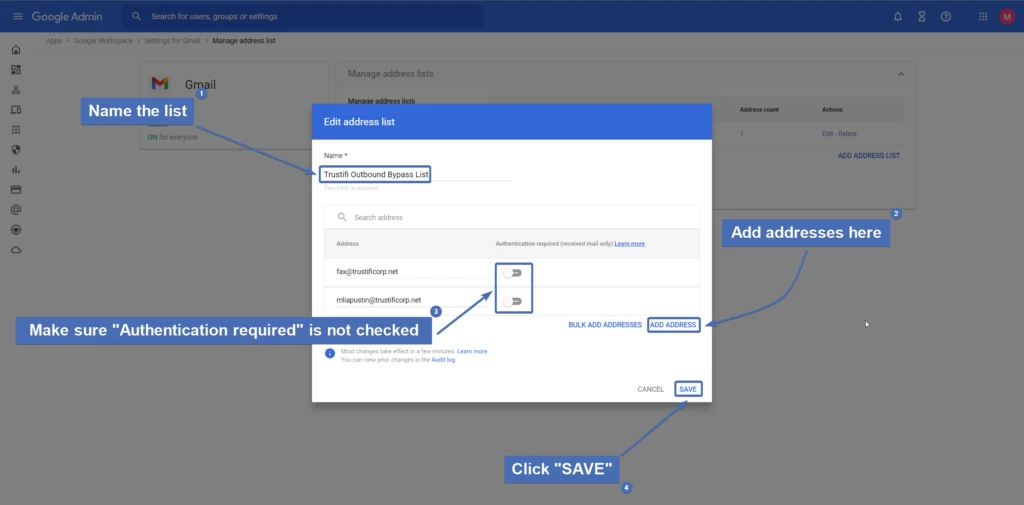
If you are creating a new list, you will need to give it a name.
You can then use the “ADD ADDRESSES” link to add addresses to the list. For the added addresses, make sure “Authentication required” is not selected.
Click on “Save” once finished adding addresses.
Step 6 – Selecting a list to use
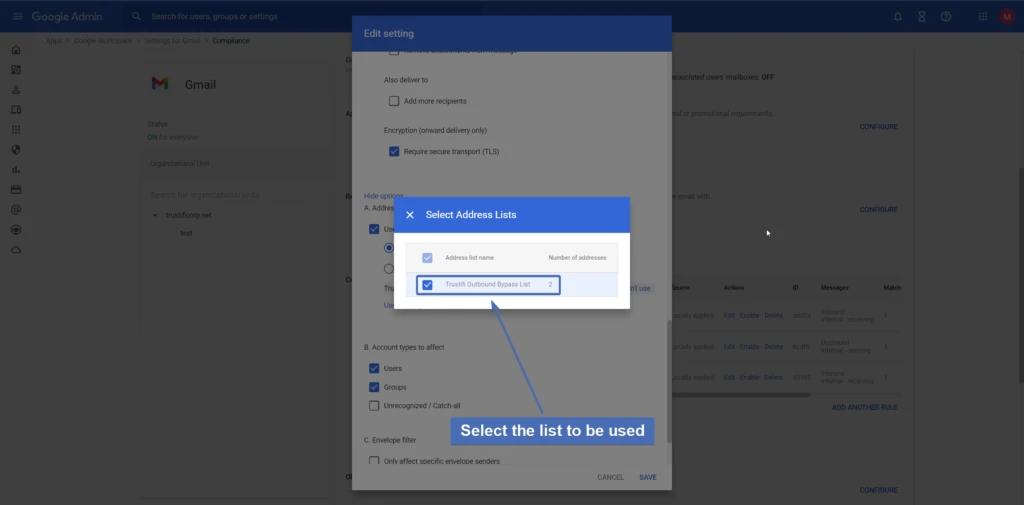
Return to the Trustifi outbound rule edit screen and click on “Use existing list” under “Address lists“.
In the pop-up, select the list(s) you want to use and close the pop-up to confirm.
Step 7 – Confirming and saving the setting
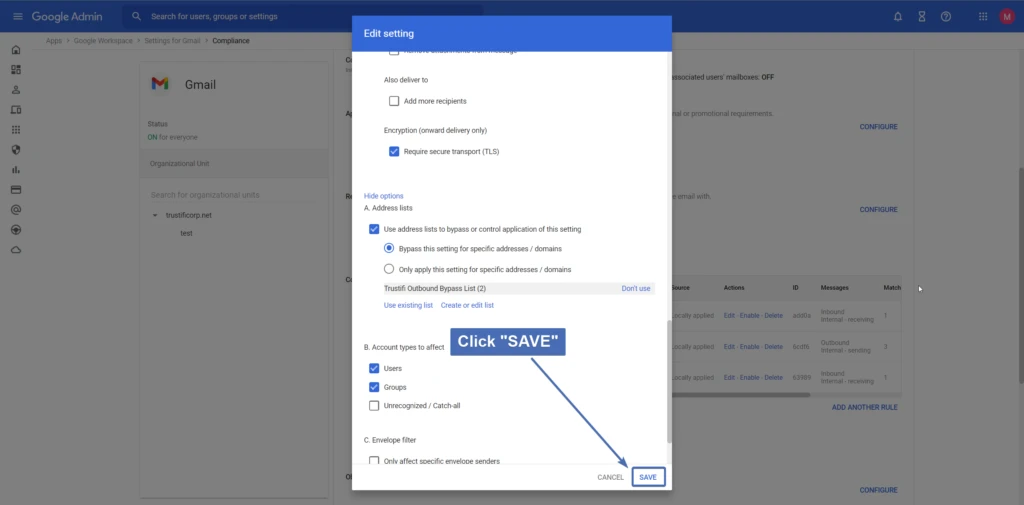
The list(s) you selected should now appear in the “Address lists” section.
Once you confirmed the correct lists appear there, click on “SAVE” at the bottom-right to save and apply this exception.
