Opening the Trustifi add-in
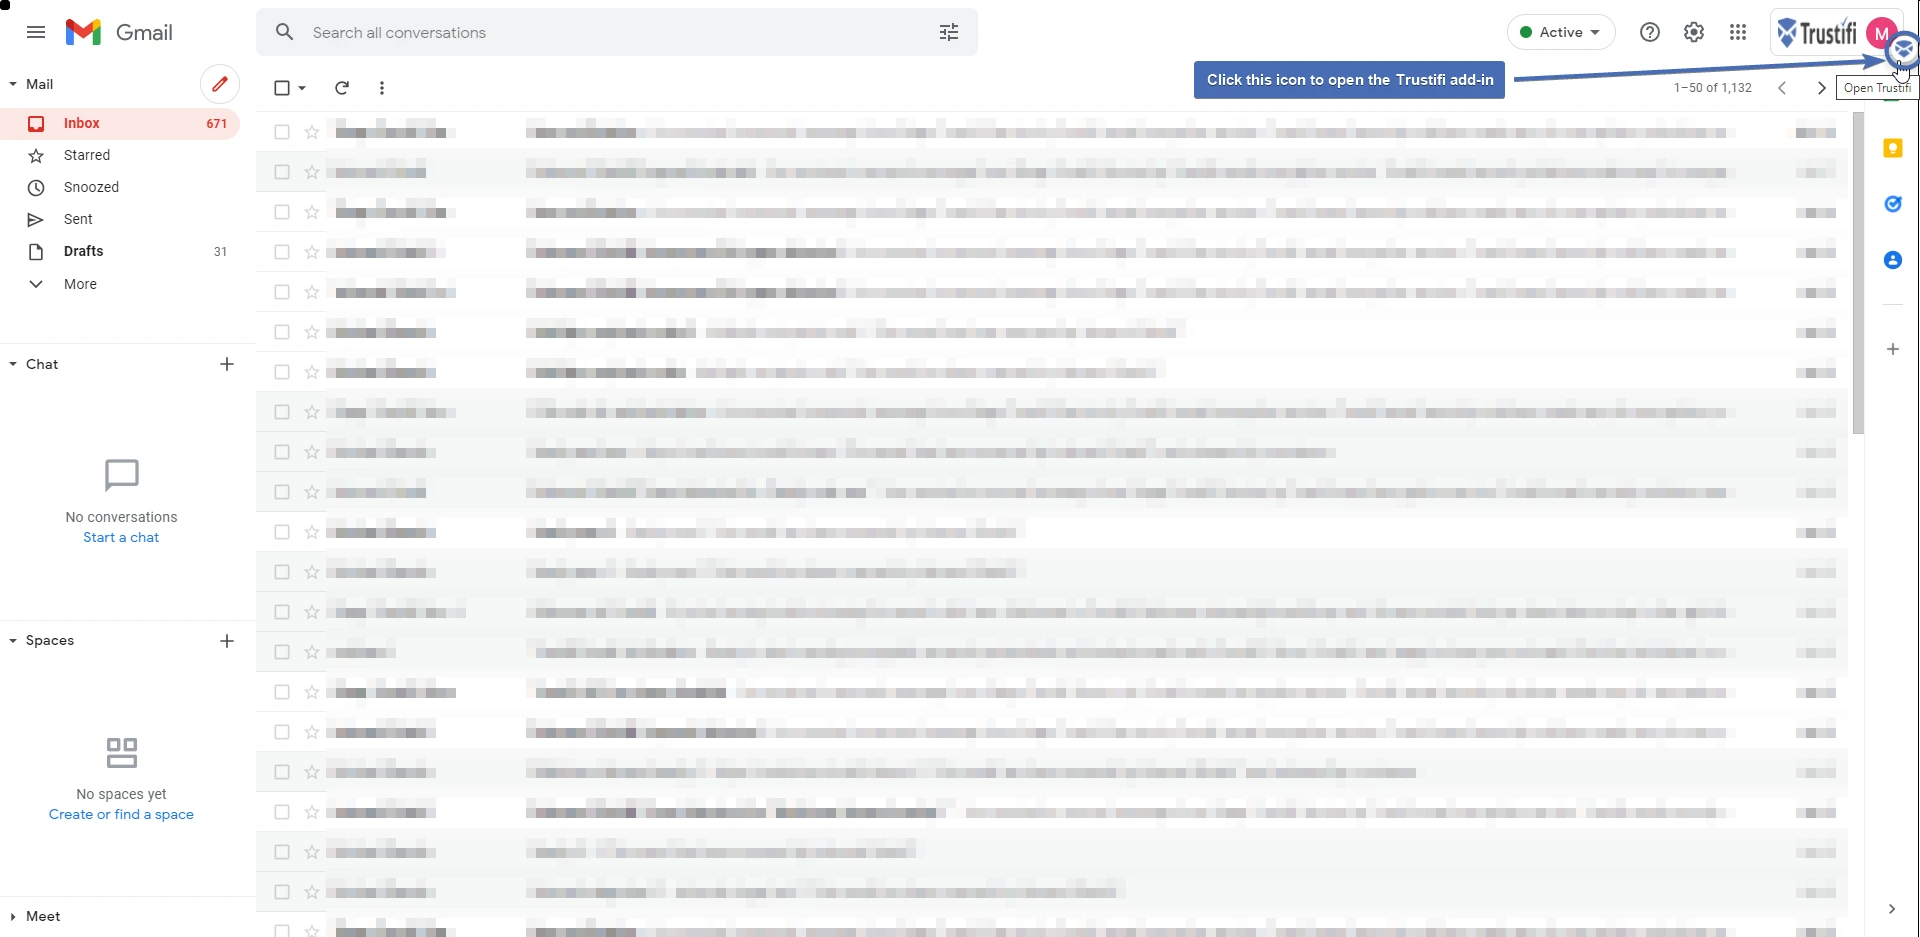
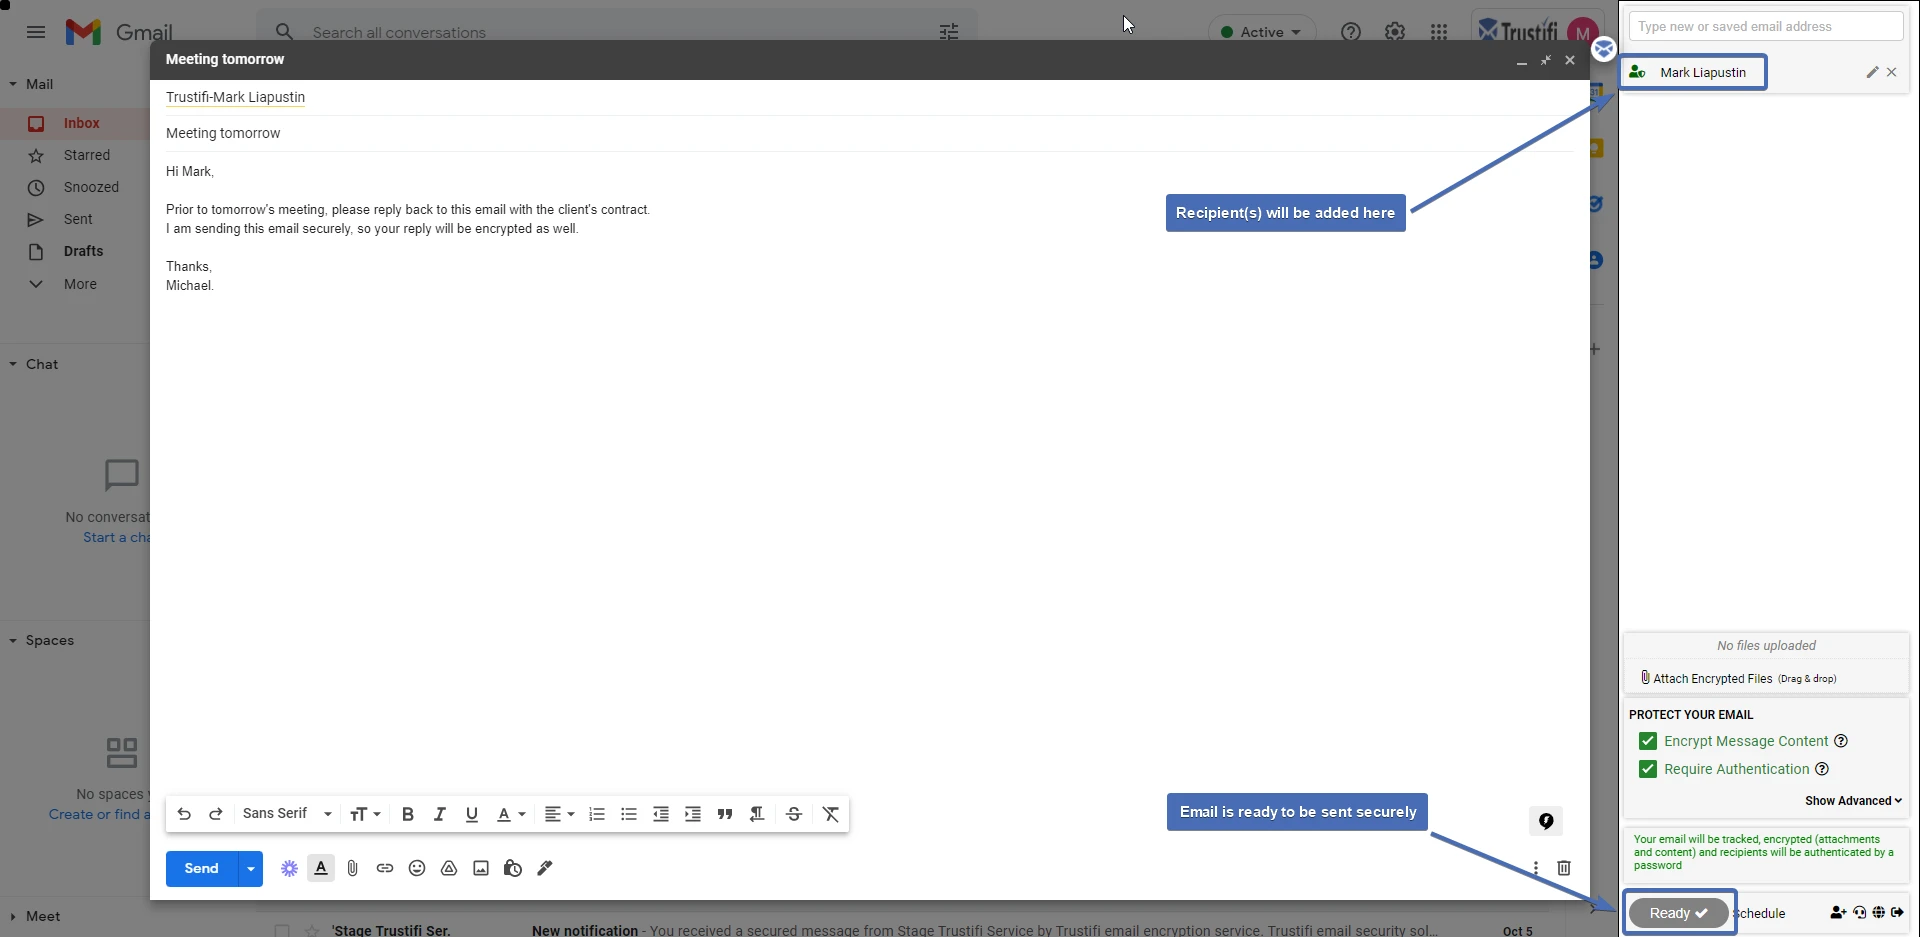
The add-in should be located on the right corner screen in Gmail/Google Workspace.
Click on the Trustifi “envelope” icon to open the add-in.
Logging in
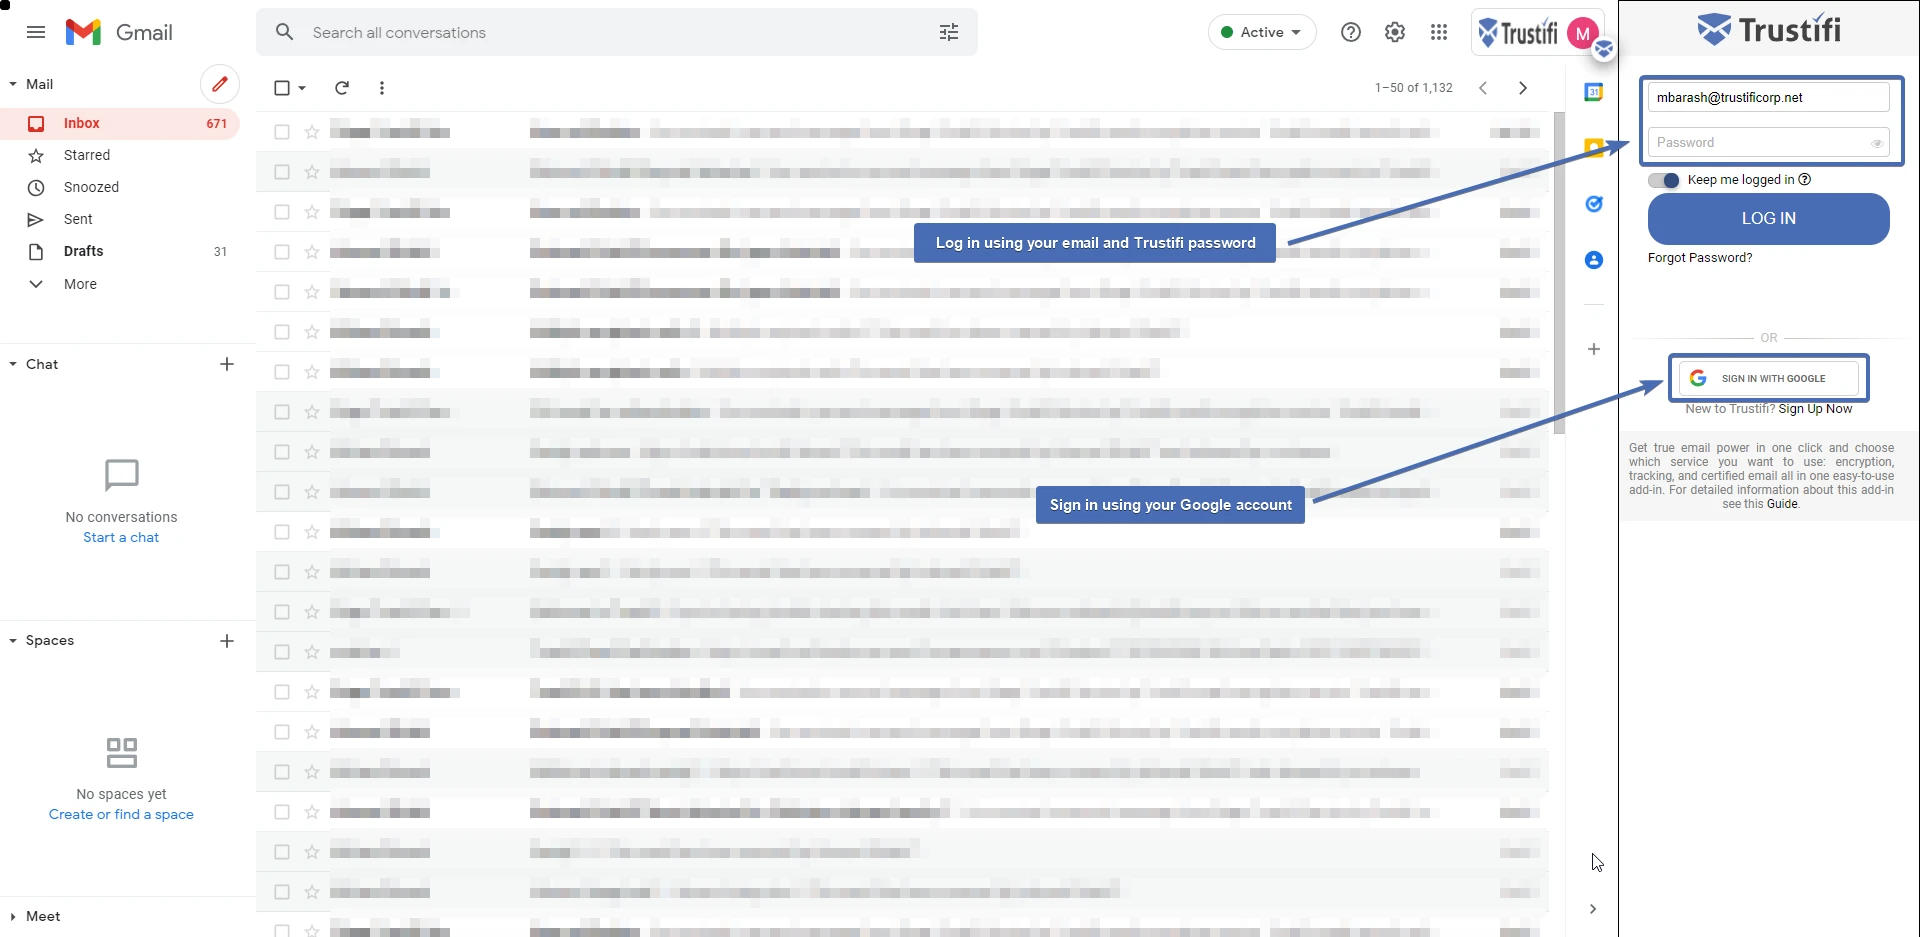
You can log in to Trustifi in one of 2 ways:
Enter your email and the password you configured while creating your Trustifi account.Click on “Sign in with Google” to use your Google account.
A registered user account is required in order to log-in. Sign-up is available through the add-in at the bottom of the window.
Composing a new email
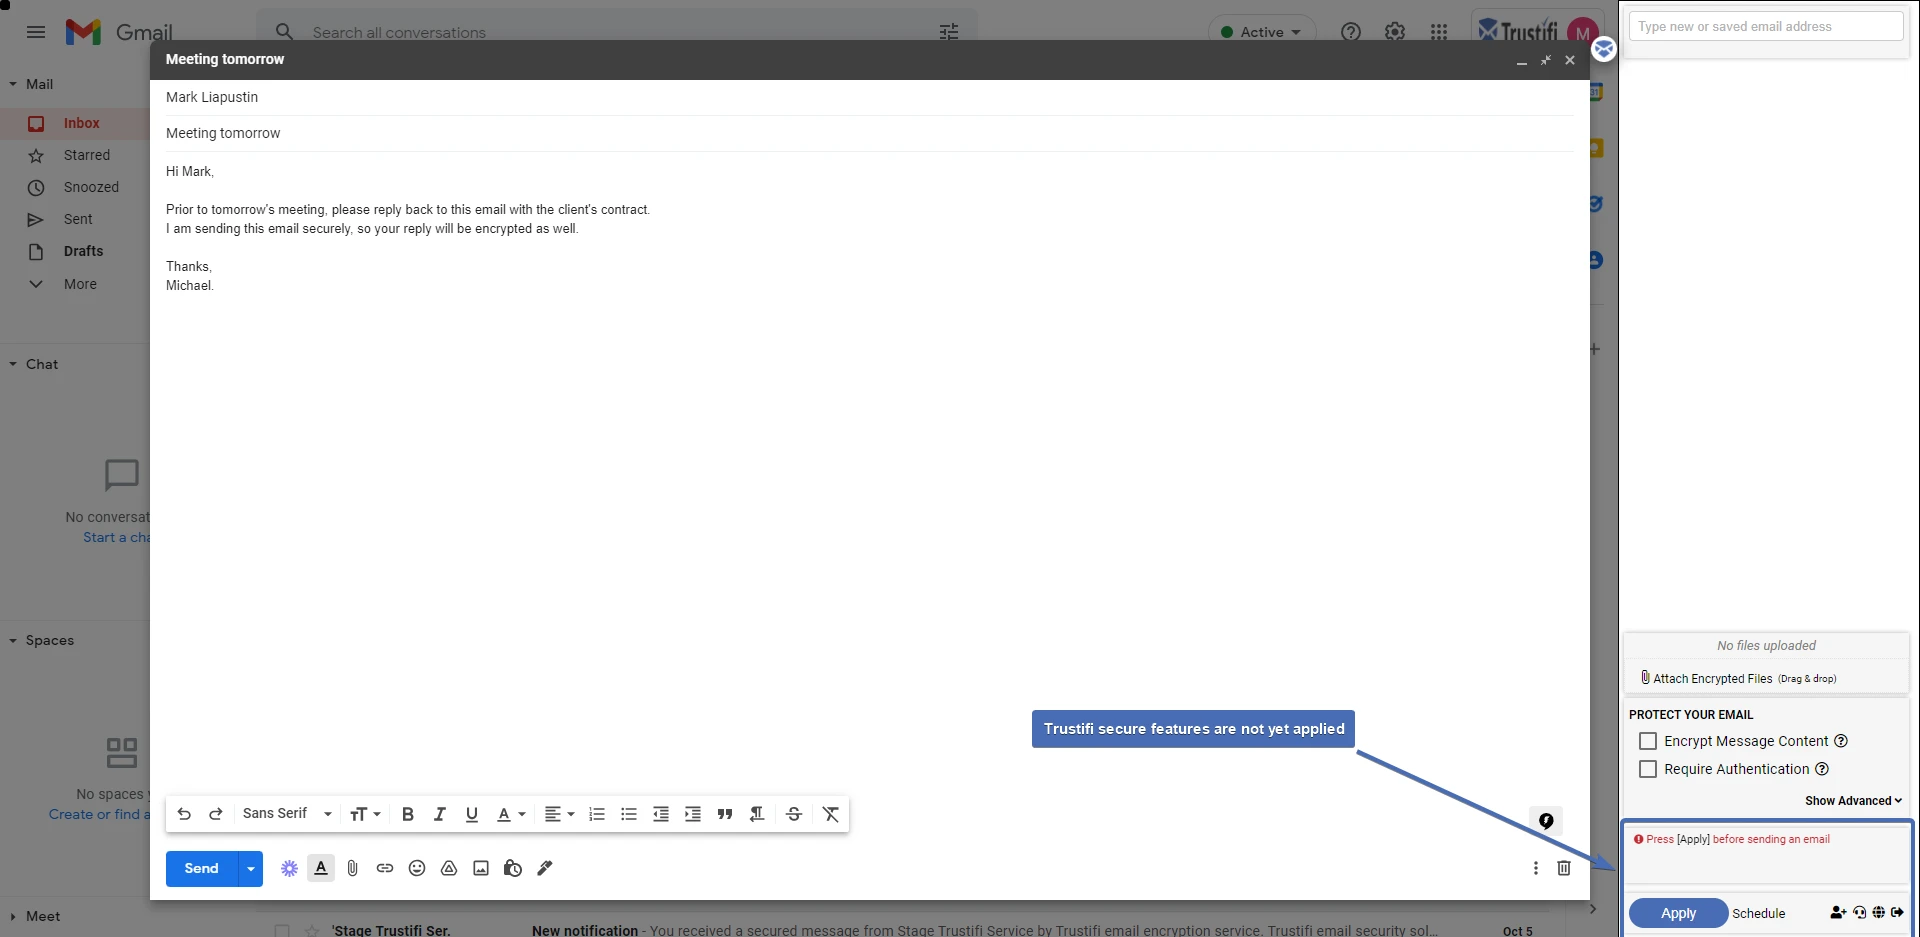
First, compose your email as you would regularly – add the email’s To/Cc/Bcc recipients, subject and email content.
Note: at this point, Trustifi encryption and other security features are not yet enabled.
Now you can choose to apply the Trustifi security features to your email.
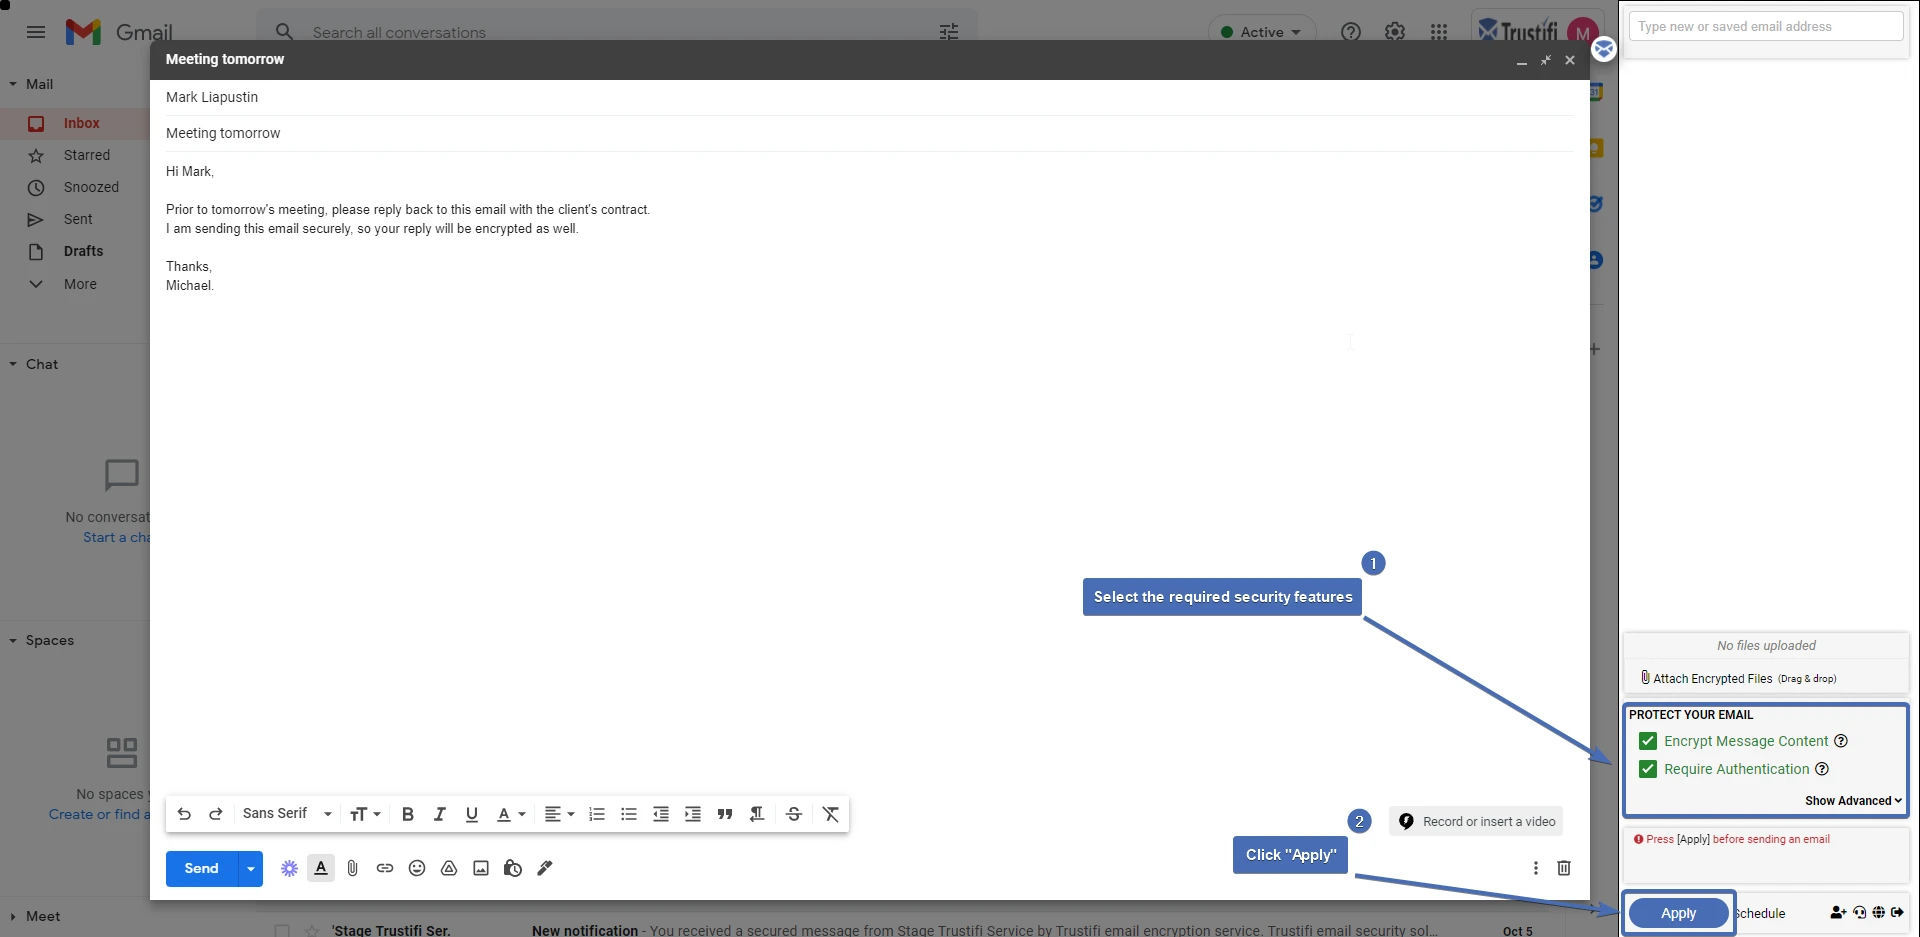
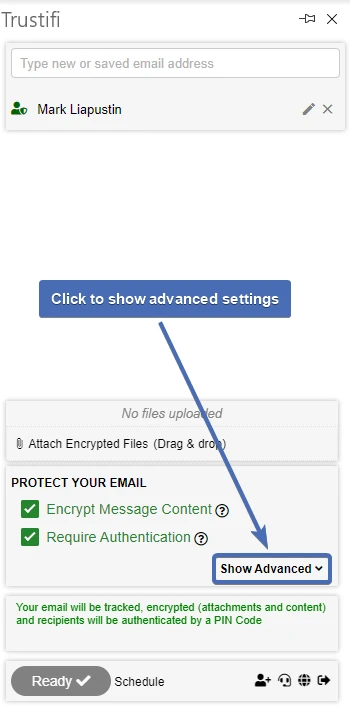
Encrypt Message Content – When this feature is selected, the content of the email (including attachments) will not be visible to the recipient until the email is decrypted and opened in the secure email portal.Note: This option, by itself, does not apply Multi-Factor Authentication to the email.
Require Authentication – When this feature is selected, the recipient will have to pass Multi-Factor Authentication (MFA) in order to view the encrypted email or download the included attachments.
MFA can use several authentication methods: PIN code sent to phone, custom password, PIN code sent by email, or Single Sign-On (SSO). See the “Advanced Methods” section to learn more.
Once you are satisfied with your selection of security features, click “Apply” at the bottom of the add-in.
After the “Apply” button has been clicked, you will see the button will now say “Ready” and that your recipients have been added to the Trustifi.
This means the email is ready to be sent out securely with Trustifi.
Adding encrypted attachments
Attachments sent using the Trustifi add-in will always be sent encrypted.
To send an encrypted attachment, you can simply add it to your email as you would normally, and click “Apply” in the Trustifi add-in before sending.
Trustifi also supports adding attachments directly using the Trustifi add-in to gain additional control.
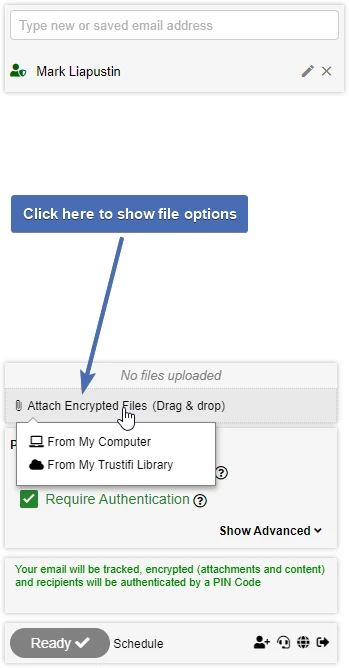
Clicking on “Attach Encrypted Files” will show 2 options to add files.
From My Computer: This will open a file browser window where you can select files to upload from your computer.
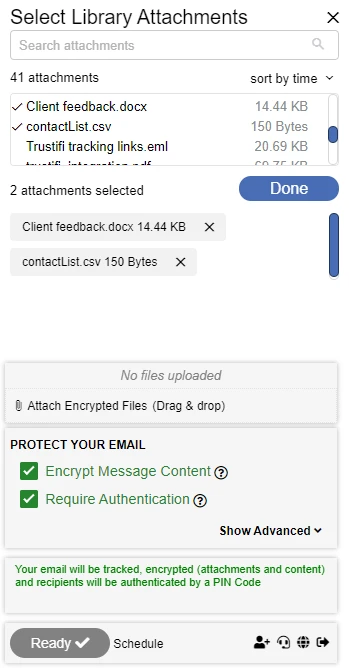
From My Trustifi Library: This will allow you to search and select files which have been previously sent using Trustifi.
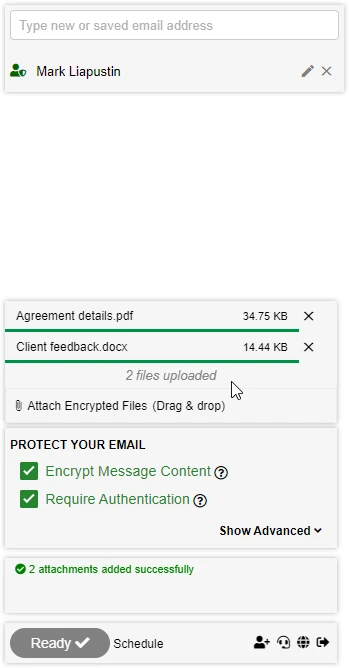
Additionally, you may simply drag and drop files from your computer directly into the Trustifi add-in.
Once the files have been added, you can see the files by placing your mouse over this text –
Using advanced settings
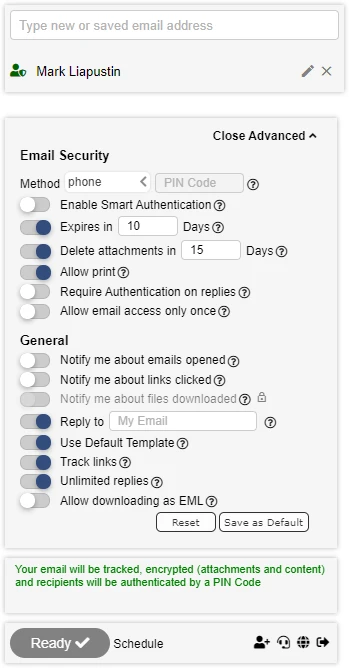
You can open the “Advanced” settings menu to enable additional control over the secure email and enable more security features.
To show these settings, click on “Show Advanced“.
From this menu, you may change the method used for Multi-Factor Authentication (under “Method”), as well as other configurations such as: setting an expiration time for the email, enabling/disabling printing, changing your reply-to address and many more.
Alert! Modifying advanced settings is meant for more technical users. You can always revert any changes made using the “Reset” button at the bottom
